# HelpCenter.io Help Center
---
Source: https://self.helpcenter.io/content/sign-in
# Sign in to HelpCenter.io
_Category: Getting started_
Sign in once to work on every help center you belong to, from one place. Whichever help center you manage or read, you sign in at [helpcenter.io/app/signin](https://helpcenter.io/app/signin).
**Who can do this:** Anyone with a HelpCenter.io account · **Plans:** All plans
## Sign in
1. Go to [helpcenter.io/app/signin](https://helpcenter.io/app/signin).
2. Enter your **Email address** and **Password**.
3. If you're on a device only you use, tick **Keep me logged in**.
4. Click **Sign in**.
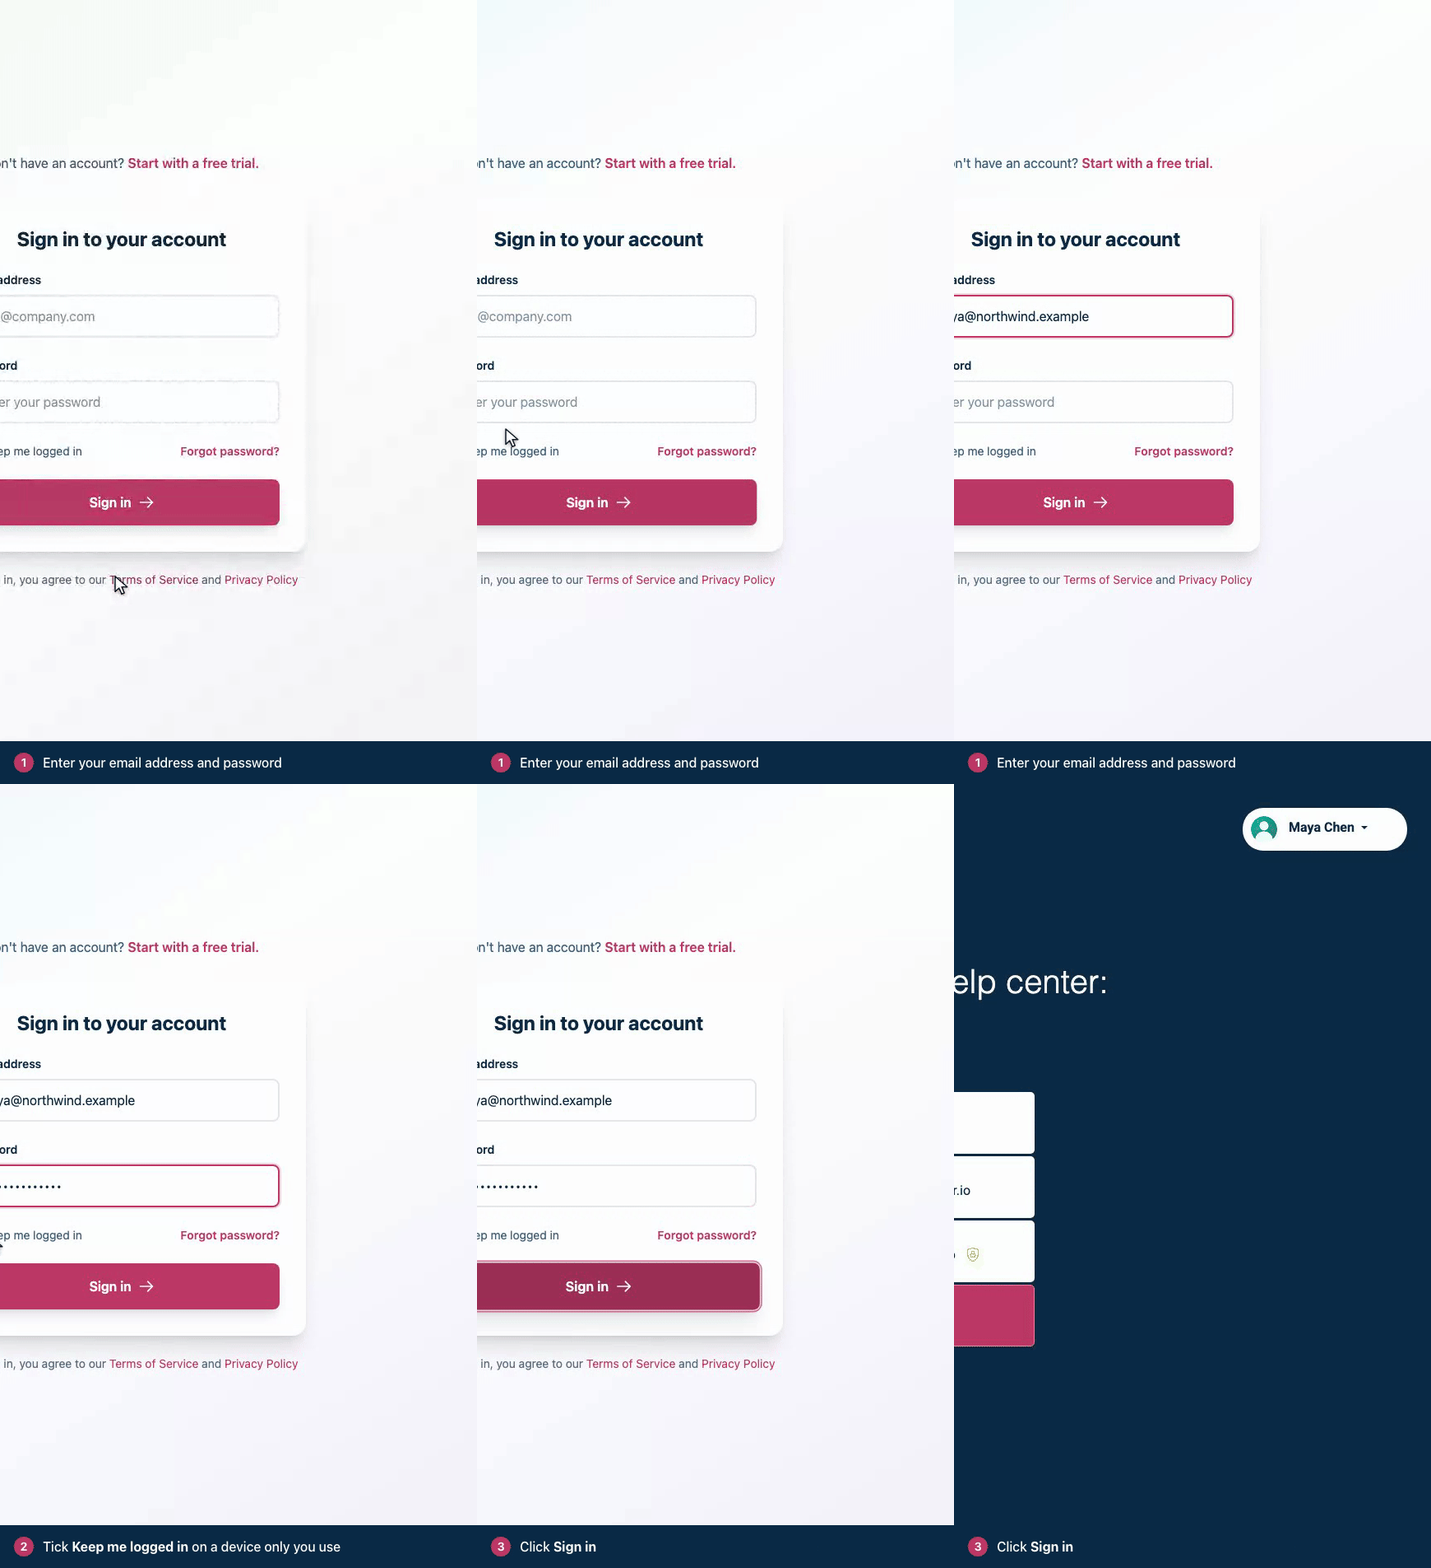
Leave Keep me logged in unticked on a shared computer.
## Sign in with Google
Click **Continue with Google** on the sign-in page and pick your Google account. You're signed in without typing a password.
- **Your Google address matches your HelpCenter.io account.** The first time, Google is connected to that account for you, as long as you've verified your email address with us.
- **Your Google address is different.** Sign in with your password once, then connect Google under **Account Settings** → **Sign-in Methods**. See [Change or reset your password](https://self.helpcenter.io/content/change-your-password).
- **You don't have an account yet.** You're taken to the sign-up page to finish creating one. See [Create your HelpCenter.io account](https://self.helpcenter.io/content/create-your-account).
## After you sign in
Next you see the list of your help centers. Click one to open its dashboard. If you opened a link to a dashboard page before signing in, you go straight to that page instead. See [Switch between your help centers](https://self.helpcenter.io/content/switch-help-centers).
## If you use two-factor authentication
After your password, or after you pick your Google account, the **Two-Factor Authentication** page asks for a code. Open your authenticator app, type the code it shows under **Authentication Code** and click **Verify and Continue**.
Lost the phone with your authenticator app? See [I lost my authenticator device](https://self.helpcenter.io/content/lost-two-factor-device).
## Forgot your password?
1. Click **Forgot password?** on the sign-in page.
2. Enter your **Email address** and click **Send Password Reset Link**.
3. Open the email and click the reset link within 60 minutes.
4. Enter your email address and a new password of at least 8 characters, twice. Then click **Reset Password**.
The page answers "If an account exists for that address, we've emailed a password reset link." whichever address you enter, so check that you typed the one on your account. No email after a few minutes? Check your spam folder. See [Change or reset your password](https://self.helpcenter.io/content/change-your-password) for more.
## Reading a private help center
If a team invited you to read their private help center, sign in with the email address the invitation went to. When you open a private help center while signed out, it sends you to this sign-in page, and you return to the help center once you're in.
Some help centers sign readers in with their company's own login instead. If yours does, you're sent to that company's login page rather than this one.
## Sign out
Click your avatar at the bottom of the left menu and choose **Log out**. On a shared computer, sign out when you're done.
## Troubleshooting
**"The provided email and password do not match."** Check that you're using the email address you signed up with. If you still can't get in, reset your password.
**"An account with this email already exists. Sign in with your password, then connect Google from Account Settings."** Your HelpCenter.io email address isn't verified yet, so Google can't be connected for you. Sign in with your password and connect Google yourself.
**"Too Many Requests" (error 429).** You tried to sign in too many times in a short while. Wait a minute, then try again.
**"This account has been suspended. Please contact support for more information."** [Contact our support team](https://self.helpcenter.io/content/contact-support).
For more fixes, see [I can't sign in](https://self.helpcenter.io/content/cant-sign-in).
## Related articles
- [I can't sign in](https://self.helpcenter.io/content/cant-sign-in)
- [Change or reset your password](https://self.helpcenter.io/content/change-your-password)
- [Turn on two-factor authentication](https://self.helpcenter.io/content/two-factor-authentication)
- [Switch between your help centers](https://self.helpcenter.io/content/switch-help-centers)
---
Source: https://self.helpcenter.io/content/free-trial
# How the free trial works
_Category: Plans and billing_
Every HelpCenter.io account starts with a 14-day free trial. You don't need a credit card, so you can build and publish a real help center before you decide to pay.
**Length:** 14 days · **Credit card:** Not needed · **Features:** Those of the plan you picked when you signed up
## What the trial includes
- **The features of your plan.** If you signed up from a plan on the [pricing page](https://helpcenter.io/pricing), you're trying that plan. If you signed up without picking one, you're trying Growth.
- **AI.** A Catalyst trial includes AI Answers and AI writing help. On Bootstrap and Growth they come with the AI add-on, which you can add once you activate your subscription.
- **Your team.** You can send up to 10 invitations during the trial, within your plan's team size.
- **A private start.** New help centers start private, so only your team can see them. [Make your help center public](https://self.helpcenter.io/content/make-your-help-center-public) when it's ready.
Want to try a different plan? Email support@helpcenter.io and we'll switch your trial.
## See how many days are left
1. At the bottom of the left menu, click your avatar, then **Billing & Invoices**.
2. Under **Let's get you started**, you see the plan you're trying and the days left in your trial. Click **Change** to compare it with the other plans.
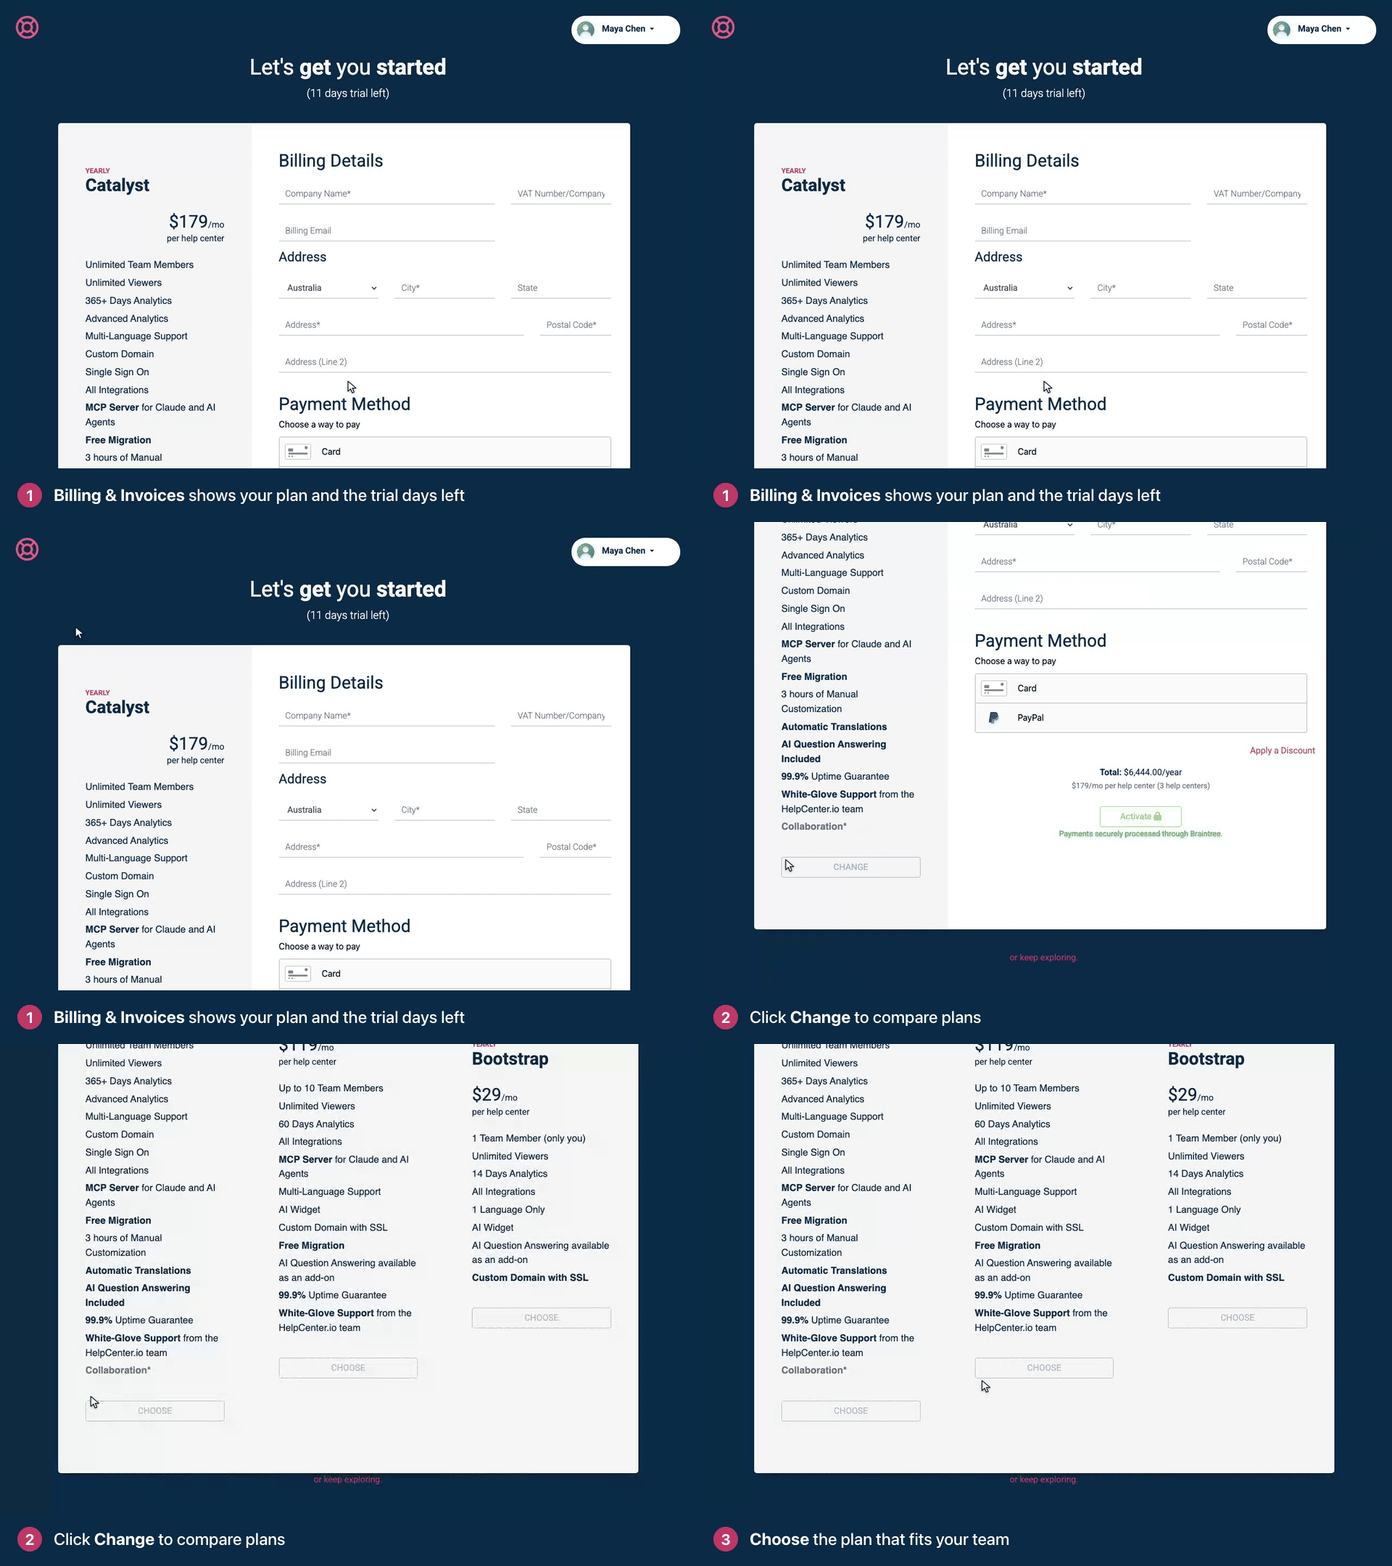
The days left in your trial appear under the page title.
During the last 7 days, a banner at the top of the dashboard counts down ("Your trial expires in 5 days") with an **Activate Now** button.
## Keep your help center after the trial
Choose a plan and add a payment method whenever you're ready. Activating early doesn't cut your trial short: you keep the days you have left, and your first payment is taken when the trial ends. See [Choose a plan and start your subscription](https://self.helpcenter.io/content/activate-your-subscription).
## When the trial ends
If you haven't activated a plan, your help center goes offline. Visitors see a page that says "This Help Center is Taking a Break", and the dashboard asks you to activate your subscription. Your articles, categories and settings are kept, and activating brings everything back right away. See [What happens when a trial or subscription ends?](https://self.helpcenter.io/content/when-a-subscription-ends)
## Adding more help centers
To create a second help center, activate your subscription first. The new help center gets its own subscription, which starts with the rest of your trial, or with 5 free days if your trial is over. See [Create another help center](https://self.helpcenter.io/content/create-another-help-center).
## Decided HelpCenter.io isn't for you?
You don't need to do anything. We never asked for a card, so nothing is charged. You can delete your help center yourself (see [Export or delete a help center](https://self.helpcenter.io/content/delete-a-help-center)), or email support@helpcenter.io to have your account deleted. We'd be grateful to hear what was missing.
## Related articles
- [Choose a plan and start your subscription](https://self.helpcenter.io/content/activate-your-subscription)
- [What happens when a trial or subscription ends?](https://self.helpcenter.io/content/when-a-subscription-ends)
- [Plans and pricing](https://self.helpcenter.io/content/plans-and-pricing)
- [Will I be charged as soon as I activate?](https://self.helpcenter.io/content/will-i-get-immediately-charged-when-i-activate-my-subscription-plan)
---
Source: https://self.helpcenter.io/content/change-your-subdomain
# Change your help center's address
_Category: Domain, access and SEO_
Every help center has its own address on helpcenter.io, like yourbrand.helpcenter.io. The first part is your subdomain, and you can change it whenever your name changes. Read what happens to the old address before you do.
**Who can do this:** Owners and Admins · **Plans:** All plans
**The old address stops working the moment you save.** It isn't redirected to the new one, and it becomes free for anyone else to take. Links, bookmarks and search results that use it show a "This Help Center Doesn't Exist" page.
## Change your subdomain
1. In the left menu, click the gear icon, then **Settings**.
2. Under **General**, type the new name in **Subdomain**.
3. Click **Save changes**.
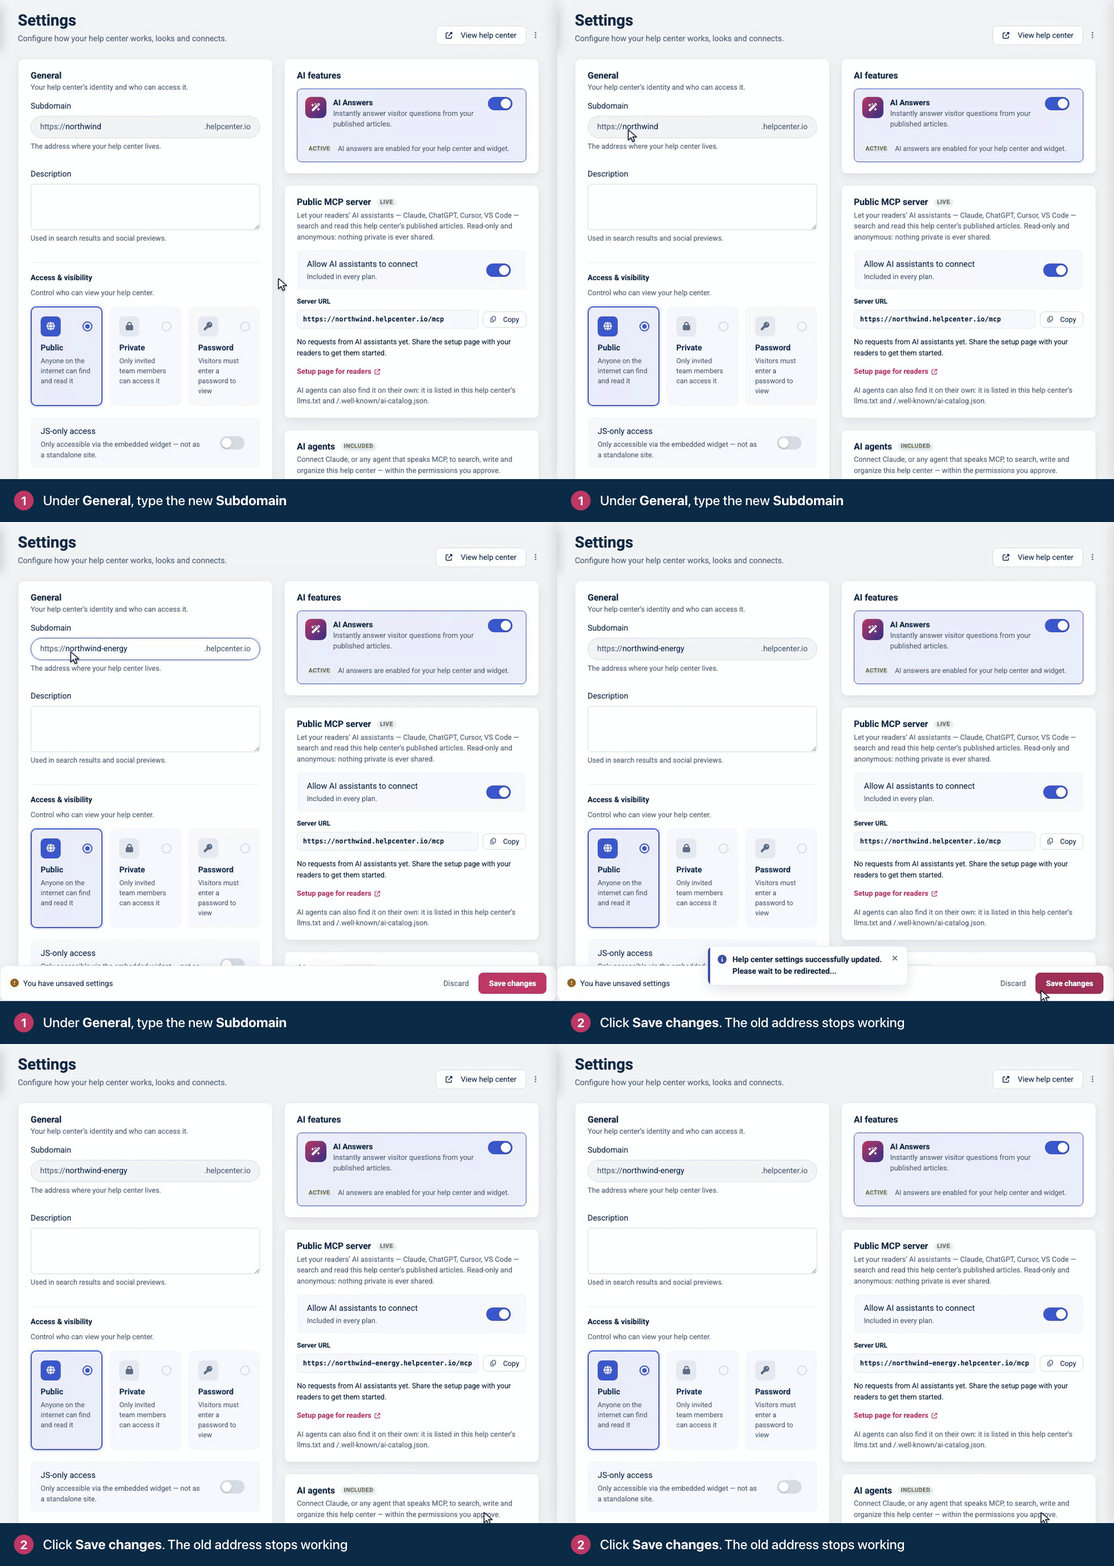
The old address stops working as soon as you save.
You'll see "Help center settings successfully updated. Please wait to be redirected..." and the Settings page opens again at its new address.
## Update everything that uses the old address
- **Links and bookmarks.** Update links on your website, in your product, in emails and in saved support replies. Bookmarks to dashboard pages include the old name too.
- **Your custom domain.** If you use one, change the value of its CNAME record to the new address (newname.helpcenter.io) right away, then click **Verify DNS** under **Settings** → **Custom domain**. Links that use your own domain keep working once the record points to the new name. See [Use your own domain](https://self.helpcenter.io/content/custom-domain).
- **Subfolder hosting.** If your help center is served from a path of your website, change your proxy to forward to the new address (newname.helpcenter.io) right away. Until you do, your help center doesn't load at that path. **Settings** → **Subfolder hosting** shows the rules with the new address. See [Host your help center in a subfolder of your website](https://self.helpcenter.io/content/host-your-help-center-in-a-subfolder).
- **Single sign-on.** If your login endpoint sends readers back to the old address, point it at the new one.
- **Iframes and embeds.** Anything that loads your help center by its address, such as an iframe, needs the new address.
- **AI assistants.** Without a custom domain, your help center's public MCP server moves to the new address too. Readers who connected it to their AI assistant need the new URL.
The widget keeps working without changes: its code finds your help center by its widget ID, not by its address.
Custom redirects can't send the old address anywhere, because it no longer belongs to your help center. They only handle paths on your current address. See [Redirect old links to the right page](https://self.helpcenter.io/content/custom-redirects).
## Subdomain rules
- 3 to 63 characters.
- Letters, numbers and dashes. Capital letters are saved as lowercase, and underscores become dashes.
- Not a reserved word. Common names such as www, help, support, docs, kb, api, app, admin, blog and status are reserved.
- Not already used by another help center.
## Choose a good subdomain
Your subdomain is how people find and remember your help center, especially if you don't use a custom domain. Pick one that clearly stands for your business, brand or project. Most companies use their name in lowercase, with dashes instead of spaces: a help center for "My Company" becomes my-company.helpcenter.io.
For a private help center, a short, memorable name makes it easier for your team to come back to it.
## Troubleshooting
**"Subdomain must contain only letters, numbers, and dash (-)."** Remove spaces, dots and other symbols.
**"The subdomain you have chosen is a reserved word. Please choose another one."** Add something that makes it yours, such as your company name.
**"The subdomain has already been taken."** Another help center uses that name. Try a variation.
**Your custom domain stopped verifying after the rename.** Its CNAME record still points to the old address. Update the record's value to your new helpcenter.io address.
## Related articles
- [Use your own domain](https://self.helpcenter.io/content/custom-domain)
- [Redirect old links to the right page](https://self.helpcenter.io/content/custom-redirects)
---
Source: https://self.helpcenter.io/content/is-helpcenter-io-right-for-my-company
# Is HelpCenter.io right for my company?
_Category: Why HelpCenter.io_
Yes, if you want a branded help center that's quick to set up and easy to keep up to date, without paying for a full support suite. It works for teams of any size that answer customer questions with articles.
- **SaaS companies** that want help inside their product: the widget, sign-in for customer-only docs (Catalyst) and an API. See [HelpCenter.io for SaaS companies](https://self.helpcenter.io/content/helpcenter-io-for-saas).
- **E-commerce and service businesses** that answer the same questions every day, with FAQ sections on product and checkout pages.
- **Agencies** that run help centers for clients: each one has its own design, domain and plan.
- **Internal knowledge bases:** keep a help center private or password-protected for your team.
**You may want something else if** you need a ticketing system or shared inbox (HelpCenter.io connects to tools like Zendesk, Front and HubSpot instead), a general website builder, or multi-step content approval.
The quickest way to find out is to try it: start a 14-day free trial, no credit card needed. On Growth and Catalyst, we'll move your existing help center for free.
## Related articles
- [What makes HelpCenter.io different?](https://self.helpcenter.io/content/what-makes-helpcenter-io-unique)
- [HelpCenter.io for SaaS companies](https://self.helpcenter.io/content/helpcenter-io-for-saas)
- [Plans and pricing](https://self.helpcenter.io/content/plans-and-pricing)
---
Source: https://self.helpcenter.io/content/what-is-a-help-center
# What is a help center?
_Category: Help center best practices_
A help center is a website where your customers find answers on their own: how-to guides, troubleshooting steps, FAQs and policies, organized by topic and easy to search. It's where people go when they get stuck, at any hour, before they write to your team.
You're reading one right now. This is HelpCenter.io's own help center, and it's built with HelpCenter.io.
**In one sentence:** a help center is the self-service home for everything your customers need to know to use your product, solve problems and reach a person when they need one.
## What goes in a help center
Most help centers mix a few kinds of content, and each kind answers a different question. Here's what that could look like for an online invoicing app.
| Content | The question it answers | Example title |
| --- | --- | --- |
| Getting started guide | "Where do I begin?" | Send your first invoice |
| How-to article | "How do I do this?" | Add your logo to invoices |
| Troubleshooting article | "Why isn't this working?" | A client didn't get their invoice |
| FAQ | A quick question with a short answer | Can I change my plan later? |
| Account and billing article | "How do I pay, upgrade or cancel?" | Download your receipts |
| Policy | "What are the rules?" | Refund policy |
| Reference | "What exactly does this mean?" | Glossary of invoicing terms |
Alongside the articles, a good help center always shows people how to reach a person when the articles don't solve their problem.
## Who uses a help center
- **Customers** use it to get unstuck without waiting for a reply, including at night, on weekends and in time zones your team doesn't cover.
- **People comparing products** read it to see how yours works, and how well you look after customers, before they buy.
- **Your support team** sends a link instead of typing the same answer again, so every customer hears the same, correct answer.
- **The rest of your company** relies on it too: sales checks what the product can do, and new colleagues learn the product from it.
- **Search engines** list your public articles, so people who type their question into a search box can land on your answer.
- **AI assistants** such as ChatGPT and Claude can read public help centers when someone asks them about your product. Many help centers also have AI built in: readers ask a question in their own words and get an answer written from your articles, with links to the sources.
Each of these readers is a reason to have one. For the full business case, see [Why your business needs a help center](https://self.helpcenter.io/content/why-you-need-a-help-center).
## Public, private or both
Most help centers are public, so anyone can read them and search engines can list them. Some sit behind a login and serve only paying customers or partners.
Others are private and made for your own team: processes, policies, support playbooks and onboarding guides in one searchable place. That's usually called an internal knowledge base, and many companies run one next to their public help center. See [Use a private help center as an internal knowledge base](https://self.helpcenter.io/content/internal-knowledge-base).
## Help center vs FAQ page, knowledge base, forum and contact form
These terms overlap, and people often mix them up. Here's how each one relates to a help center.
| Term | What it is | How it relates to a help center |
| --- | --- | --- |
| **FAQ page** | One page of short questions and answers. | Fine for a handful of questions, but hard to scan as it grows. A help center includes FAQs, plus full guides, categories and search. |
| **Knowledge base** | The organized collection of articles. | The heart of a help center. The two terms are often used for the same thing. See [Help center vs knowledge base: what's the difference?](https://self.helpcenter.io/content/help-center-vs-knowledge-base) |
| **Documentation** | Detailed reference material, often for developers. | Can live inside a help center or next to it. |
| **Community forum** | A place where customers ask and answer each other's questions. | Good for discussion and ideas, but answers vary in quality and go out of date. Turn the best ones into help center articles. |
| **Contact form or ticketing system** | A way to send a message to your team. | For problems that need a person. A good help center makes the form easy to find, and can suggest articles while people type their question. |
## What a modern help center includes
The basics haven't changed: useful articles in a clear structure. What has changed is how people reach them.
- **Search that works as you type.** Results appear while people type, and good search copes with different ways of saying the same thing.
- **AI answers with sources.** Readers ask a question in their own words and get a direct answer built from your articles, with links so they can check it.
- **Help inside your product.** A widget on your website or in your app brings search and articles to the page where people got stuck, so they don't have to leave it.
- **Your brand and your address.** Your logo, your colors and a domain like help.yourcompany.com, so customers know they're in the right place.
- **Works for everyone, on any device.** Pages that read well on a phone and work with a keyboard and a screen reader.
- **Your customers' languages.** Translated articles for each market you serve.
- **Feedback and statistics.** "Was this helpful?" ratings, your most-read articles, and the searches that found nothing.
- **Access control.** Public for everyone, private for your team, or behind your own login.
- **Open to search engines and AI tools.** A sitemap, stable addresses and machine-readable versions of your articles, so answers about your product come from you.
## Help centers worth a look
A few well-run help centers show these ideas in practice:
- [Slack Help Center](https://slack.com/help) leads with search and example questions, groups articles into a handful of sections such as Getting started and Workspace administration, and names articles after tasks.
- [Figma's help center](https://help.figma.com/hc/en-us) pairs search with a short getting-started path for new users, and puts Contact support next to its community forum.
- [Stripe Support](https://support.stripe.com/) opens with "How can we help?" and a list of the most popular articles, so the common questions are one click away.
- [GitHub Docs](https://docs.github.com/en) organizes a very large library by product area and says plainly when a feature has been retired, instead of letting its pages disappear.
## How to start a help center
1. **Collect the questions people already ask.** Your support inbox, chat history, sales calls and onboarding sessions are full of them. Write each one down in the customer's own words.
2. **Group them into five to ten categories.** Name each category the way customers would, not the way your teams are organized. See [Plan your help center's structure](https://self.helpcenter.io/content/plan-your-help-center).
3. **Write your first ten articles.** Start with the questions you answer most often, one question per article. See [The first 10 articles every help center needs](https://self.helpcenter.io/content/first-articles).
4. **Choose where it lives.** Help center software gives you hosting, search, structure and statistics from day one. A custom build takes longer and needs someone to maintain it. See [Why use a hosted help center instead of building your own?](https://self.helpcenter.io/content/why-should-i-go-with-a-hosted-solution-instead-of-creating-my-own)
5. **Make it easy to find.** Link to it from your website's header or footer, your product's help menu, your emails and your support replies.
6. **Improve it every month.** Look at the searches that found nothing and the articles with low ratings, then fix what they point to. See [Help center metrics that matter](https://self.helpcenter.io/content/help-center-metrics).
## A quick checklist
Your help center is doing its job when:
- It answers the questions your team hears most often.
- Article titles use your customers' words, not internal jargon.
- Search finds the right article on the first try.
- Each article covers one task or one question.
- People can reach a person when the articles aren't enough.
- It's linked from your website, your product and your emails.
- It reads well on a phone.
- Someone owns it and keeps it accurate as your product changes.
## How HelpCenter.io helps
HelpCenter.io is help center software. You write articles in a visual editor, pick a theme and publish to your own domain. Every plan includes search, the widget for your website and app, statistics, and a way for readers to connect their own AI assistant to your public help center. AI Answers are included on Catalyst and available as an add-on on Bootstrap and Growth. To try it, [create your HelpCenter.io account](https://self.helpcenter.io/content/create-your-account). The 14-day free trial needs no credit card.
## Related articles
- [Why your business needs a help center](https://self.helpcenter.io/content/why-you-need-a-help-center)
- [Help center vs knowledge base: what's the difference?](https://self.helpcenter.io/content/help-center-vs-knowledge-base)
- [Plan your help center's structure](https://self.helpcenter.io/content/plan-your-help-center)
- [The first 10 articles every help center needs](https://self.helpcenter.io/content/first-articles)
- [Create your HelpCenter.io account](https://self.helpcenter.io/content/create-your-account)
---
Source: https://self.helpcenter.io/content/why-you-need-a-help-center
# Why your business needs a help center
_Category: Help center best practices_
A help center answers your customers' questions at any hour, takes repeat questions off your team's plate, and gives people, search engines and AI assistants one reliable source of truth about your product. Here's what that looks like in practice, and what it takes.
## Customers get answers when they want them
Questions don't wait for office hours. A customer setting up your product late on a Sunday, or in a time zone your team doesn't cover, can find the answer and keep going instead of waiting until morning for a reply.
And not everyone wants to write to support. Some people don't want to wait, some find it hard to describe a problem in a message, and some prefer to learn a product on their own terms. A help center lets them solve the problem now.
## Your team stops answering the same question twice
Every support team has questions it answers again and again. Write the answer once, carefully, and link to it from then on. Your frequently asked questions become frequently answered ones, and your team spends its time on the problems that need a person.
A link in a support reply also shows the customer where to look next time.
## New customers get going faster
The first days with a product often decide whether people stay. Getting started guides and short how-tos help new customers reach their first success without booking a call. A help widget inside your product puts that help on the page where they need it.
## Everyone gives the same answer
When answers live in people's heads, customers hear one thing from support and another from sales. A help center gives everyone the same version, and when something changes, you update it in one place.
The same goes for your team. An internal knowledge base with your processes and policies means fewer interruptions and a faster start for new colleagues. See [Use a private help center as an internal knowledge base](https://self.helpcenter.io/content/internal-knowledge-base).
## People find you through search
People type questions into search engines all day, including questions your product answers. Public help center articles can appear for those searches, both for your customers and for people who are still comparing options. Every useful article is one more way for someone to find you. See [Help center SEO: get your articles found](https://self.helpcenter.io/content/help-center-seo).
## AI assistants give better answers about your product
People ask AI assistants about products too. When someone asks about yours, the assistant answers from what it can read. Clear, current, public articles give it the right facts to work with.
AI answers inside your own help center work the same way: they reply to questions in the customer's own words, using your articles as the source. See [Make your help center ready for AI](https://self.helpcenter.io/content/ai-ready-help-center).
## You learn what confuses customers
A help center shows you things a ticket queue doesn't. Searches that find nothing show what's missing. Articles with low ratings show what doesn't help. A troubleshooting article that everyone reads can point to a part of your product worth fixing. See [Help center metrics that matter](https://self.helpcenter.io/content/help-center-metrics).
## Signs you need one now
- Your team answers the same questions every week.
- Customers wait hours for answers you could have written down once.
- New customers need a call or a demo before they can get started.
- Your FAQ page has grown too long to scan.
- Colleagues keep asking each other how things work.
- You're moving into new markets or languages.
## What it takes
A help center doesn't have to be a big project, but it does need some care. You need:
- **Time to write the first articles.** Start with ten, not a hundred. See [The first 10 articles every help center needs](https://self.helpcenter.io/content/first-articles).
- **An owner.** One person who makes sure articles stay accurate and gaps get filled.
- **A habit.** Update articles when the product changes, and check what people search for. See [Keep your help center up to date](https://self.helpcenter.io/content/keep-your-help-center-up-to-date).
## What a help center won't do
It won't replace your support team. Some problems need a person, and a help center works best when reaching one is easy. It won't fix a confusing product either, though it will show you where the confusion is. And it only stays useful while someone keeps it current.
## Make the case to your team
If you need buy-in, use the numbers you already have rather than industry averages:
1. List your five most common support questions and how many times each came in last month.
2. Estimate how long your team spends answering them.
3. Note how long customers wait for a first reply, especially outside office hours.
4. Propose a small start: articles for those five questions, then compare next month's numbers with this month's.
For example, if 120 messages a month ask how to reset a password and each one takes your team four minutes, one clear article can win back up to eight hours a month. Two or three questions like that usually make the case on their own.
## How HelpCenter.io helps
HelpCenter.io gives you a help center on your own domain, with search, the widget for your website and app, and statistics on every plan. AI Answers reply to questions from your articles and link to their sources, on Catalyst or with the AI add-on on Bootstrap and Growth. You pay a flat price per help center, not per agent. See [Plans and pricing](https://self.helpcenter.io/content/plans-and-pricing).
## Related articles
- [What is a help center?](https://self.helpcenter.io/content/what-is-a-help-center)
- [Reduce support tickets with self-service](https://self.helpcenter.io/content/reduce-support-tickets)
- [Help center metrics that matter](https://self.helpcenter.io/content/help-center-metrics)
- [The first 10 articles every help center needs](https://self.helpcenter.io/content/first-articles)
---
Source: https://self.helpcenter.io/content/custom-css
# Add custom CSS
_Category: Design and templates_
Fine-tune your help center's look with your own CSS when the theme settings don't go far enough. You add CSS as labeled snippets, watch the preview change as you type, and publish when it looks right.
This is for people comfortable with CSS. For colors, fonts, spacing and corner radius, start with the **Theme** tab: those settings work in light and dark mode without any code.
**Who can do this:** Owners and Admins (Editors through **Customize** on your help center) · **Plans:** All plans
## Add a CSS snippet
1. In the left menu, click **Template editor**, then open the **Advanced** tab.
2. Under **Custom CSS**, click **Add custom CSS**.
3. Give the snippet a label that says what it does, for example "Bigger logo".
4. Write your CSS in the code editor. The preview updates as you type.
5. Click **Save** to fold the snippet away. Your draft saves on its own either way.
6. Click **Publish** to put it live.
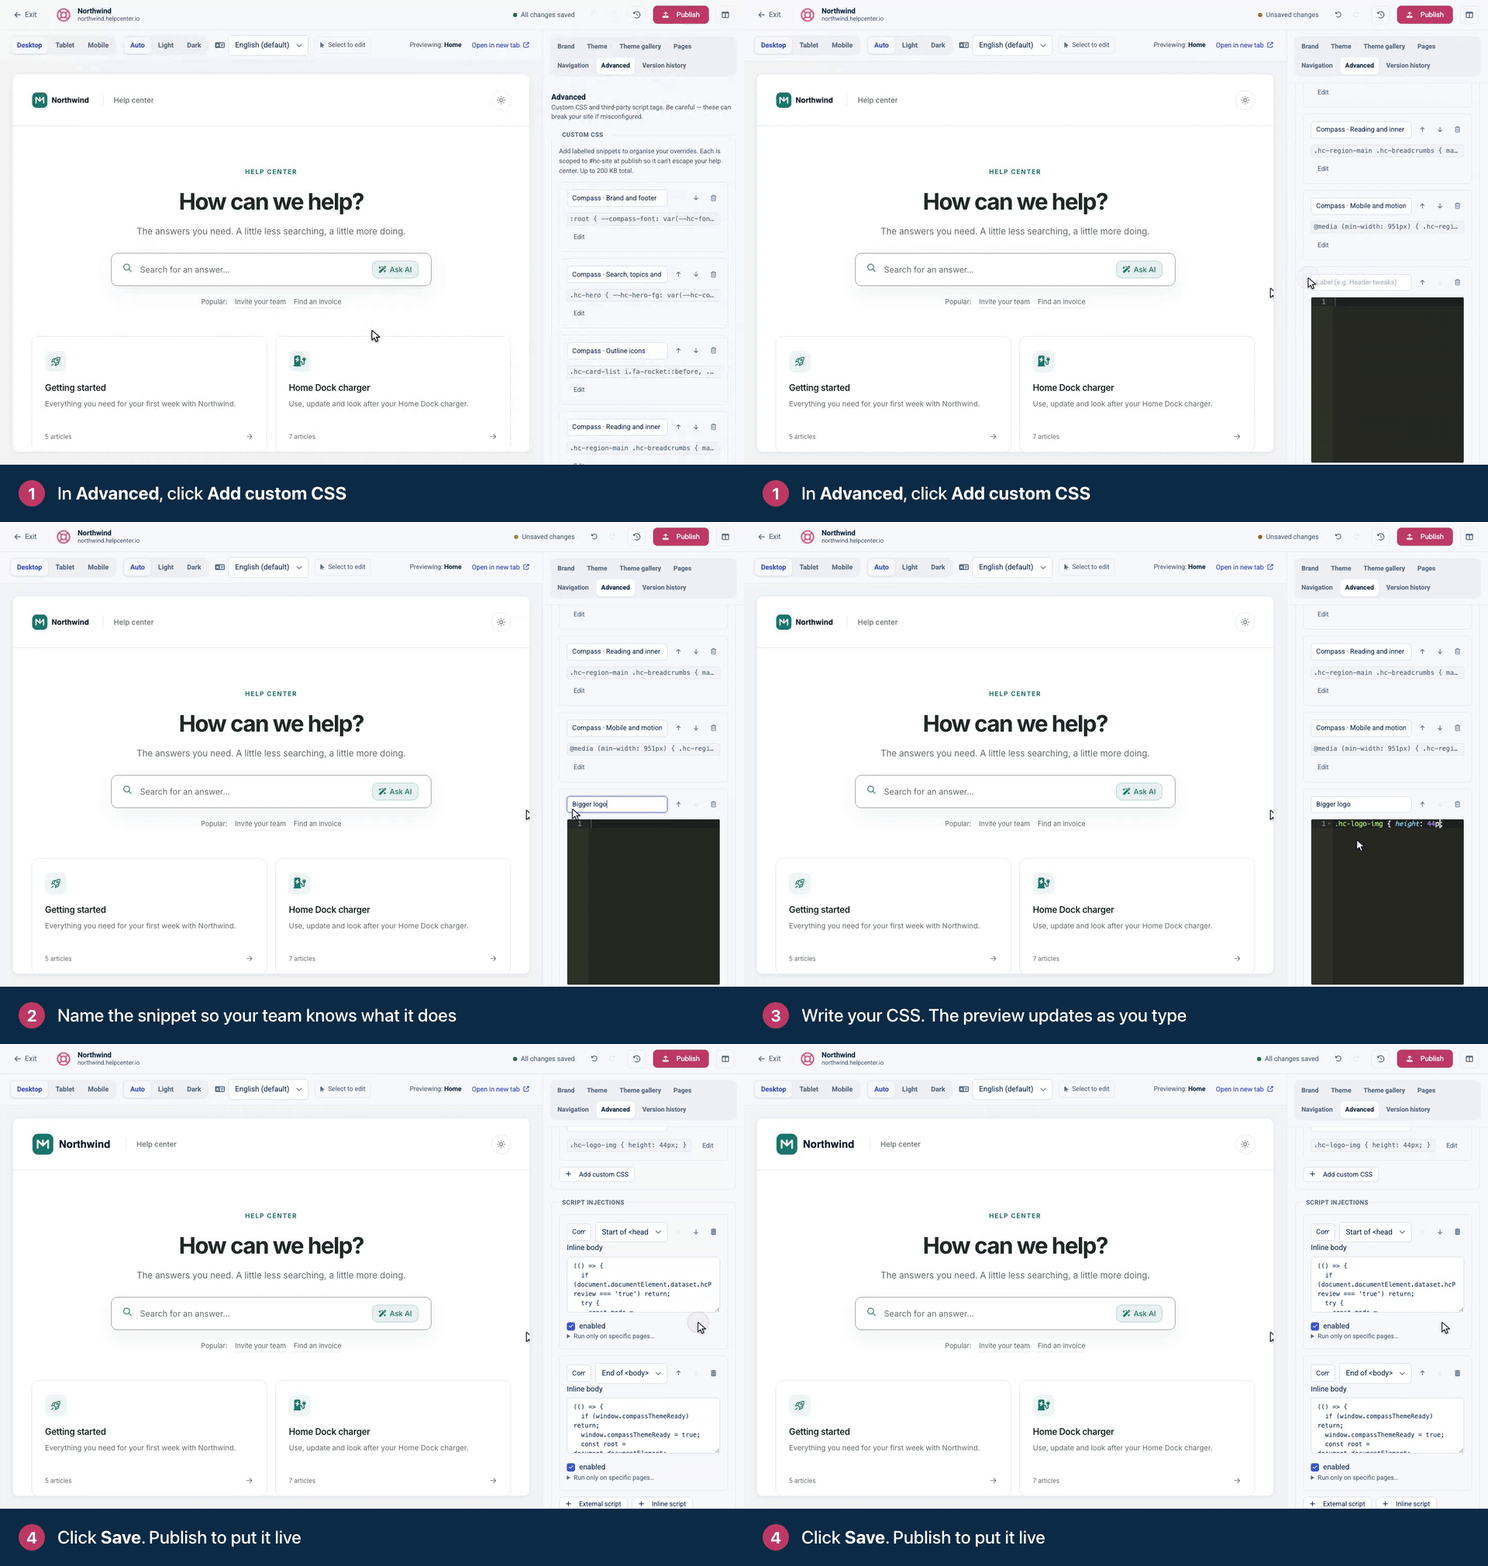
Label each snippet so your team knows what it's for.
The recording uses a snippet like this one. Your logo shows 32 pixels tall, and this makes it 48:
```
.hc-logo-img {
height: 48px;
}
```
## Manage your snippets
- **Edit** opens a folded snippet again.
- The **Enabled** switch turns a snippet off without deleting it. A disabled snippet stays saved but isn't used.
- The up and down arrows change the order. Snippets are combined from top to bottom, so when two rules are equally specific, the lower one wins.
- The trash icon removes a snippet. Press ⌘Z (Ctrl+Z) to bring it back.
Your theme may come with snippets of its own. Compass's start with "Compass ·" and hold part of its look. Leave them in place and add yours below them.
## How your CSS is applied
- **It only styles your help center.** HelpCenter.io puts `#hc-site` in front of every selector, so your rules can't leak into anything else. You don't need to write `#hc-site` yourself.
- **Rules for `html`, `body` or `:root`** apply to that `#hc-site` wrapper instead. The [Custom CSS reference](https://self.helpcenter.io/content/custom-css-reference) explains what that means for your selectors.
- **Up to 200 KB in total.** That covers all your enabled snippets together. Above the limit, none of your custom CSS is applied, and your draft can't be saved until you trim it.
- **Some things are removed for safety:** `@import`, `@charset`, `@namespace`, `javascript:` URLs, `behavior` and `expression()`. To change fonts, use the **Theme** tab.
- **Applying a theme can replace your snippets.** When you apply a theme with **Custom CSS** ticked, the theme's snippets replace yours. Untick it in the **Apply theme** dialog to keep them.
**One missing brace turns off all your custom CSS.** If any snippet has an unmatched `{` or `}`, none of your snippets are applied, in the preview or on your live help center. If all your styling disappears at once, look for the missing brace in the snippet you edited last.
## Write CSS that keeps working
- Target the hooks made for customization, such as `[data-hc-component-type="CategoryGrid"]` or `.hc-article__title`, rather than utility classes that can change. The [Custom CSS reference](https://self.helpcenter.io/content/custom-css-reference) lists them.
- Use theme variables instead of fixed colors, so your rules look right in light and dark mode.
- Check **Mobile**, **Tablet** and **Dark** in the preview before you publish.
- Keep a visible focus outline on anything readers can click, for people who use a keyboard.
For example, this colors every article title with your brand color, in a shade that stays readable in both modes:
```
.hc-article__title {
color: var(--hc-color-primary-text);
}
```
## Troubleshooting
**The preview is right, but your help center isn't.** Click **Publish**. Custom CSS goes live with the rest of your draft.
**All your custom CSS stopped working.** Look for an unmatched brace, and check that your snippets together stay under 200 KB.
**One rule does nothing.** Check that the snippet is enabled and that the selector matches the page. See [My custom CSS doesn't work](https://self.helpcenter.io/content/custom-css-not-working).
## Related articles
- [Custom CSS reference: selectors and examples](https://self.helpcenter.io/content/custom-css-reference)
- [My custom CSS doesn't work](https://self.helpcenter.io/content/custom-css-not-working)
- [Add analytics and other scripts](https://self.helpcenter.io/content/scripts)
---
Source: https://self.helpcenter.io/content/cant-sign-in
# I can't sign in
_Category: Troubleshooting_
Most sign-in problems have a quick fix. Find the message you see below, or work through the checks in order.
## "The provided email and password do not match."
HelpCenter.io didn't recognize that email and password together.
1. Check that you're on the sign-in page at [helpcenter.io/app/signin](https://helpcenter.io/app/signin).
2. Use the email address your account was created with. If a team invited you, that's the address the invitation went to.
3. Check that Caps Lock is off, and that your password manager didn't fill in the details of another account.
4. Still no luck? Reset your password (next section).
Were you invited but never finished signing up? Open the invitation email and create your account from its link first. Until you do, there's no password to sign in with.
## Reset your password
1. On the sign-in page, click **Forgot password?**
2. Enter your email address and click **Send Password Reset Link**.
3. Open the email with the subject "Reset Password Notification" and click the link in it. The link works for 60 minutes.
4. Enter your **Email address** and a **New password** of at least 8 characters, confirm it, then click **Reset Password**.
Messages you might see along the way:
- **"If an account exists for that address, we've emailed a password reset link."** You see this for every address, to keep it private who has an account. If no email arrives, try the other email addresses you use, and wait a minute before you ask for another link.
- **"This password reset token is invalid."** The link is more than 60 minutes old, or it was already used. Request a new one.
No email after a few minutes? Check your spam folder for a message from app@helpcenter.io. See [I'm not getting emails from HelpCenter.io](https://self.helpcenter.io/content/not-getting-emails).
## Signing in with Google doesn't work
- **"An account with this email already exists. Sign in with your password, then connect Google from Account Settings."** Your HelpCenter.io email address isn't verified yet. Sign in with your password, then click **Connect** under **Sign-in Methods** in Account Settings.
- **"This account is connected to a different Google account. Sign in with that one, or with your password."** Pick the Google account you connected before, or use your password.
- **"Google has not verified the email address on that account, so it cannot be used to sign in."** Verify the address with Google, or sign in with your email and password.
- **"Your Google sign-in expired or was started in another tab. Please try again."** Go back to the sign-in page and click **Continue with Google** again.
- **You created your account with Google and have no password.** Use **Continue with Google**. To add a password, see [Change or reset your password](https://self.helpcenter.io/content/change-your-password).
## "Too Many Requests" (error 429)
After several sign-in attempts in a short time, HelpCenter.io pauses sign-in for that email address for a minute. Wait a minute, then try again. If you're not sure of your password, reset it instead of guessing.
## Your two-factor code isn't accepted
If the **Two-Factor Authentication** page says **"The provided two factor authentication code was invalid."**:
- Type the code your authenticator app shows at that moment. Codes change every 30 seconds, and each code works only once.
- Check that you're reading the HelpCenter.io entry in your app, not the code for another account.
- Set your phone's date and time to update automatically. Codes are based on the clock, so a phone that runs fast or slow produces codes that don't match.
Lost the phone with your authenticator app? See [I lost my authenticator device](https://self.helpcenter.io/content/lost-two-factor-device).
## "This account has been suspended."
The full message reads **"This account has been suspended. Please contact support for more information."** Only our team can help here. Contact us from the email address on the account.
## "Page Expired" (error 419), or the page reloads without an error
HelpCenter.io needs cookies to sign you in. If your browser blocks them or holds on to old ones, you can land back on the sign-in page with no message at all.
1. Reload the sign-in page and try again. A sign-in page that was left open for a long time shows "Page Expired" when you submit it.
2. Try a private (incognito) window. If sign-in works there, the problem is in your usual browser's cookies or extensions.
3. Allow cookies for helpcenter.io, or clear its cookies. Here's how in [Chrome](https://support.google.com/chrome/answer/95647), [Firefox](https://support.mozilla.org/en-US/kb/delete-cookies-remove-info-websites-stored), [Safari](https://support.apple.com/guide/safari/manage-cookies-sfri11471/mac) and [Edge](https://support.microsoft.com/en-us/help/4027947/windows-delete-cookies).
## Signing in to read a help center
- **A private help center** opens only for people on its team. Ask the team to invite you (the Viewer role is enough to read), then sign in with the address the invitation went to.
- **A help center that uses single sign-on** signs you in through its company's own login page, not with a HelpCenter.io password. If that doesn't work, contact the company that runs the help center.
## Still stuck?
Write to us from the email address on your account and tell us what you see on the screen. See [Contact HelpCenter.io support](https://self.helpcenter.io/content/contact-support).
## Related articles
- [Sign in to HelpCenter.io](https://self.helpcenter.io/content/sign-in)
- [Change or reset your password](https://self.helpcenter.io/content/change-your-password)
- [I lost my authenticator device](https://self.helpcenter.io/content/lost-two-factor-device)
---
Source: https://self.helpcenter.io/content/table-of-contents
# When does an article show a table of contents?
_Category: Write articles_
When the article has headings and your theme's Article page includes the **Table of contents** component. Readers then see an **On this page** list beside the article and can jump to any section.
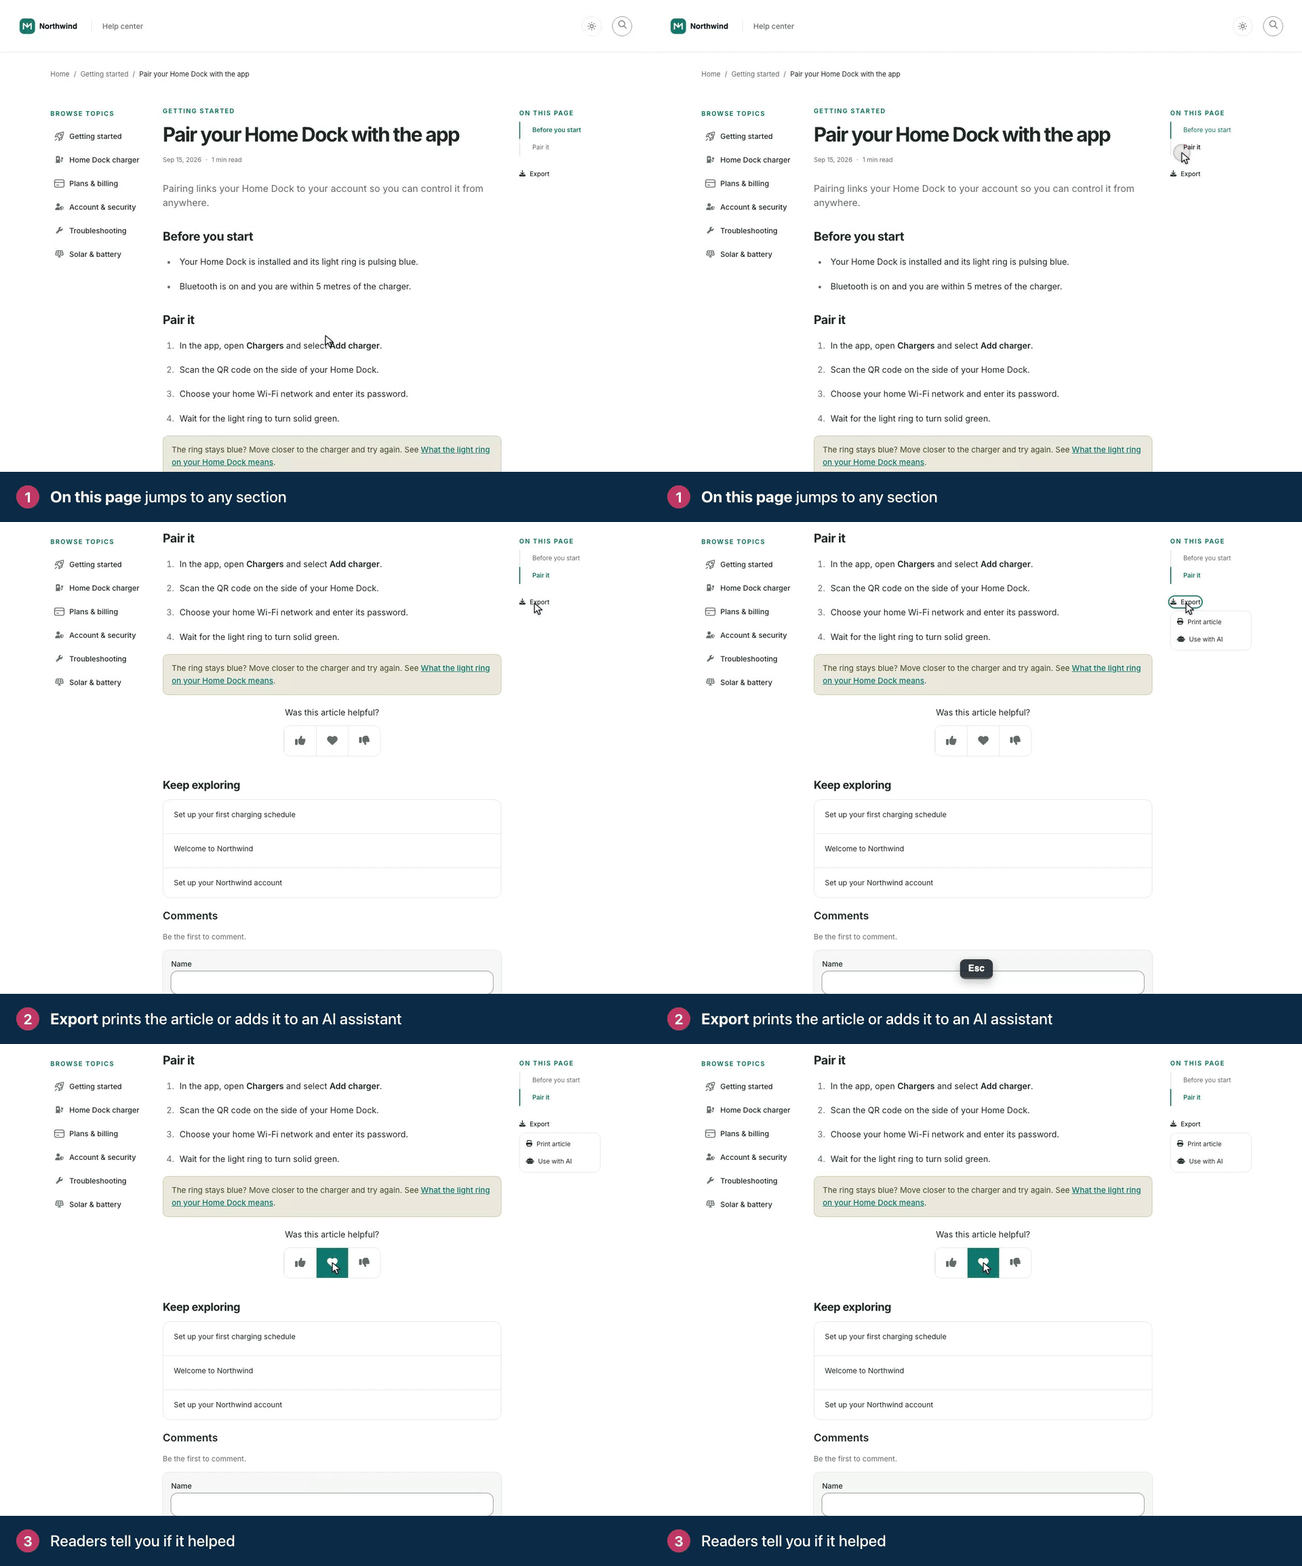
The On this page list follows the reader down the article.
The list is built from the article's headings, starting at Heading 2. The article title isn't included, and an article without headings shows no list. Use Heading 2 for your main sections and Heading 3 for the parts inside them.
Compass, the default theme, includes the component. To add it, remove it or change it:
1. Open the **Template editor**, go to **Pages** and pick the **Article** page.
2. The component lives in the **Sidebar** or **Utility** region. Add it there with **Add component**, or click it to edit it.
3. In **Heading levels**, choose how deep the list goes, from Heading 2 only down to Heading 5. **Sticky** keeps it in view while readers scroll.
4. Click **Publish**.
## Related articles
- [Add headings, lists and other blocks](https://self.helpcenter.io/content/add-blocks)
- [Customize the article page](https://self.helpcenter.io/content/article-page)
---
Source: https://self.helpcenter.io/content/why-should-i-go-with-a-hosted-solution-instead-of-creating-my-own
# Why use a hosted help center instead of building your own?
_Category: Why HelpCenter.io_
A help center looks like a few pages of articles, but behind it sits software: an editor, search, hosting, security, SEO and more. A hosted help center gives you all of that ready to use, so your team spends its time on the answers instead of on the platform.
## What you'd have to build and keep running
Here's what a good help center needs, and what HelpCenter.io takes care of for you.
| What you need | What HelpCenter.io gives you |
| --- | --- |
| An editor your whole team can use | A rich editor with drafts, templates, version history, and roles for writers, translators and admins. |
| Search that finds answers | Results that appear as readers type. With AI Answers (Catalyst, or the AI add-on), readers can ask a question and get an answer written from your articles, with sources. |
| Search engine basics | A sitemap, canonical links, language tags and a search title and description for every article. |
| Readiness for AI tools | AI-readable versions of your pages, an llms.txt file, and a public MCP server readers can add to their AI assistant. |
| Accessibility | Themes with keyboard navigation, a skip link, screen reader landmarks, automatic color contrast and support for reduced motion. |
| Security and access | HTTPS on every page, free SSL certificates for your own domain, two-factor sign-in for your team, and private or password-protected help centers. Catalyst adds single sign-on for readers. |
| Hosting and backups | We run the servers, update the software and back up your data several times a day. Growth and Catalyst come with a 99.9% uptime guarantee. |
| Languages | Several languages, each with its own addresses, on Growth and Catalyst, plus AI translation on Catalyst. |
| Knowing what's missing | Statistics on what readers search for and don't find, and which articles they rate as helpful. |
| Help inside your product | A widget for your website or app, and FAQ sections you can embed on any page. |
## The real cost of building it yourself
Each row above has to be designed, built and tested, then maintained. The work doesn't stop at launch: browsers, search engines and AI tools keep changing, certificates expire, and someone has to fix the site when it goes down. For most teams, that's a second product to look after.
HelpCenter.io starts at $29/month per help center (Bootstrap, billed yearly), with no per-agent fees. See [Plans and pricing](https://self.helpcenter.io/content/plans-and-pricing).
## When building your own can make sense
Some large companies with specific requirements build their own. That can be the right call if your documentation has to live inside a system you already run, or you need workflows HelpCenter.io doesn't offer, such as multi-step approvals.
If you'd rather host a knowledge base yourself, Compass, HelpCenter.io's default theme, is also free and open source (GPL-3.0) as plain HTML, CSS and JavaScript on [knowledgebase.dev](https://knowledgebase.dev/).
## You stay in control of your content
A hosted help center doesn't mean giving up your content. Serve it from your own domain, export articles as PDF whenever you like, or copy everything out through the API. See [Do you back up my content?](https://self.helpcenter.io/content/do-you-create-a-backup-of-my-content)
## Related articles
- [Is HelpCenter.io right for my company?](https://self.helpcenter.io/content/is-helpcenter-io-right-for-my-company)
- [Security and privacy at HelpCenter.io](https://self.helpcenter.io/content/security-and-privacy)
- [Plans and pricing](https://self.helpcenter.io/content/plans-and-pricing)
---
Source: https://self.helpcenter.io/content/create-your-account
# Create your HelpCenter.io account
_Category: Getting started_
Sign up to start your 14-day free trial. You create your account and your first help center in two short steps, and you don't need a credit card.
**Who can do this:** Anyone · **Plans:** 14-day free trial, no credit card needed
## Create your account
1. Go to [helpcenter.io/app/signup](https://helpcenter.io/app/signup), or click **Start free trial** on our [pricing page](https://helpcenter.io/pricing).
2. Under **What is your name?**, enter your full name.
3. Under **What's your email?**, enter your work email address.
4. Under **Choose a password**, enter a password of at least 6 characters. Type it again under **Confirm your password**.
5. Tick **I agree to the terms of service and privacy policy.** The box for news and offers from HelpCenter.io is optional.
6. Click **Continue**.
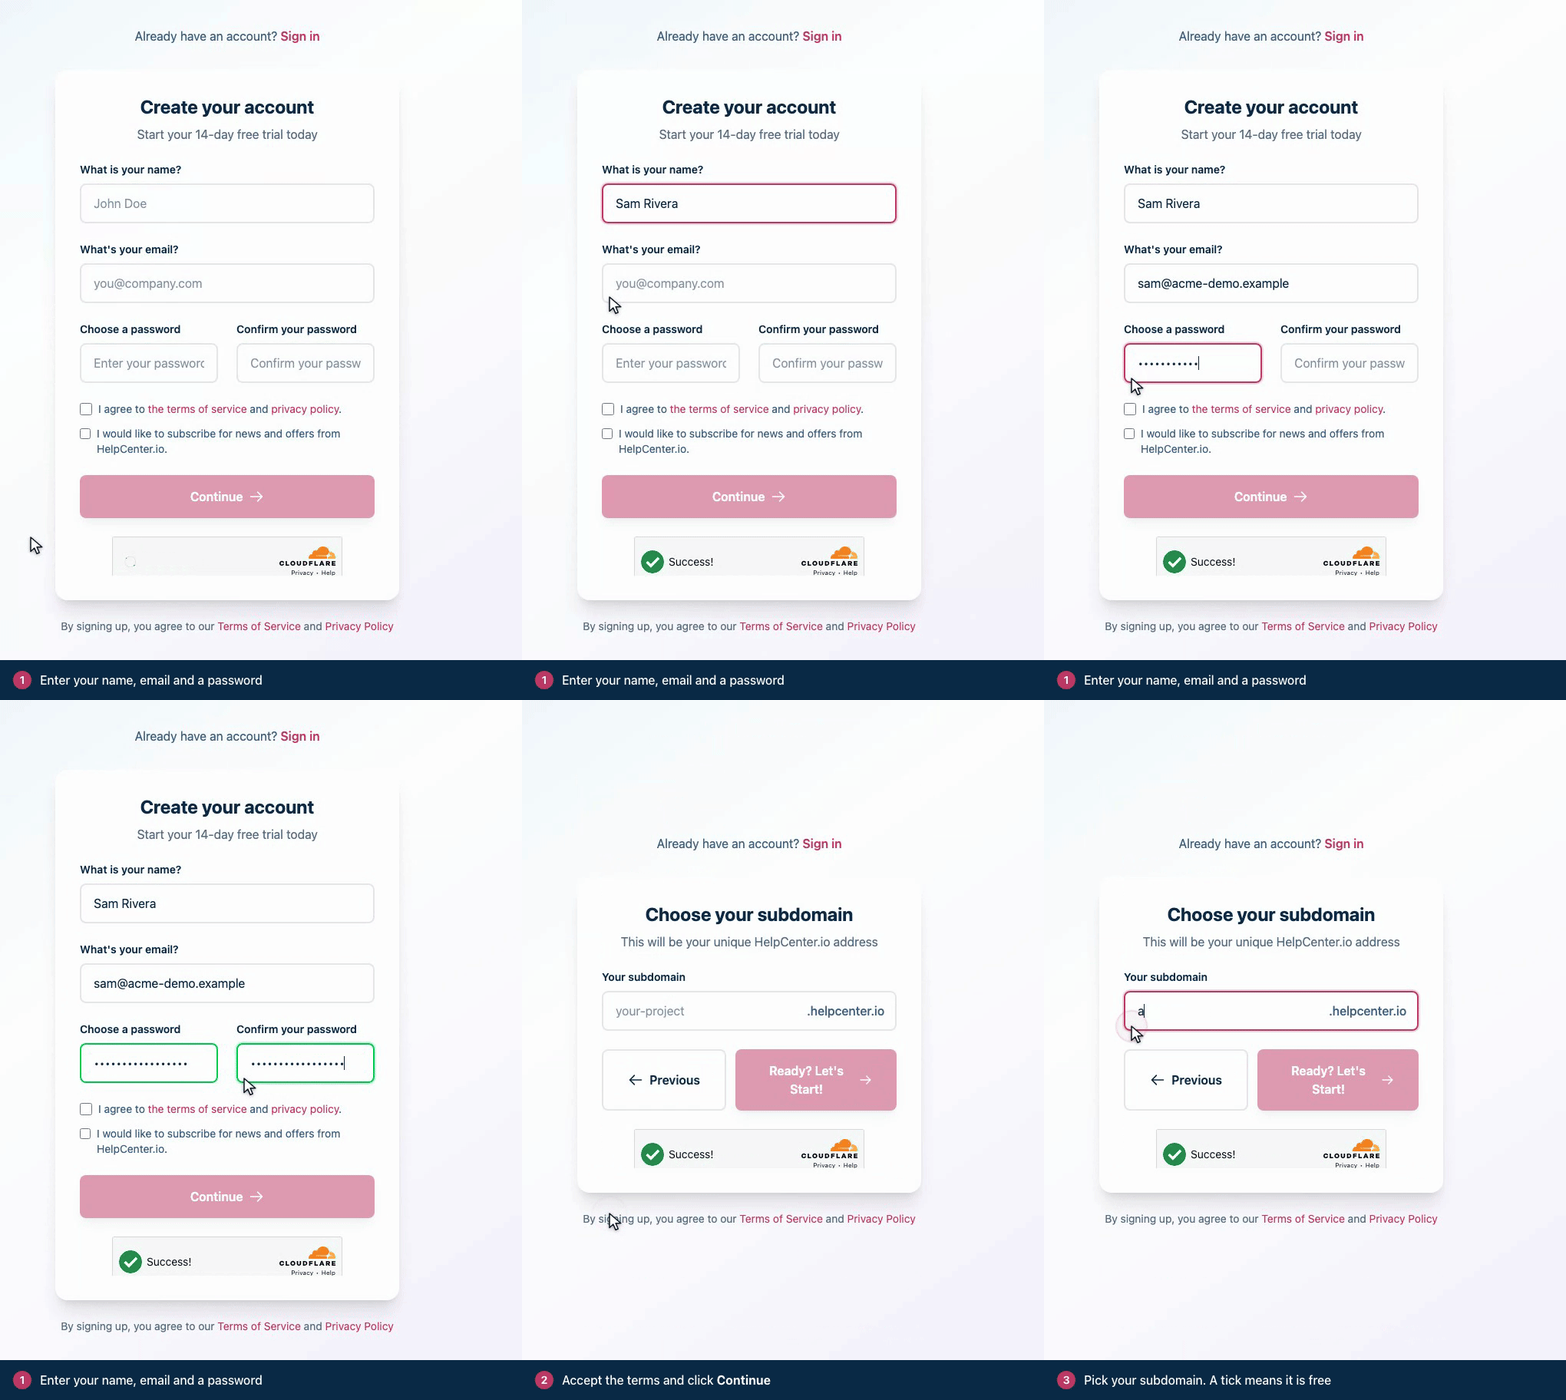
Continue stays grayed out until you fill in your details and tick the terms box.
## Or sign up with Google
Click **Sign up with Google** at the top of the sign-up page and pick your Google account. The form comes back as **Finish creating your account**, with your Google address under **Your email** and no password fields. Check your name, tick the terms box and click **Continue**, then choose your subdomain as described below.
You sign in with that Google account from then on, and your email address counts as verified, so no verification email is sent. You can add a password later in **Account Settings**. To go back to the email form, click **Use email instead**.
## Choose your subdomain
Your subdomain is your help center's address, such as `acme.helpcenter.io`. Your company or product name is a good choice.
1. Type it under **Your subdomain**. A tick means it's free.
2. Click **Ready? Let's Start!**
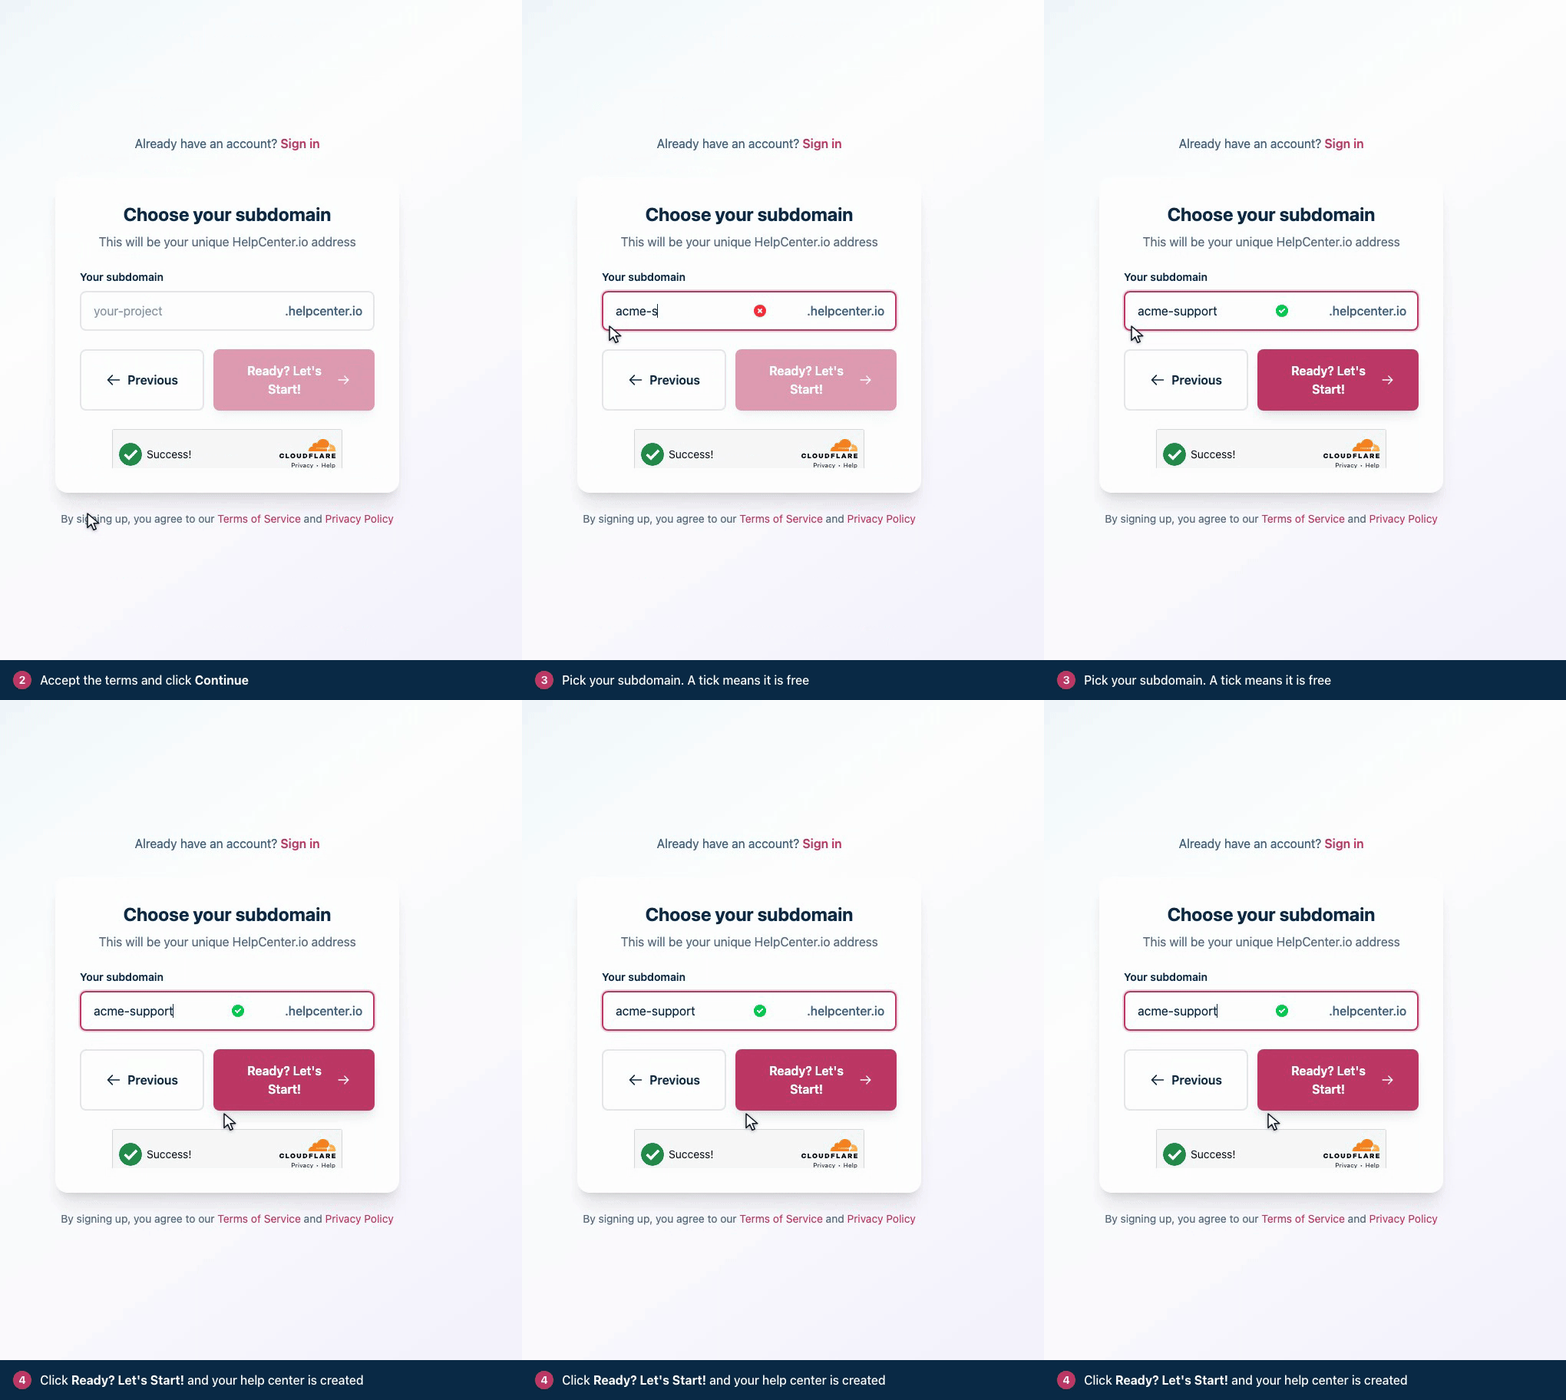
Your help center is created and its dashboard opens.
A subdomain is 3 to 63 characters long and uses letters, numbers and dashes. Capital letters are saved as lowercase. Reserved words, such as `app`, `help`, `support` and `www`, and some protected brand names aren't available.
You can change your subdomain later, but links to the old address stop working, so it pays to choose carefully. See [Change your help center's address](https://self.helpcenter.io/content/change-your-subdomain). You can also serve your help center from your own domain, such as help.yourcompany.com: see [Use your own domain](https://self.helpcenter.io/content/custom-domain).
## What you get
- **A help center named after your subdomain.** To rename it, change **Site name** under **Brand** in the template editor, then publish.
- **A first category and article.** A **General** category with a draft article named after your help center, such as "What is Acme?". Edit them or delete them.
- **A ready-made design** that you can change in the template editor.
- **Privacy while you build.** New help centers are **Private**: only you and the people you invite can see yours. [Make it public](https://self.helpcenter.io/content/make-your-help-center-public) when you're ready.
- **A 14-day free trial** of the plan you picked on our pricing page, or of Growth if you signed up without picking one. See [How the free trial works](https://self.helpcenter.io/content/free-trial).
## Verify your email
If you signed up with Google, skip this step. Otherwise, we send you an email to confirm your address. Open it and click **Verify Email Address**. The link works for 60 minutes.
You need a verified email to make your help center public and to activate your subscription. If the email doesn't arrive, check your spam folder. To get a new link, click your avatar at the bottom of the dashboard's left menu, then **Account Settings**, and click **Resend** under your email address.
## Joining a teammate's help center?
If someone invited you, use the link in your invitation email instead of signing up here. You create your account without choosing a subdomain and go straight to their help center.
## Troubleshooting
**"The email has already been taken."** You already have an account with that address. [Sign in](https://self.helpcenter.io/content/sign-in) instead, or reset your password from the sign-in page.
**"The password field must be at least 6 characters." or "The password field confirmation does not match."** Use at least 6 characters, and type exactly the same password in both fields.
**"The subdomain has already been taken." or "The subdomain you have chosen is a reserved word. Please choose another one."** Try another address, for example your company name with your product name added.
**"Subdomain must contain only letters, numbers, and dash (-)."** Remove spaces, dots and other symbols.
**"This subdomain contains a protected brand name."** Subdomains that contain certain well-known brand names are blocked. Choose one based on your own company's name.
**"The captcha verification failed. Please try again." or "The captcha has expired. Please refresh and try again."** Reload the page and sign up again.
## Related articles
- [Set up your help center: a first-hour checklist](https://self.helpcenter.io/content/set-up-your-help-center)
- [Sign in to HelpCenter.io](https://self.helpcenter.io/content/sign-in)
- [Make your help center public](https://self.helpcenter.io/content/make-your-help-center-public)
- [How the free trial works](https://self.helpcenter.io/content/free-trial)
---
Source: https://self.helpcenter.io/content/switch-help-centers
# Switch between your help centers
_Category: Getting started_
Manage several help centers? Move between them without signing in again. You land in the same section of the other help center, so if you're looking at Statistics in one, you see Statistics in the next.
**Who can do this:** Anyone on the team of more than one help center · **Plans:** All plans
## Switch from the left menu
1. Hover over the logo at the top of the left menu. It shows which help center you're in.
2. Click the arrow next to it to list your other help centers.
3. Click the help center you want.
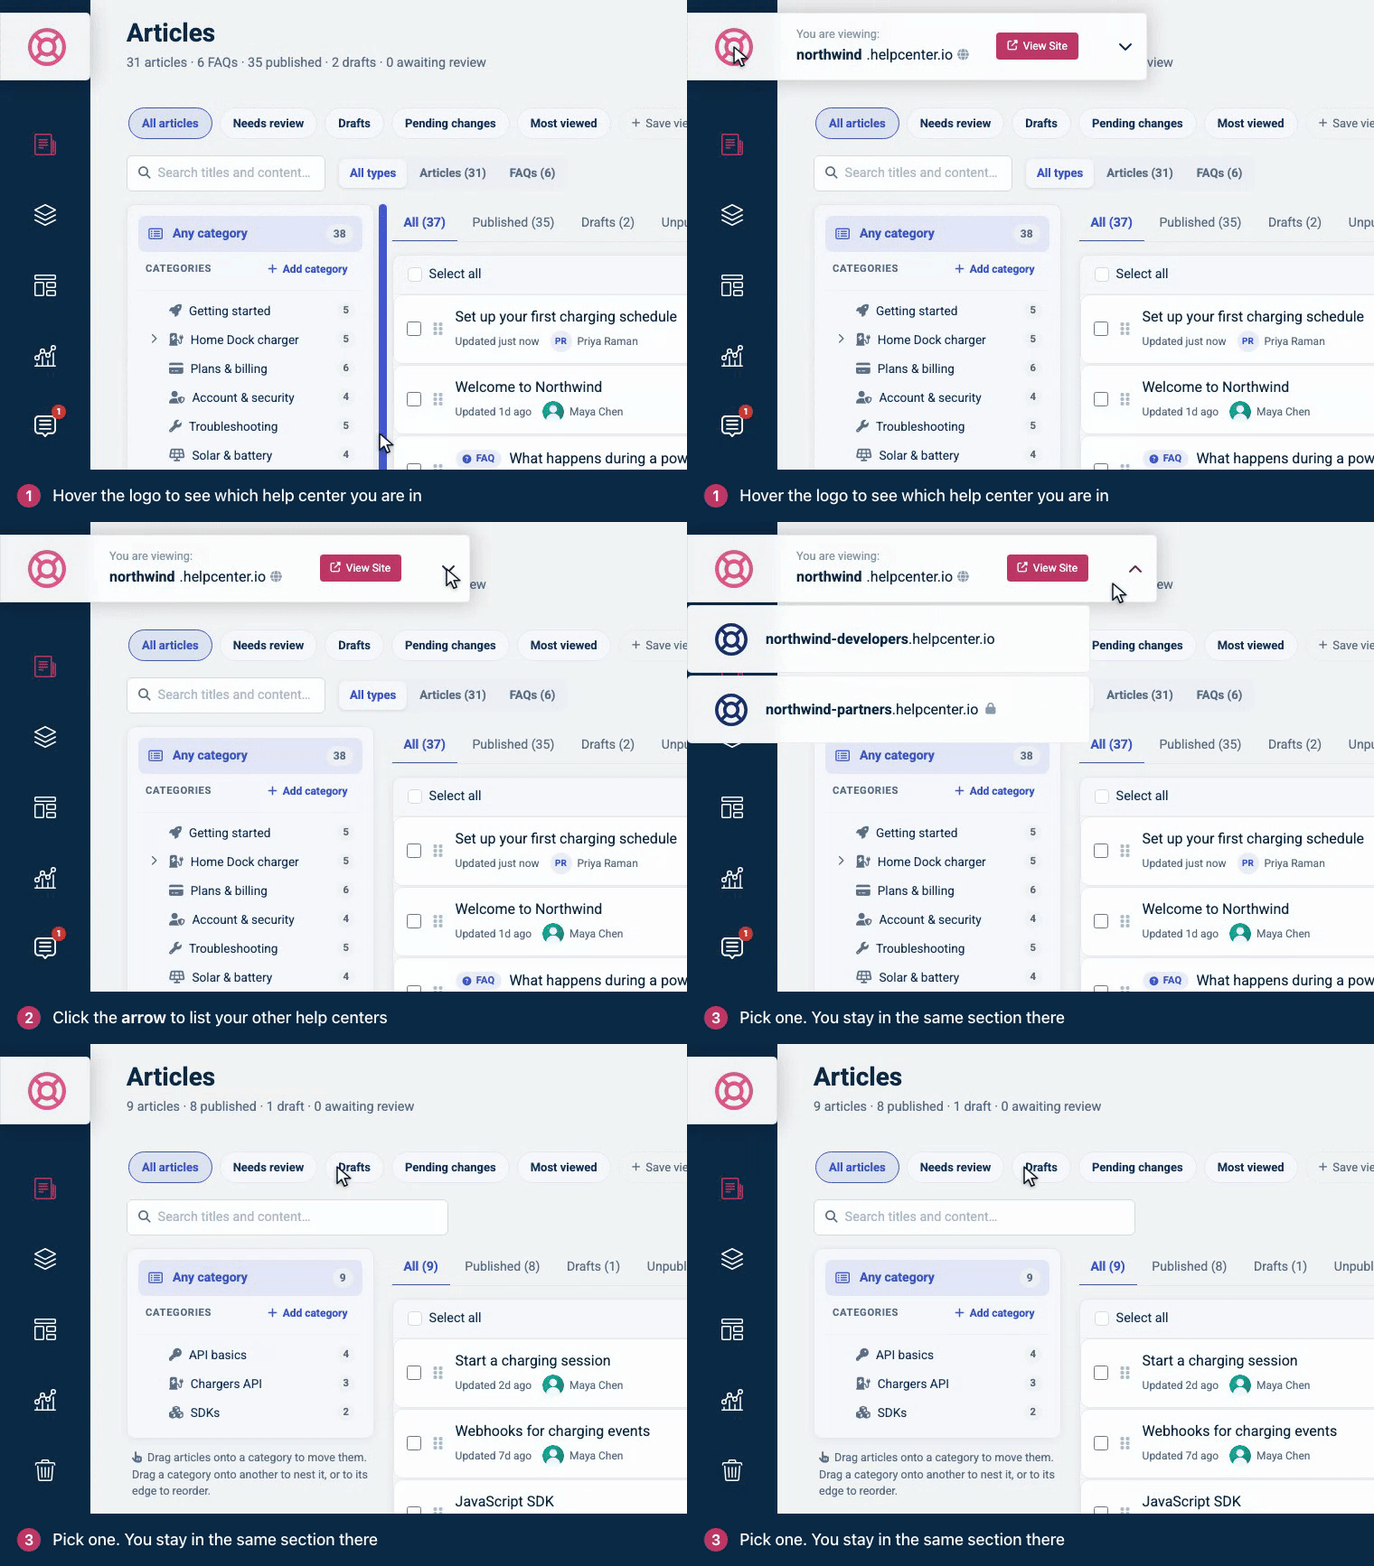
You stay in the same section when you switch.
In the list, a lock means the help center isn't public, and a globe means it has more than one language. **View Site** opens the help center you're in.
If your role in the other help center doesn't include the section you're on, you land on its Articles page. If you're a Viewer there, you go to the help center itself, because Viewers don't use the dashboard.
## Use My Help Centers
My Help Centers lists every help center you belong to. Open it at [helpcenter.io/app/sites](https://helpcenter.io/app/sites), or open **Account Settings**, click your name at the top of the page, then click **My Help Centers**. Click a help center to open it.
It's also the page you see right after you sign in, and where account owners create new help centers. See [Create another help center](https://self.helpcenter.io/content/create-another-help-center).
## Troubleshooting
**A help center is missing from the list.** Check that you signed in with the email address you were invited with. If it's still missing, ask the help center's owner or an admin to check that you're on its team.
## Related articles
- [Create another help center](https://self.helpcenter.io/content/create-another-help-center)
- [Find your way around the dashboard](https://self.helpcenter.io/content/dashboard-tour)
---
Source: https://self.helpcenter.io/content/resize-images-and-add-alt-text
# Resize images and add alt text
_Category: Write articles_
Give each image the right size and position in your article, and add alt text so everyone understands it, including people who use screen readers.
**Who can do this:** Owners, Admins and Editors · **Plans:** All plans (AI alt text: Catalyst plan, or the AI add-on on Bootstrap and Growth)
## Start with an image
1. If the image isn't in the article yet, type `/image` on an empty line, press Enter and pick a file.
2. Click the image. Its toolbar appears above it.
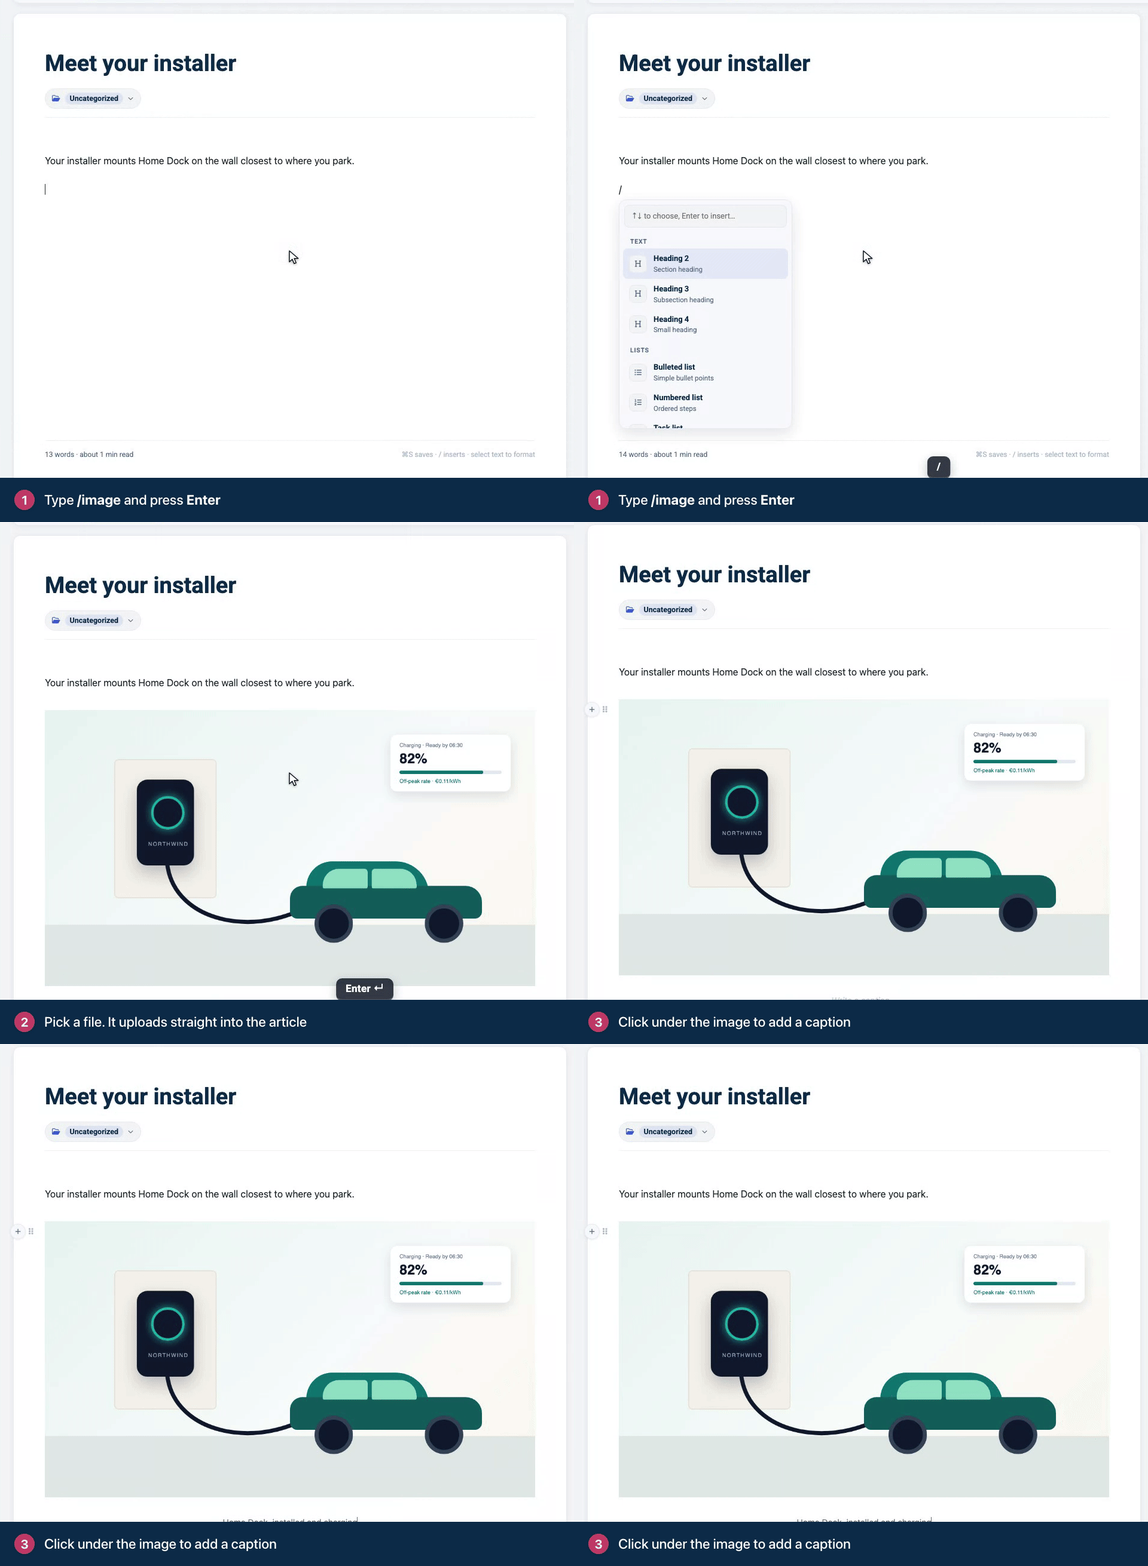
Start by adding the image to your article.
## Resize an image
1. Click the image.
2. Point at its left or right edge until the pointer becomes a double arrow.
3. Drag inward to make the image smaller, or outward to make it bigger.
The width is saved as a share of the article's width, from 10% up to the full width, and the height follows so the image keeps its shape. On phones, images shrink to fit the screen.
### Images inside a line of text
For a small image that sits inside a sentence, click it and click **Size**. Choose **Text height** to make it as tall as the words around it, **Original** for its own size, or type a width in pixels and click the check mark.
## Align an image
Click the image, then click **Align to left**, **Align to center** or **Align to right**. With left or right alignment, the text flows around the image, which works well for small images next to a short paragraph.
## Add alt text
1. Click the image, then click **Alt text and title**.
2. In **Alt text**, describe what the image shows.
3. If you like, add a **Title**. Readers see it as a tooltip when they point at the image.
4. Press Enter or click the check mark to save.
## Write alt text that helps
Screen readers read alt text aloud, search engines use it to understand your images, and browsers show it when an image can't load.
- Describe what matters for the reader's task. "The Settings page with the Custom domain field filled in" says more than "Screenshot".
- Skip "Image of" and "Picture of". Screen readers already announce that it's an image.
- Keep it to a sentence. If the text next to the image already explains it, a few words are enough.
## Draft alt text with AI
In the **AI writing help** card, click **Write alt text for images**. AI writes alt text for up to four block images that don't have any yet, and adds it to them straight away. Click each image and open **Alt text and title** to check what it wrote. Run it again for the next four.
## Related articles
- [Add images to an article](https://self.helpcenter.io/content/add-images)
- [Write accessible help content](https://self.helpcenter.io/content/accessible-help-content)
- [How accessible is my help center?](https://self.helpcenter.io/content/accessibility)
---
Source: https://self.helpcenter.io/content/do-you-create-a-backup-of-my-content
# Do you back up my content?
_Category: Why HelpCenter.io_
Yes. We back up all your data several times a day, so if something goes wrong on our side, we can restore it.
You also have safety nets of your own:
- **Version history:** every change your team saves in the editor is listed with who made it and when, and you can restore an earlier version. Changes made through the API or by an AI agent are listed too, under the name System. How far back you can go depends on your plan. [Learn how to restore a version](https://self.helpcenter.io/content/article-versions).
- **Trash:** deleted articles go to Trash, where you can restore them. Only Owners and Admins can delete them permanently. See [Delete and restore articles](https://self.helpcenter.io/content/delete-and-restore-articles).
- **PDF export:** export the articles you select, or your whole help center from **Settings** → **Danger zone**. See [Export articles as PDF](https://self.helpcenter.io/content/export-articles-as-pdf).
- **API export:** with an API key, `GET /v1/export` returns your categories and articles with their content, so you can keep your own copy. Articles in Trash and your team's notes aren't included. See [Create an API key](https://self.helpcenter.io/content/create-an-api-key) and [Back up your help center](https://developers.helpcenter.io/content/back-up-your-help-center) on the developer portal.
## Related articles
- [Security and privacy at HelpCenter.io](https://self.helpcenter.io/content/security-and-privacy)
- [See and restore earlier versions of an article](https://self.helpcenter.io/content/article-versions)
- [Delete and restore articles](https://self.helpcenter.io/content/delete-and-restore-articles)
---
Source: https://self.helpcenter.io/content/who-can-see-your-help-center
# Control who can see your help center
_Category: Domain, access and SEO_
Decide who can read your help center: anyone on the internet, only your team, or anyone who knows a password. New help centers start as Private, so you can get your content ready before anyone else sees it.
**Who can do this:** Owners and Admins
## The three options
You'll find them in **Settings**, under **General** → **Access & visibility**.
| Option | Who can read it | How they get in |
| --- | --- | --- |
| **Public** | Anyone on the internet. Search engines can list it. | No sign-in needed. |
| **Private** | People on your team, in any role, including Viewers. | They sign in with their HelpCenter.io account. |
| **Password** | Anyone you give the password to. | One shared password. No account needed. |
## Make your help center private
1. In the left menu, click the gear icon, then **Settings**.
2. Under **Access & visibility**, choose **Private**.
3. Click **Save changes**.
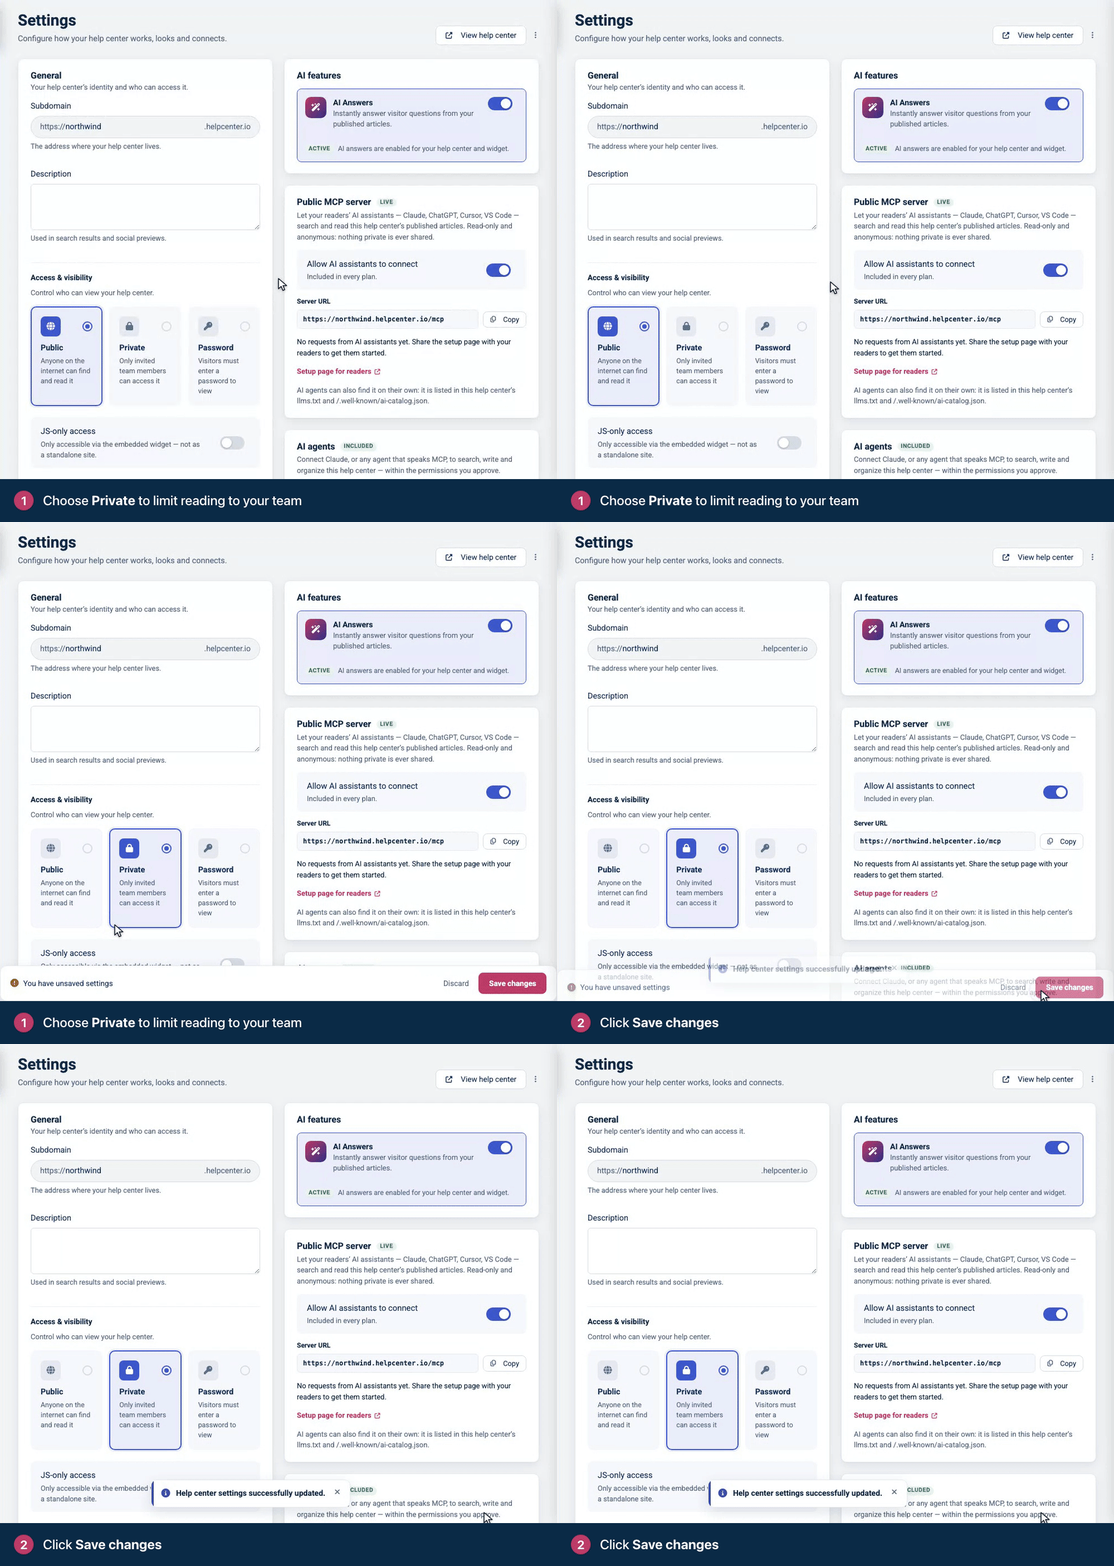
Private limits reading to your team.
To let someone read a private help center, invite them to your team. The **Viewer** role is for people who only need to read. See [Invite your team](https://self.helpcenter.io/content/invite-your-team).
Anyone who opens a private help center without being signed in is asked to sign in with their HelpCenter.io account. After they sign in, they go straight back to the page they were trying to open. If you use JWT single sign-on, visitors go to your own login instead.
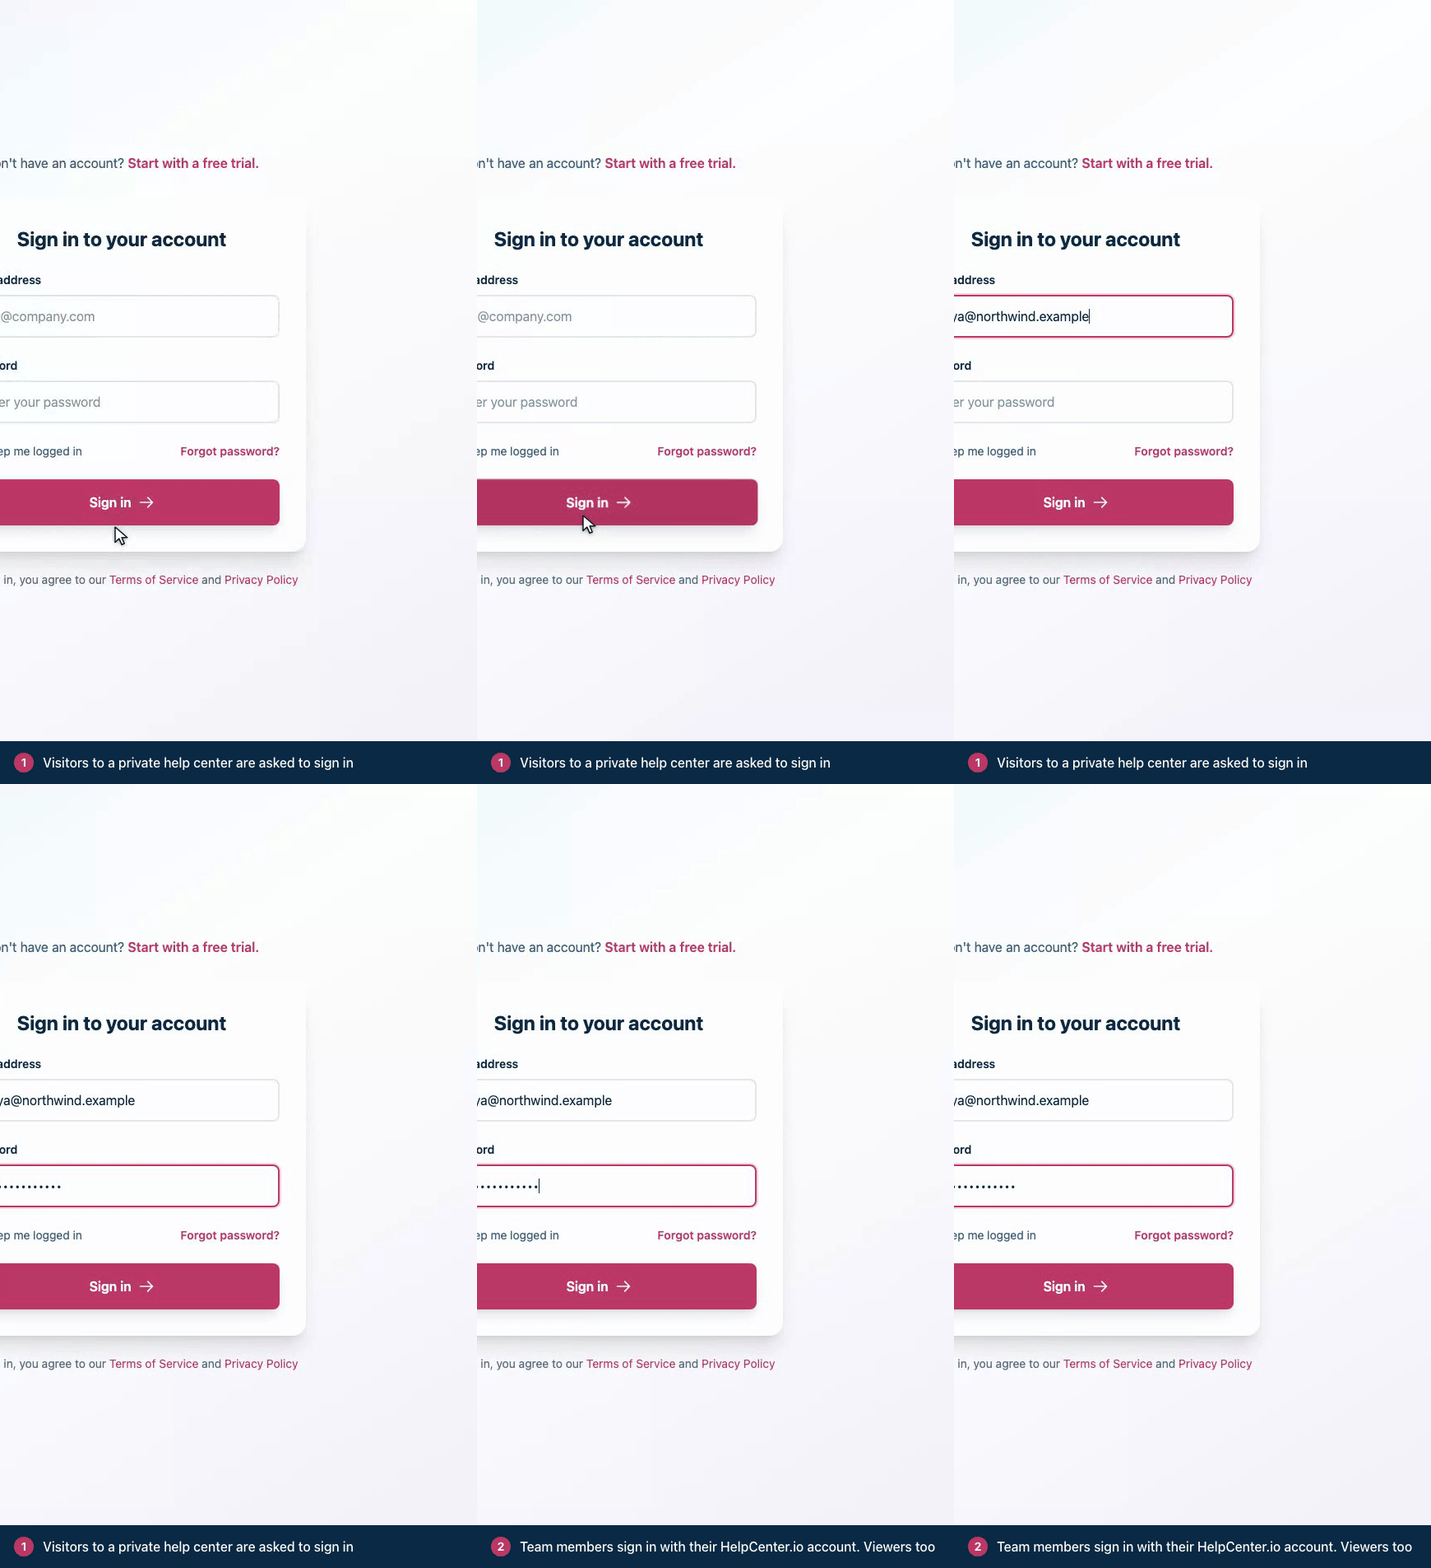
What visitors see when they open a private help center.
## Protect it with a password
1. In the left menu, click the gear icon, then **Settings**.
2. Under **Access & visibility**, choose **Password**.
3. Enter the **Access password** you'll share with readers.
4. Click **Save changes**.
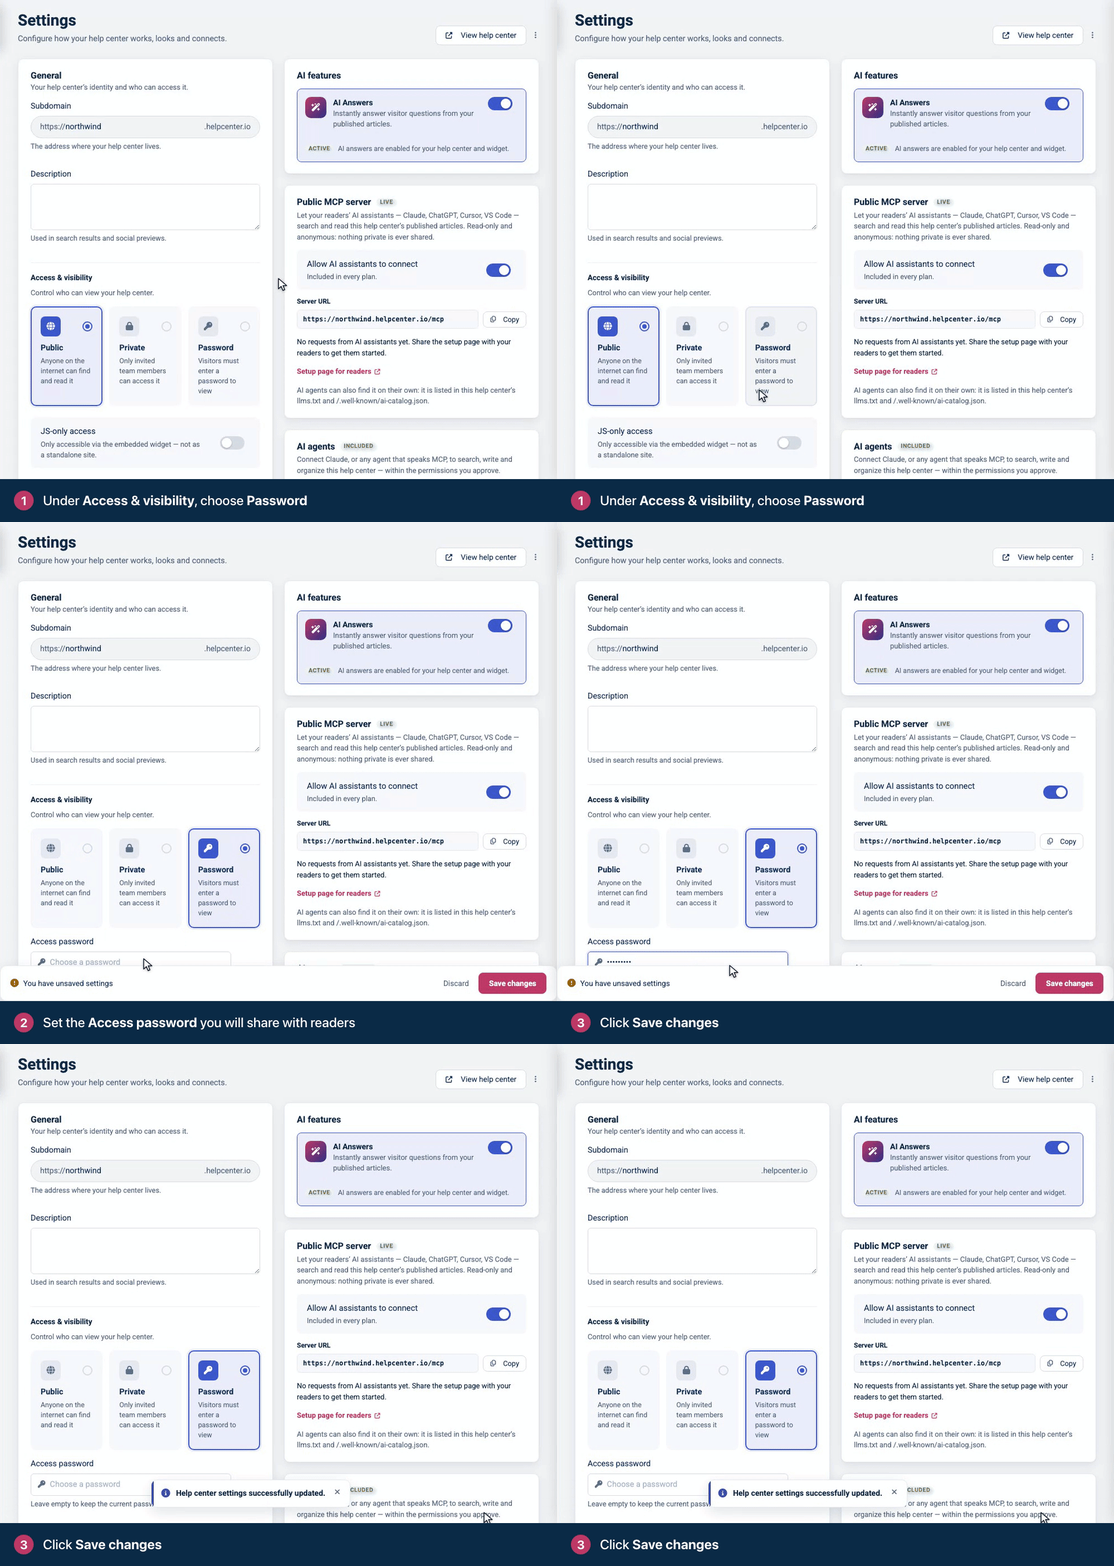
Everyone who reads your help center uses the same password.
Visitors now see a password page first. After they enter the right password, the help center stays open in that browser for up to 7 days. Team members who are signed in to HelpCenter.io skip the password page.
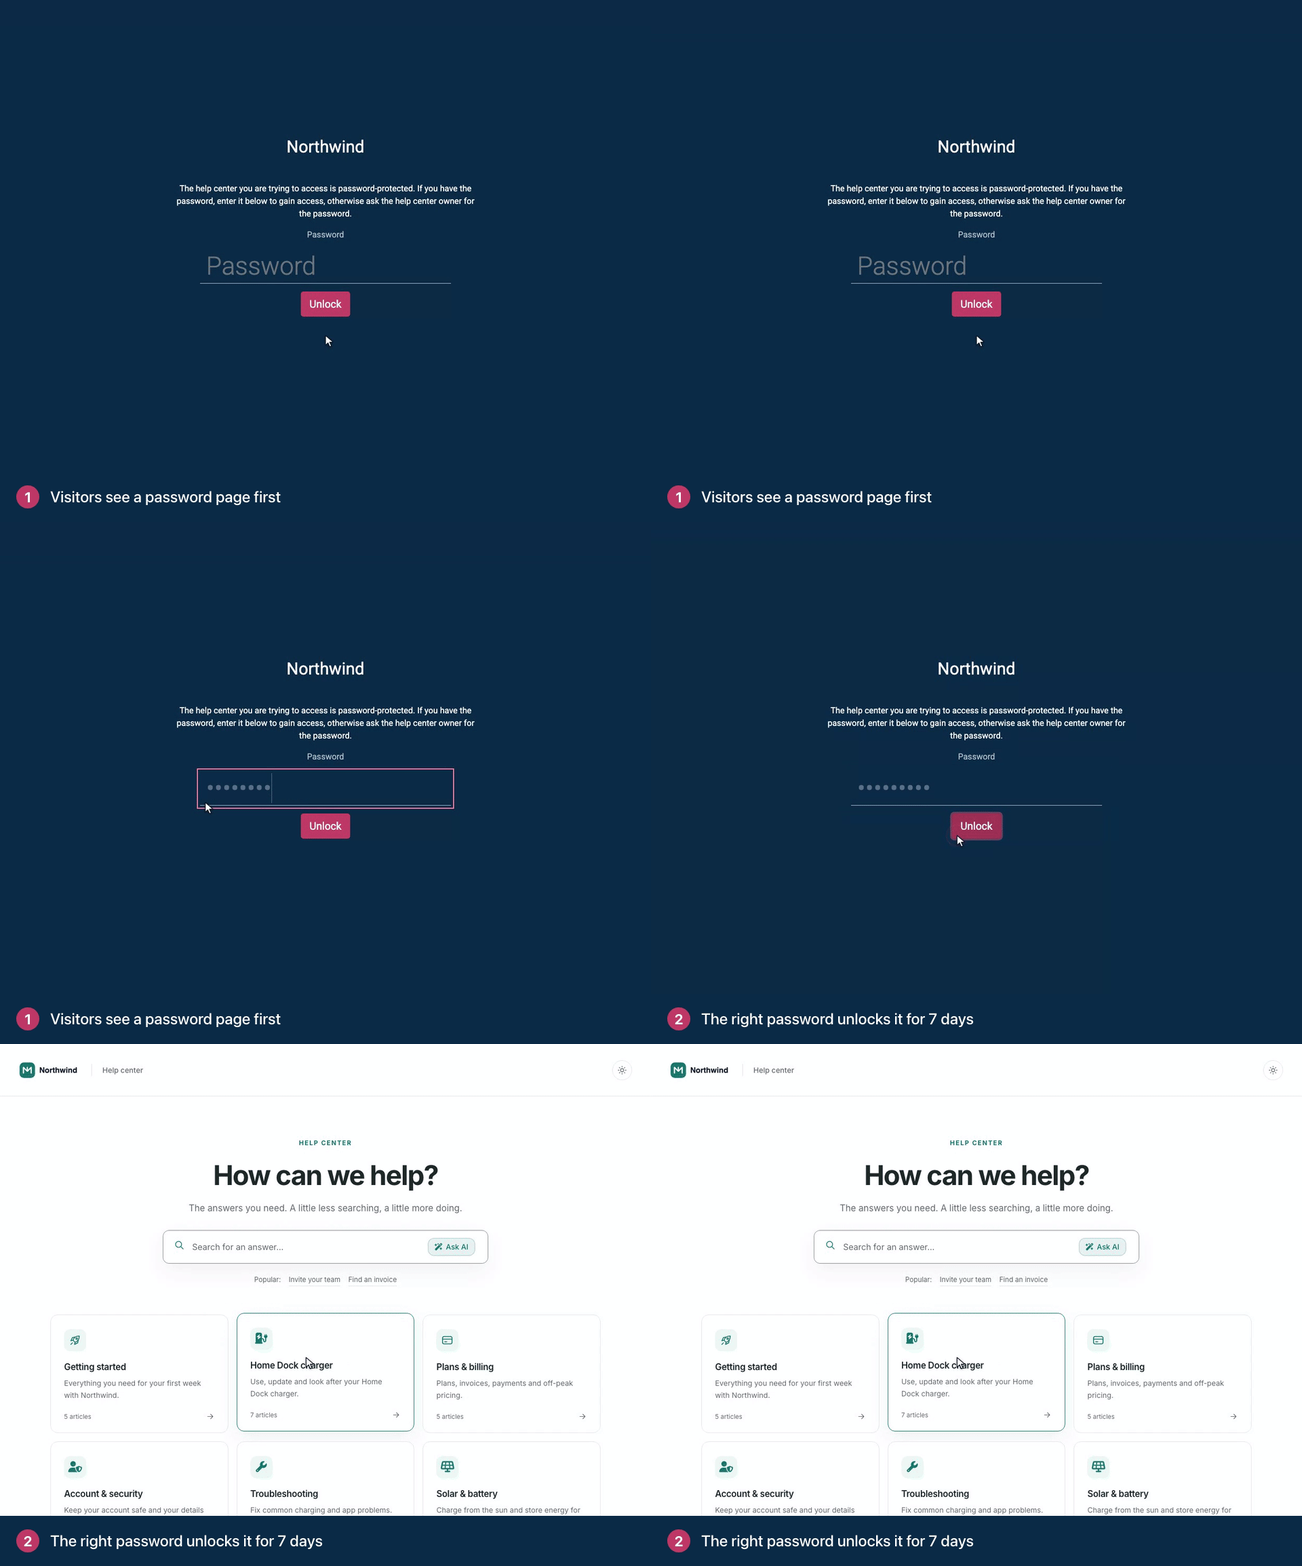
The password page shows your help center's name.
- **To change the password,** type a new one in **Access password** and save. Everyone who used the old password is signed out and needs the new one.
- **To keep the current password** while you change other settings, leave the field empty.
- You have to enter a password the first time you choose this option. Otherwise saving fails with "Please set a password before switching the help center to password-protected visibility."
## Make it public
1. In **Settings**, under **Access & visibility**, choose **Public**.
2. Click **Save changes**.
The account owner has to confirm their email address first. Until then, choosing Public shows "Confirm the owner's email address before making the help center public." See [Make your help center public](https://self.helpcenter.io/content/make-your-help-center-public).
## Which to choose
| You want | Use |
| --- | --- |
| Help for customers and prospects that anyone can find | **Public** |
| An internal knowledge base for your team | **Private**. See [Use a private help center as an internal knowledge base](https://self.helpcenter.io/content/internal-knowledge-base). |
| A customer portal for people who sign in to your product | **Private** with JWT single sign-on, so readers use their existing login (Catalyst plan). See [Sign readers in with your own login](https://self.helpcenter.io/content/jwt-sso). |
| A preview before launch, or access for a few partners without accounts | **Password** |
| Help that appears only inside your product | **JS-only access**. See [Show your help center only inside your app](https://self.helpcenter.io/content/js-only-access). |
| Access only from your office network or VPN | **IP whitelisting**, on top of any option above. See [Restrict access by IP address](https://self.helpcenter.io/content/ip-allowlist). |
To keep a help center public but hide some of its content, make individual categories or articles private instead. See [Make a category private](https://self.helpcenter.io/content/private-categories) and [Choose who can read an article](https://self.helpcenter.io/content/article-access).
## Search engines and AI assistants
Private and Password help centers never appear in search results, because search engines can't get past the sign-in or password page. They also have no public MCP server, so readers can't connect them to an AI assistant. To keep a public help center out of search results, see [Hide your help center from search engines](https://self.helpcenter.io/content/hide-from-search-engines).
## Related articles
- [Restrict access by IP address](https://self.helpcenter.io/content/ip-allowlist)
- [Sign readers in with your own login (JWT SSO)](https://self.helpcenter.io/content/jwt-sso)
- [Show your help center only inside your app](https://self.helpcenter.io/content/js-only-access)
- [Make a category private](https://self.helpcenter.io/content/private-categories)
- [Someone can't see an article or the help center](https://self.helpcenter.io/content/cant-see-an-article)
---
Source: https://self.helpcenter.io/content/create-another-help-center
# Create another help center
_Category: Getting started_
You can run as many help centers as you need from one HelpCenter.io account, for example one for each product or brand. Each help center has its own subscription, and you manage them all from the same place.
**Who can do this:** The account owner · **Plans:** All plans, once your subscription is active (each help center is billed on its own)
## Before you start
- **Activate your subscription.** On the free trial, before you subscribe, you can't add a second help center: you see "Oops, you do not seem to have an active subscription, yet." Click **Activate Subscription** to subscribe first. See [Choose a plan and start your subscription](https://self.helpcenter.io/content/activate-your-subscription).
- **Use the account owner's login.** If you created your HelpCenter.io account from a teammate's invitation, you don't see **Create New Help Center**. Ask the account owner to create the help center.
## Create a help center
1. Go to My Help Centers at [helpcenter.io/app/sites](https://helpcenter.io/app/sites).
2. Click **Create New Help Center**.
3. Under **Choose your subdomain**, type the new help center's address. A tick means it's free.
4. Click **Create**.
5. Check the confirmation: it shows the price of the new subscription. To choose a different plan or billing period for this help center, click **Adjust Plan**.
6. Click **Yes, continue and create it**.
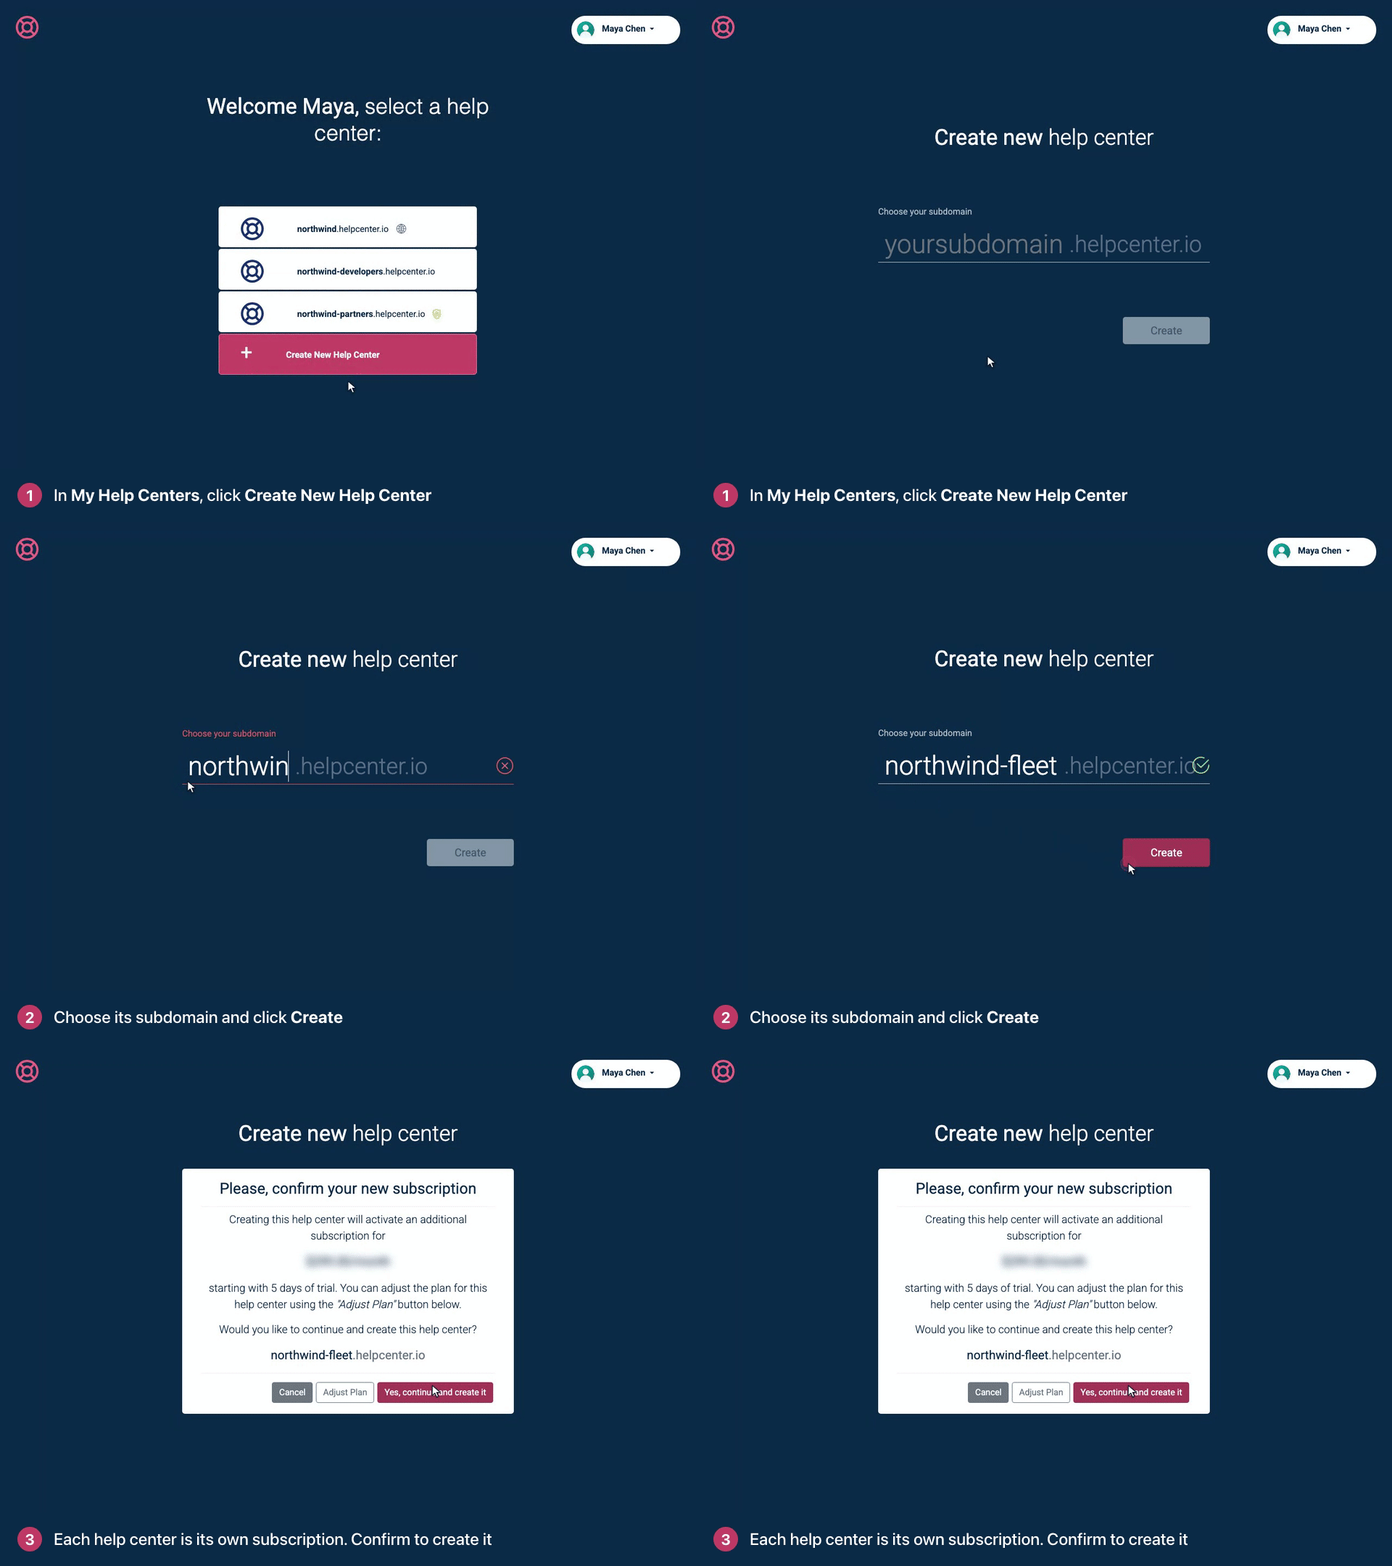
You see the price before anything is created.
## What happens next
- The new help center opens on its Articles page, with a **General** category and a draft article to start from.
- It starts **Private**. When it's ready for readers, see [Make your help center public](https://self.helpcenter.io/content/make-your-help-center-public).
- Its subscription starts with a free trial: the days left on your own free trial, or 5 days if your trial is over.
- Nothing is copied from your other help centers. Give it its own design, and invite its team separately. See [Invite your team](https://self.helpcenter.io/content/invite-your-team).
Each help center is billed at its plan's flat price, not per team member. See [How much does each additional help center cost?](https://self.helpcenter.io/content/additional-help-centers) and [Plans and pricing](https://self.helpcenter.io/content/plans-and-pricing).
## Troubleshooting
**"The subdomain has already been taken."** Pick another address. The same rules apply as when you signed up: 3 to 63 characters, using letters, numbers and dashes.
**"Could not create your help center at the moment. Please contact us."** [Contact our support team](https://self.helpcenter.io/content/contact-support) and tell us the subdomain you tried.
## Related articles
- [Switch between your help centers](https://self.helpcenter.io/content/switch-help-centers)
- [How much does each additional help center cost?](https://self.helpcenter.io/content/additional-help-centers)
- [Plans and pricing](https://self.helpcenter.io/content/plans-and-pricing)
---
Source: https://self.helpcenter.io/content/article-metadata
# Show or hide the author, date and reading time
_Category: Design and templates_
Under each article's title, readers can see who wrote it, when it was last updated and how long it takes to read. Choose which of the three to show, or hide the line altogether.
**Who can do this:** Owners and Admins (Editors through **Customize** on your help center) · **Plans:** All plans
## Choose what shows
1. In the template editor, open **Pages** and pick the **Article** page.
2. Under **Regions**, click **Main**. The **Article metadata** component sits in the **After the title** zone.
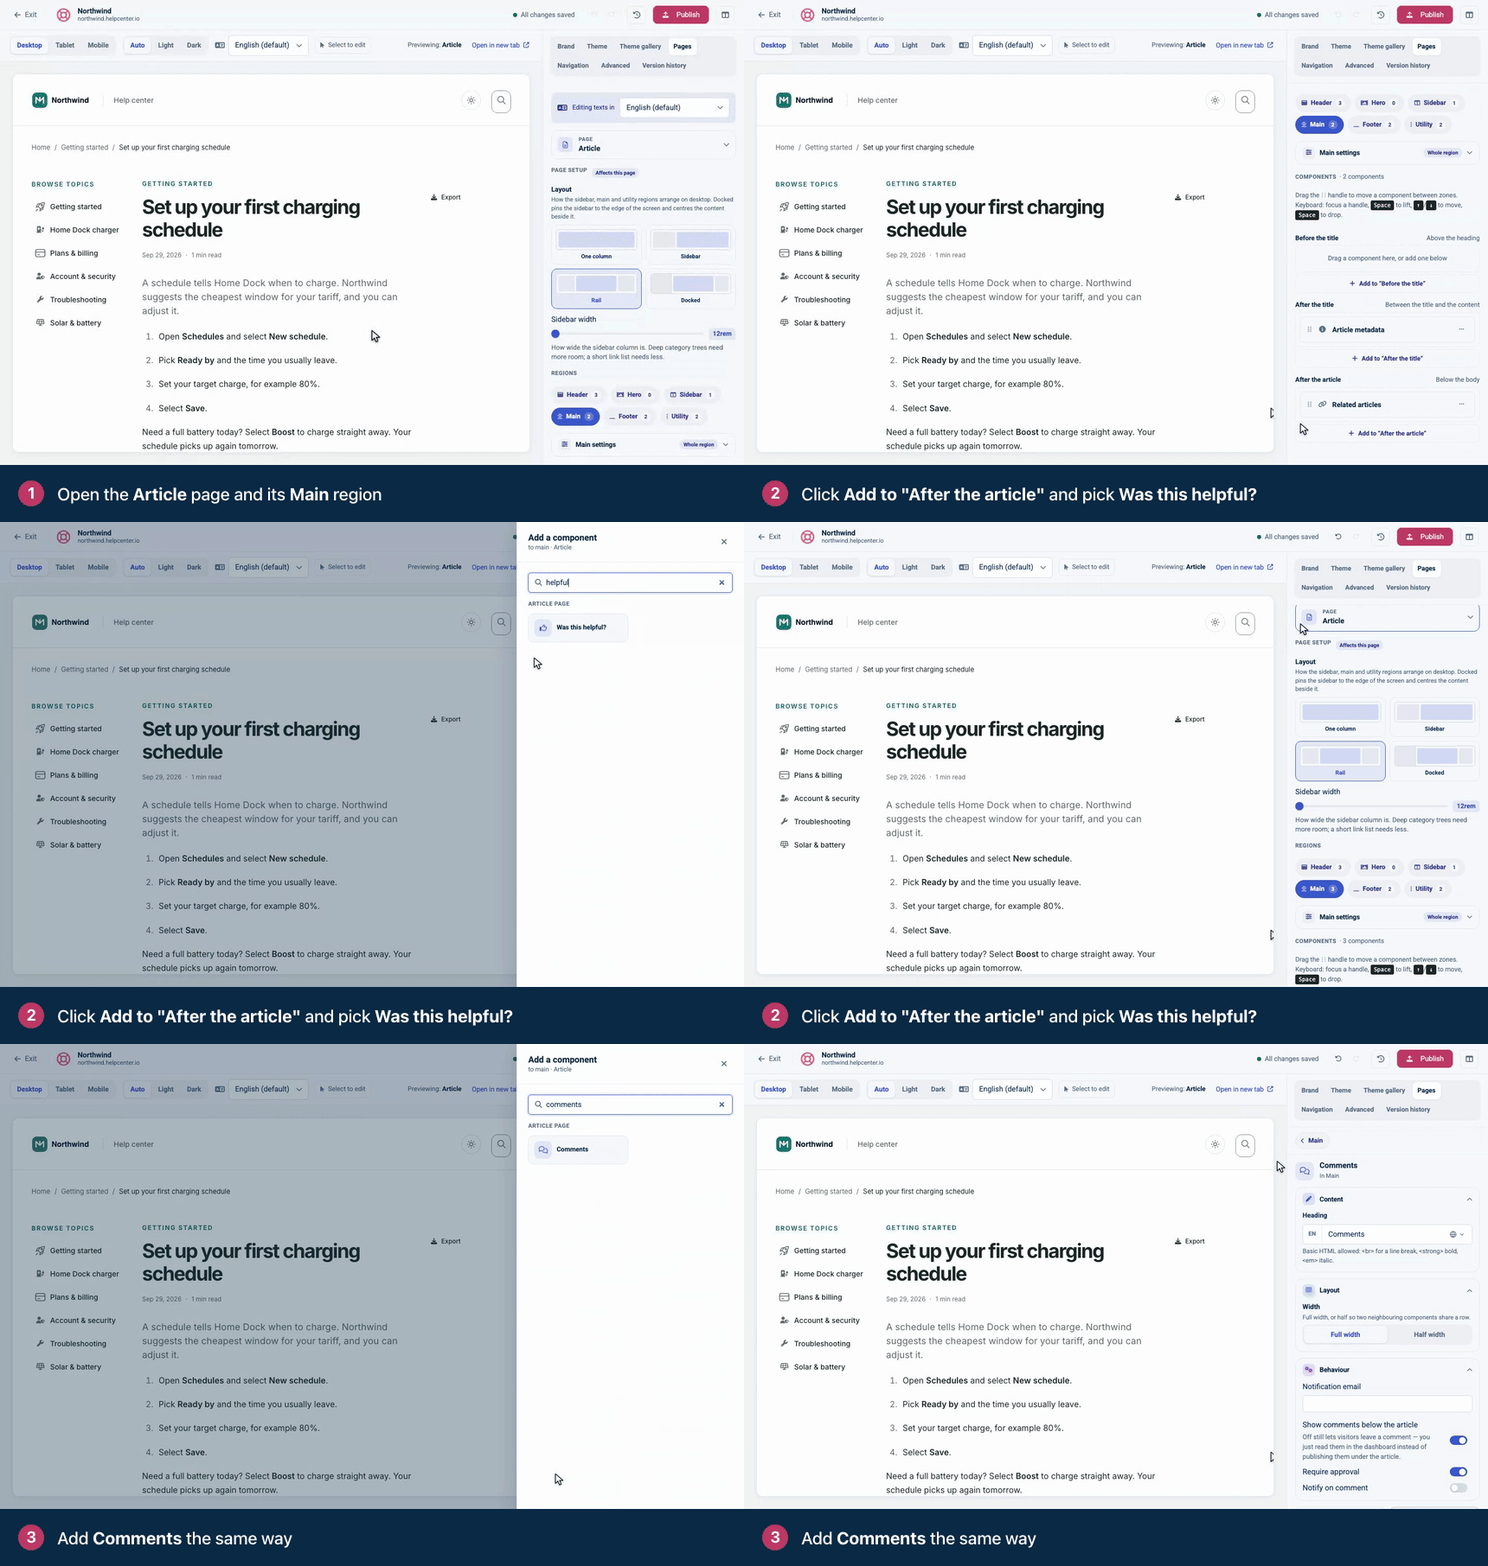
How to reach the Article page's Main region. The recording then adds other components.
1. Click **Article metadata** to open its settings.
2. Under **What each item shows**, turn **Author**, **Last updated** and **Reading time** on or off.
3. Click **Publish**.
## What each part shows
| Part | What readers see |
| --- | --- |
| **Author** | The name of the article's author. It's left out on articles without an author. |
| **Last updated** | The date the article was last updated, written the way the reader's language writes dates. |
| **Reading time** | An estimate such as "4 min read", based on the article's length at about 220 words a minute. Notes for your team don't count. |
## Hide the line completely
1. In the **Main** region of the Article page, open the **⋯** menu on the **Article metadata** row.
2. Choose **Delete**, then **Remove**.
3. Click **Publish**.
To bring it back, click **Add to "After the title"** and pick **Article metadata**.
## Move it
- Drag it by its handle (⋮⋮) to the **Before the title** zone to show it above the title.
- Set its **Width** to **Half width** to share a row with the Export menu.
- Or add it to the **Sidebar** region instead of Main.
## Troubleshooting
**My help center still shows the old line.** Click **Publish**. Your change is in the draft until you do.
**I deleted it, but the author still shows.** Check the Article page's **Sidebar** region too: each region can hold its own Article metadata.
## Related articles
- [Customize the article page](https://self.helpcenter.io/content/article-page)
- [Add, move and remove components](https://self.helpcenter.io/content/components)
---
Source: https://self.helpcenter.io/content/preview-an-article
# Preview an article before you publish
_Category: Write articles_
Save the article, then click the eye icon (**Preview article**) in the top bar. The preview opens in a new tab and shows the article on your help center, with your design, the way readers will see it.
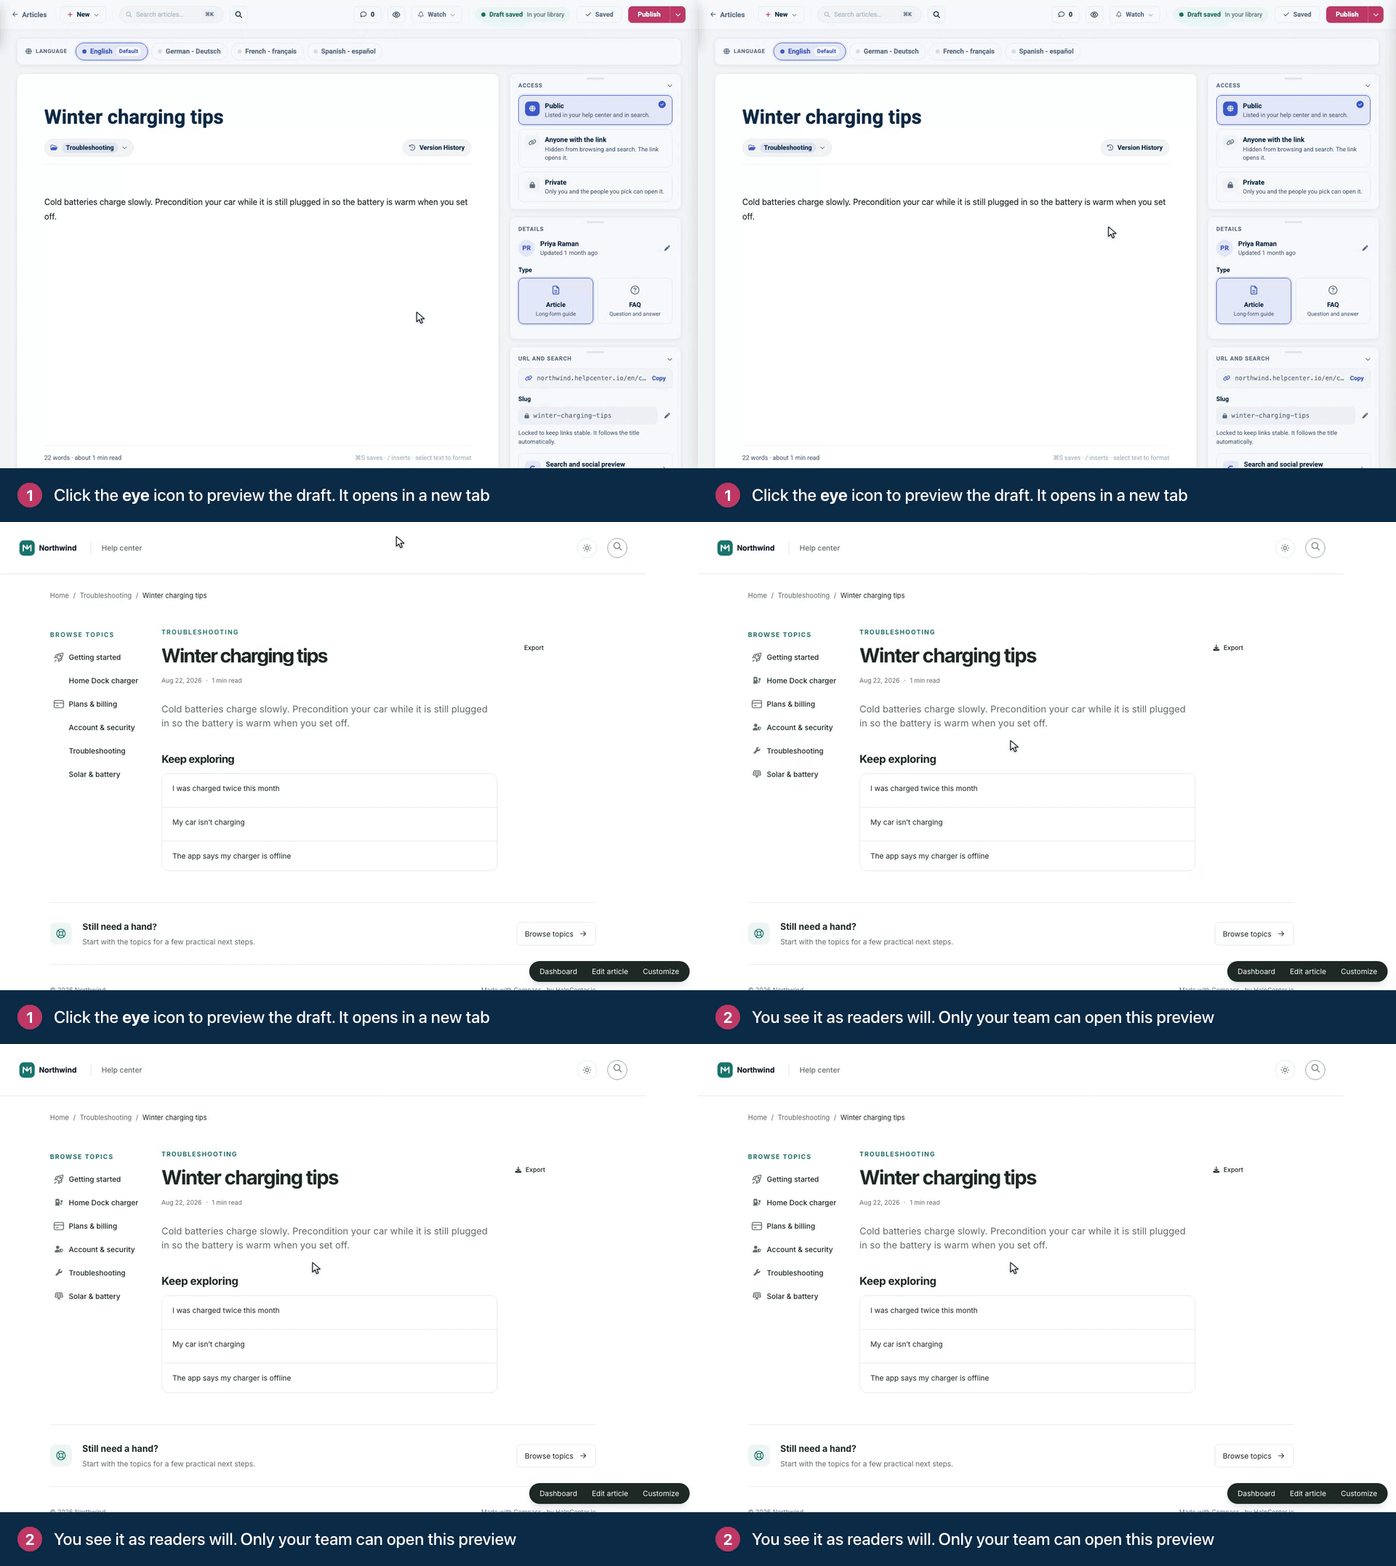
Preview a draft before anyone else can see it.
- **Save first.** The eye icon is grayed out until the article has been saved once. The preview shows the last saved version, so click **Save draft** before you preview your latest edits.
- **Published articles:** your edits are saved when you click **Update**, which also publishes them. Until then, the preview shows the live version. On help centers with staged changes, click **Preview** in the staged changes banner to see your edits before they go live.
- **Who can open it:** only teammates who can edit articles (Owners, Admins and Editors). Someone who isn't signed in is asked to sign in first, and anyone else gets a page-not-found page for an unpublished article.
You'll also find **Preview article** in the menu next to **Publish**.
## Related articles
- [Publish an article](https://self.helpcenter.io/content/publish-an-article)
- [Get to know the article editor](https://self.helpcenter.io/content/article-editor)
---
Source: https://self.helpcenter.io/content/similar-article-warnings
# Avoid duplicate articles
_Category: Write articles_
When the title you type closely matches an article you already have, HelpCenter.io tells you. Catching a duplicate early saves you from writing the same article twice and keeps your answers consistent.
**Who can do this:** Owners, Admins and Editors · **Plans:** All plans
## How the warning works
1. Type a title for your article.
2. Click into the body, or anywhere outside the title. HelpCenter.io looks for an existing article that's a close match.
3. If it finds one, a banner starting with **Heads up** appears above the article, with a link to the existing article.
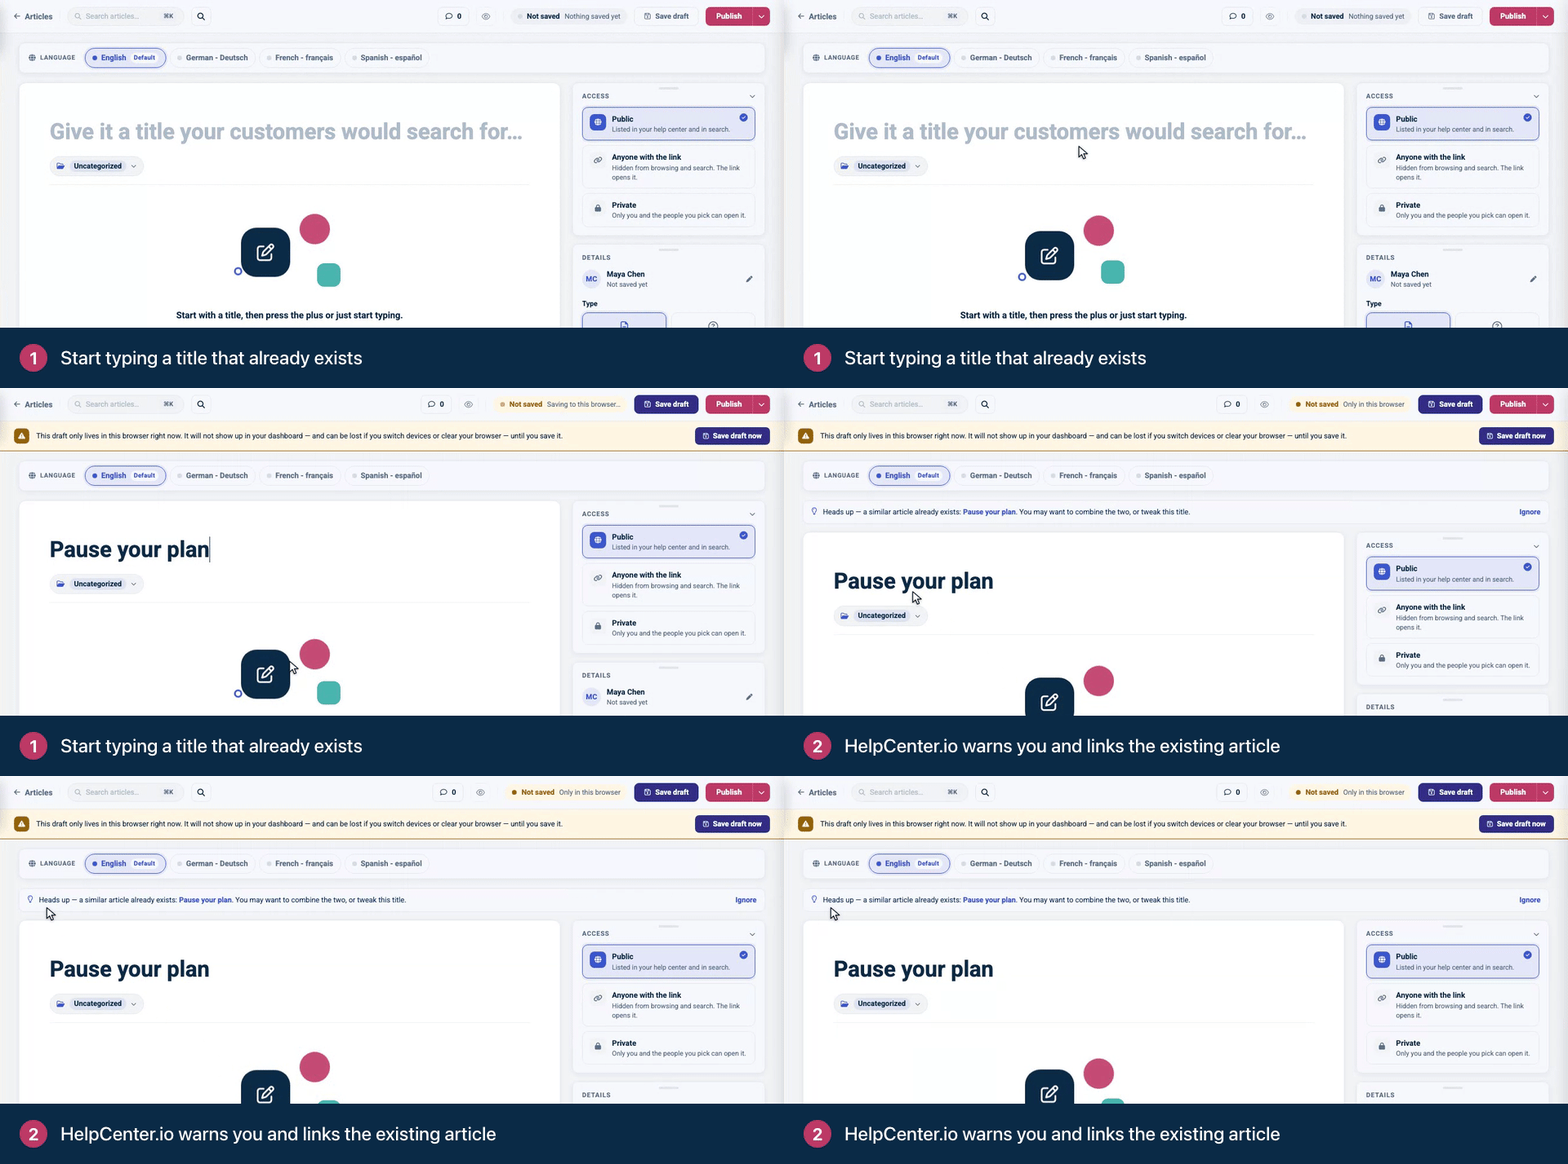
The warning links straight to the article you already have.
The check runs each time you finish editing the title.
## What to do next
- **Update the existing article.** Click its title in the banner. If it already covers the topic, improve that article instead of starting a new one. Copy anything useful from your draft first.
- **Combine the two.** If each has something the other lacks, merge them into one article, then delete the extra one.
- **Make your title more specific.** If the topics are different, change the title so readers can tell the two apart, for example by naming the product or the situation.
- **Carry on.** If the match is fine, click **Ignore** to hide the banner.
## Why duplicates hurt
- **Search gets harder.** Readers see two results that look alike and have to guess which one to open.
- **Answers can disagree.** AI Answers writes its replies from your articles, so an outdated copy can end up in an answer.
- **Upkeep doubles.** Every change has to be made twice, and the copy nobody remembers goes stale.
Before you write a new article, search for the topic first: press ⌘K (Ctrl+K on Windows) in the editor, or use the search on the **Articles** page.
## Related articles
- [Find articles with search and filters](https://self.helpcenter.io/content/find-articles)
- [Keep your help center up to date](https://self.helpcenter.io/content/keep-your-help-center-up-to-date)
---
Source: https://self.helpcenter.io/content/contact-form
# Set up your contact page and form
_Category: Design and templates_
Give readers a contact page where they can message your team, with article suggestions that often answer the question before they send it. The contact page stays hidden until you tell HelpCenter.io where to deliver messages.
**Who can do this:** Owners and Admins (Editors through **Customize** on your help center) · **Plans:** All plans
## Switch on your contact page
1. In the left menu, click **Template editor**. Open **Pages** and pick **Contact** in the page menu.
2. In the **Main** region, click **Contact form** to edit it.
3. Under **Recipient email**, enter the address that should receive messages, such as your support inbox.
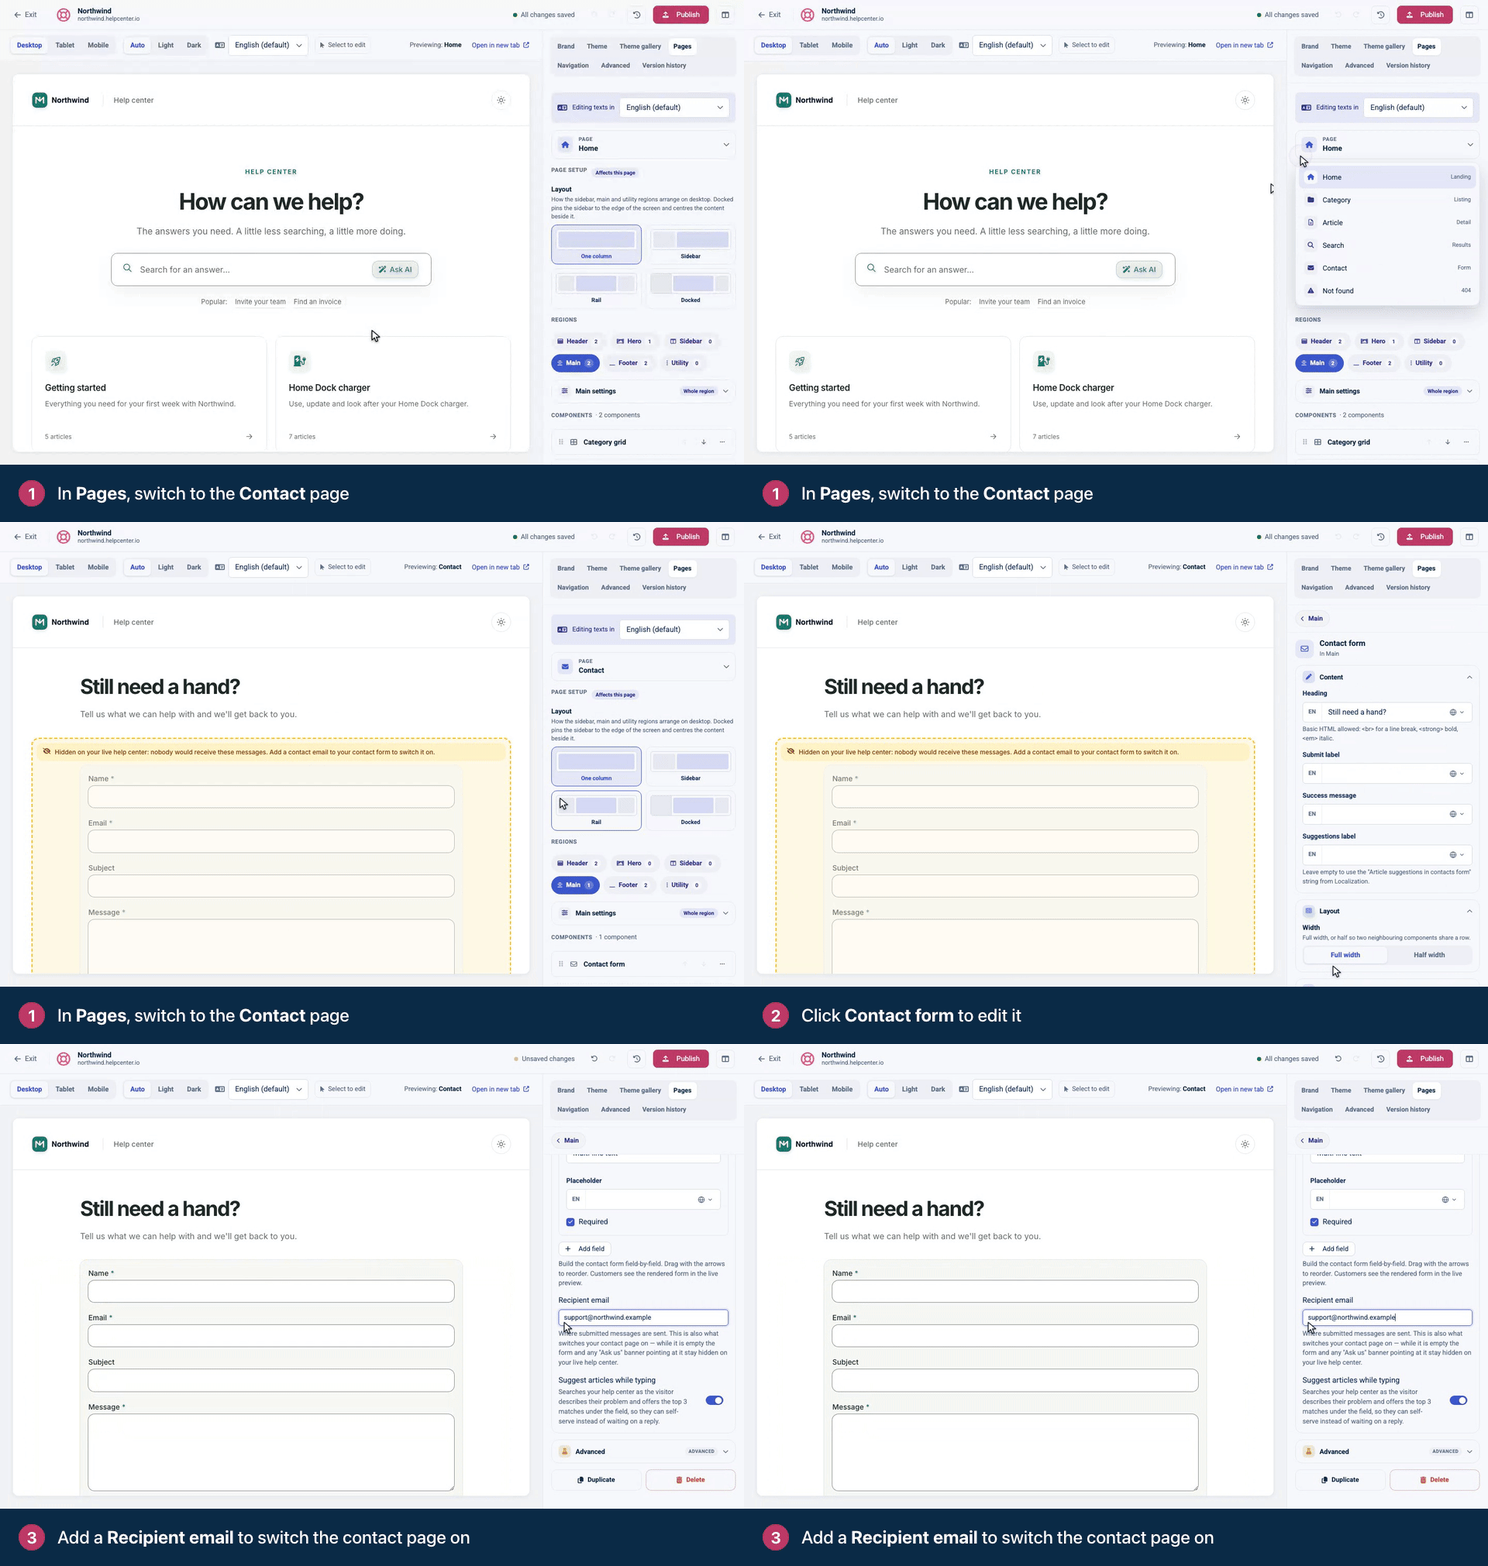
The amber notice disappears as soon as the form has a recipient.
1. Click **Publish**.
Until the form has a recipient, the preview shows it inside an amber notice: "Hidden on your live help center: nobody would receive these messages. Add a contact email to your contact form to switch it on." Readers see no contact page at all, so nobody sends a message into the void.
Once you publish with a recipient, these switch on together:
- Your contact page, at `/contacts` on your help center.
- Contact links in your header and footer.
- "Ask us" buttons (the **Contact CTA** component) that point to your contact page.
- The contact form in [the widget](https://self.helpcenter.io/content/widget-contact-form), which sends to the same address.
## Choose the fields
Under **Form fields**, each field has a **Label**, a **Field name**, a **Type**, a **Placeholder** and a **Required** checkbox. The types are **Single-line text**, **Email**, **Phone**, **Multi-line text**, **Dropdown** and **Checkbox**.
- Click **Add field** to add one. For a Dropdown, add its choices with **Add option**.
- Use the arrows to reorder fields and the trash icon to remove one.
- **Field name** is the internal name the value is sent under. You rarely need to change it.
Keep the form short: name, email, a subject and a message are enough for most teams. Keep an Email field, because your replies go to that address. Add a Dropdown only when the answer changes who handles the request.
## More options
| Option | What it does |
| --- | --- |
| **Heading** | The contact page's title. Left empty, it reads "Contact us". |
| **Submit label** | The button text. Left empty, it reads "Send message". |
| **Success message** | What readers see after their message is sent. |
| **Suggest articles while typing** | On by default. As readers describe their problem in the first Multi-line text field, the three best-matching articles appear under it. |
| **Width** | **Full width**, or **Half width** to share a row with another component. |
| **Confirmation email** (under **Advanced**) | Emails readers a confirmation that you received their message. Write your own **Confirmation email subject** and **Confirmation email text**. Both can use `{companyName}` for your brand name (the **Site name** under Brand), and the text can also use `{name}` for their first name. |
Suggestions work best when your article titles use the words your customers use. In a confirmation email, set honest expectations, such as when you usually reply.
## What your team receives
- Each message arrives by email with the subject "You've got a new support request", from no-reply@helpcenter.io.
- The email holds the message and every field the reader filled in. Reply to it and your answer goes straight to the reader's email address.
- Confirmation emails also come from no-reply@helpcenter.io, and replies to them reach your recipient address. With no subject of your own, it reads "[Site name Support] Thanks for your support request". A subject that contains a link, an email address or a domain name is replaced with that default.
- The form uses Google's invisible reCAPTCHA to block spam, so there's nothing to set up. It loads a script from Google on your contact page.
## Add "Ask us" buttons to other pages
The **Contact CTA** component is a "can't find it? ask us" banner with a button. Add it to the Home, Category, Search or Not found page, in the Main, Utility or Footer region. Set its **Heading**, **Subtext**, **Button label** and **Button url**: a page such as `/contacts`, a `mailto:` address, or a full link to your own helpdesk. Turn on **Custom content** to write the banner in your own HTML instead.
A banner whose button points to your contact page stays hidden while that page is off, and so does one with no destination. The preview shows why with an amber notice.
You can also place a **Contact form** in the Home page's Main region, so readers can write to you without leaving it. Keep the one on the Contact page too: your contact page and the links to it depend on it.
## Test it
1. Publish your changes. The form's button is inactive in the preview, so testing happens on your live help center.
2. Open `/contacts` on your help center in a private browser window.
3. Send a test message, then check that it arrives and that your reply reaches the address you entered.
## Troubleshooting
**The contact page shows "not found", or the "Ask us" button is missing.** The published form has no recipient. Add a **Recipient email** and publish. See [The contact form or "Ask us" button is missing](https://self.helpcenter.io/content/contact-form-missing).
**Messages don't arrive.** Check the recipient address for typos, and look in your spam folder for mail from no-reply@helpcenter.io. See [I'm not getting emails from HelpCenter.io](https://self.helpcenter.io/content/not-getting-emails).
**You changed the form but your help center didn't.** Click **Publish**. Edits stay in your draft until you do.
## Related articles
- [Let visitors message your team from the widget](https://self.helpcenter.io/content/widget-contact-form)
- [The contact form or "Ask us" button is missing](https://self.helpcenter.io/content/contact-form-missing)
- [Add links to your header and footer](https://self.helpcenter.io/content/navigation-links)
- [Publish your design](https://self.helpcenter.io/content/publish-your-design)
---
Source: https://self.helpcenter.io/content/how-do-i-get-a-free-migration-of-my-existing-help-center
# How do I get a free migration?
_Category: Why HelpCenter.io_
Request it on our free migration page, and our migration team moves your existing help center to HelpCenter.io for you. Free migration is included with the Growth and Catalyst plans.
1. Go to [helpcenter.io/free-migration](https://helpcenter.io/free-migration) and click **Start your migration**.
2. Under **Where does your help center live today?**, pick your platform, or **Something else** if it isn't listed. Click **Continue**.
3. Enter your current help center's address under **Its address**, then answer **Roughly how many articles?** and **In how many languages?**
4. Under **Anything we should plan around?**, mention a deadline, private articles or a new domain. This one is optional. Click **Continue**.
5. Enter **Your name** and **Work email**, then click **Start my migration**.
We review your knowledge base and tell you how long the move will take. Most migrations are done in under a week. If you'd like your new help center to look like your old one, ask for that in your request too. Prefer email? Write to migrate@helpcenter.io.
Not sure your plan includes free migration? Ask us at support@helpcenter.io.
## Related articles
- [Can you move my existing help center to HelpCenter.io?](https://self.helpcenter.io/content/can-you-migrate-my-existing-help-center-to-helpcenter.io)
- [Plans and pricing](https://self.helpcenter.io/content/plans-and-pricing)
---
Source: https://self.helpcenter.io/content/customize-your-help-center
# Make your help center look like your brand
_Category: Getting started_
Give your help center your logo, colors and fonts so customers know they're in the right place. You work on a draft, so readers see nothing until you publish.
**Who can do this:** Owners and Admins (Editors can open the template editor with **Customize** on your help center) · **Plans:** All plans
## Pick a theme
1. Sign in to HelpCenter.io and click **Template editor** in the left menu. Your help center opens in a preview, with the settings beside it.
2. Click **Theme gallery**.
3. Click **Compare & apply…** on a theme you like.
4. Untick anything you want to keep as it is.
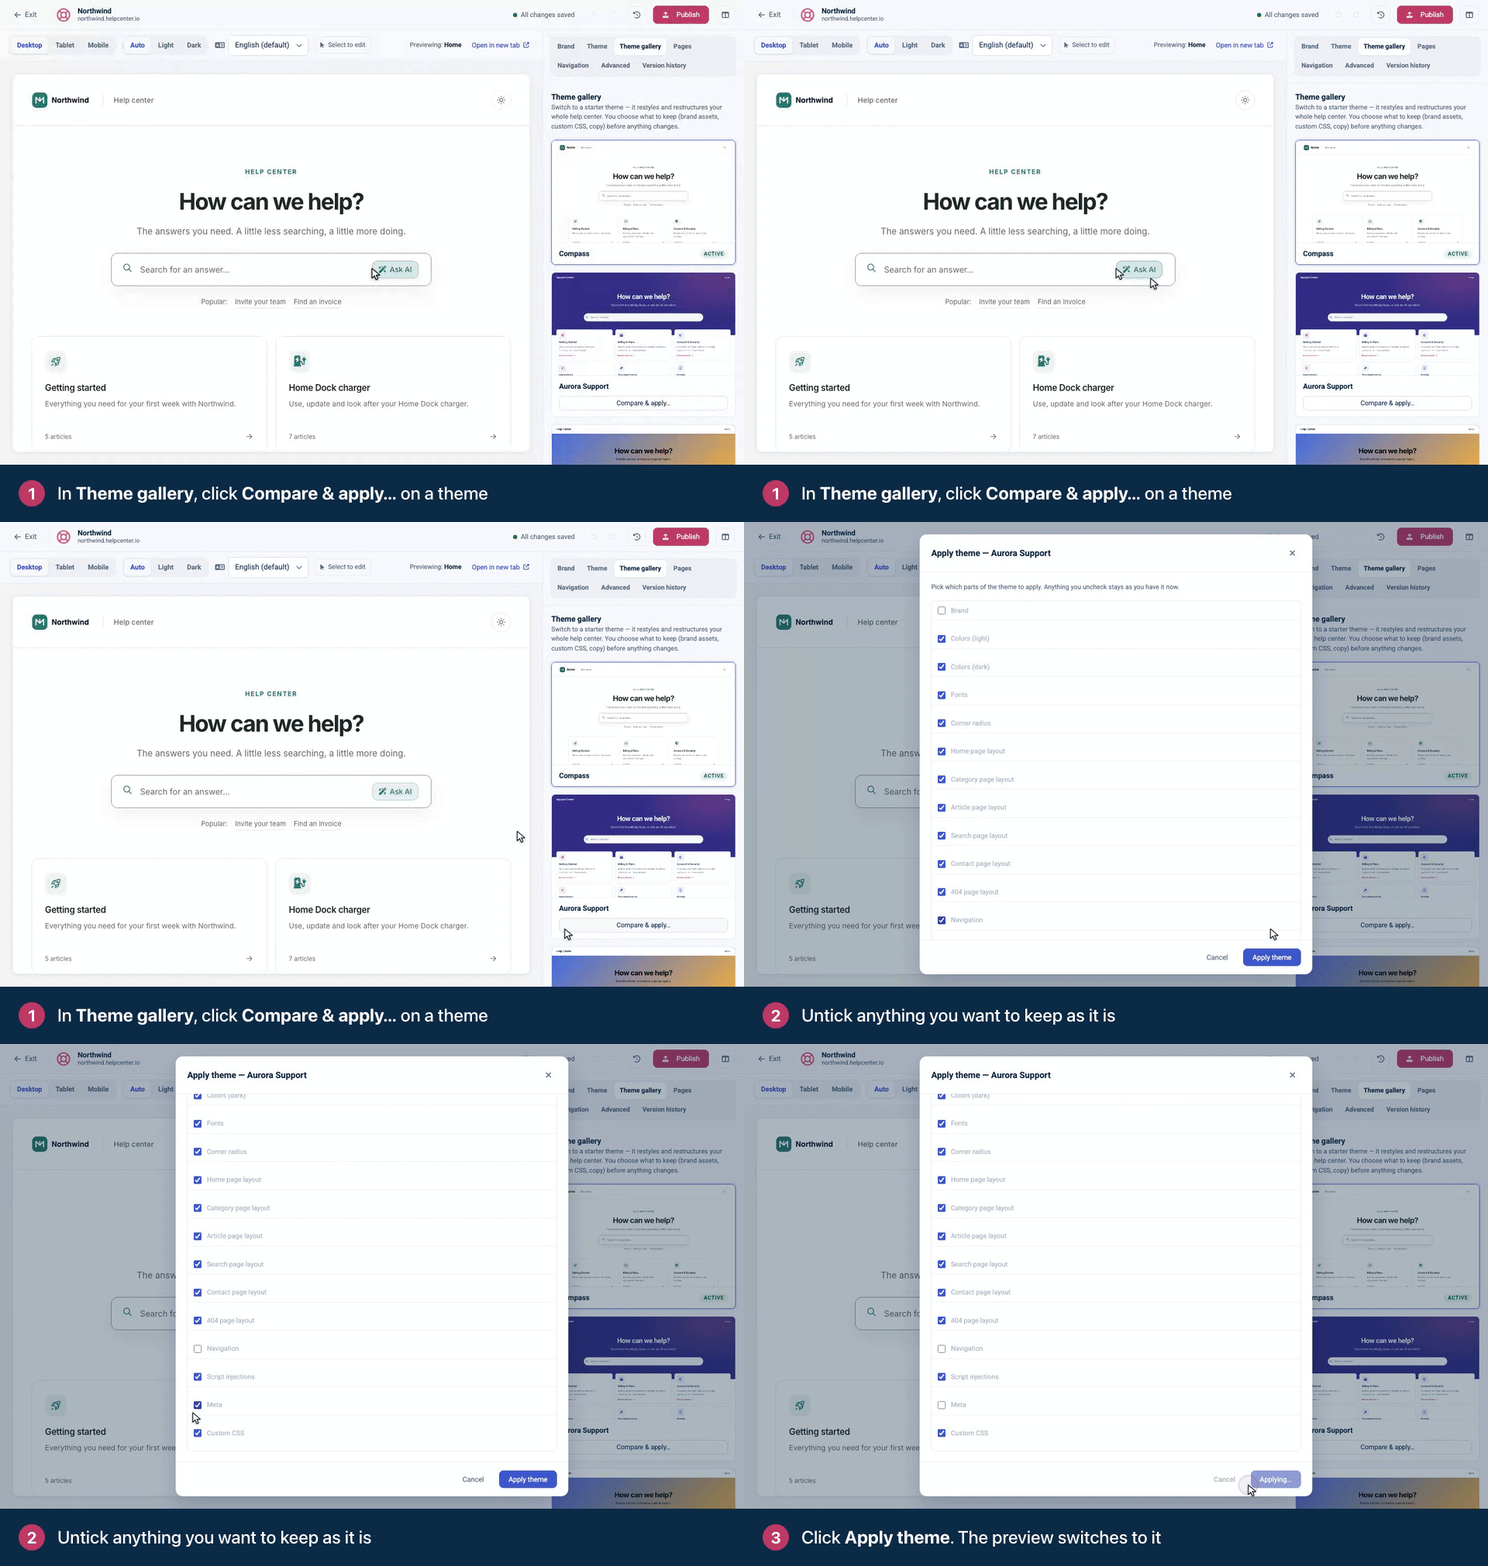
A theme changes your design, never your articles or categories.
1. Click **Apply theme**. The preview switches to the new theme. It stays a draft until you publish.
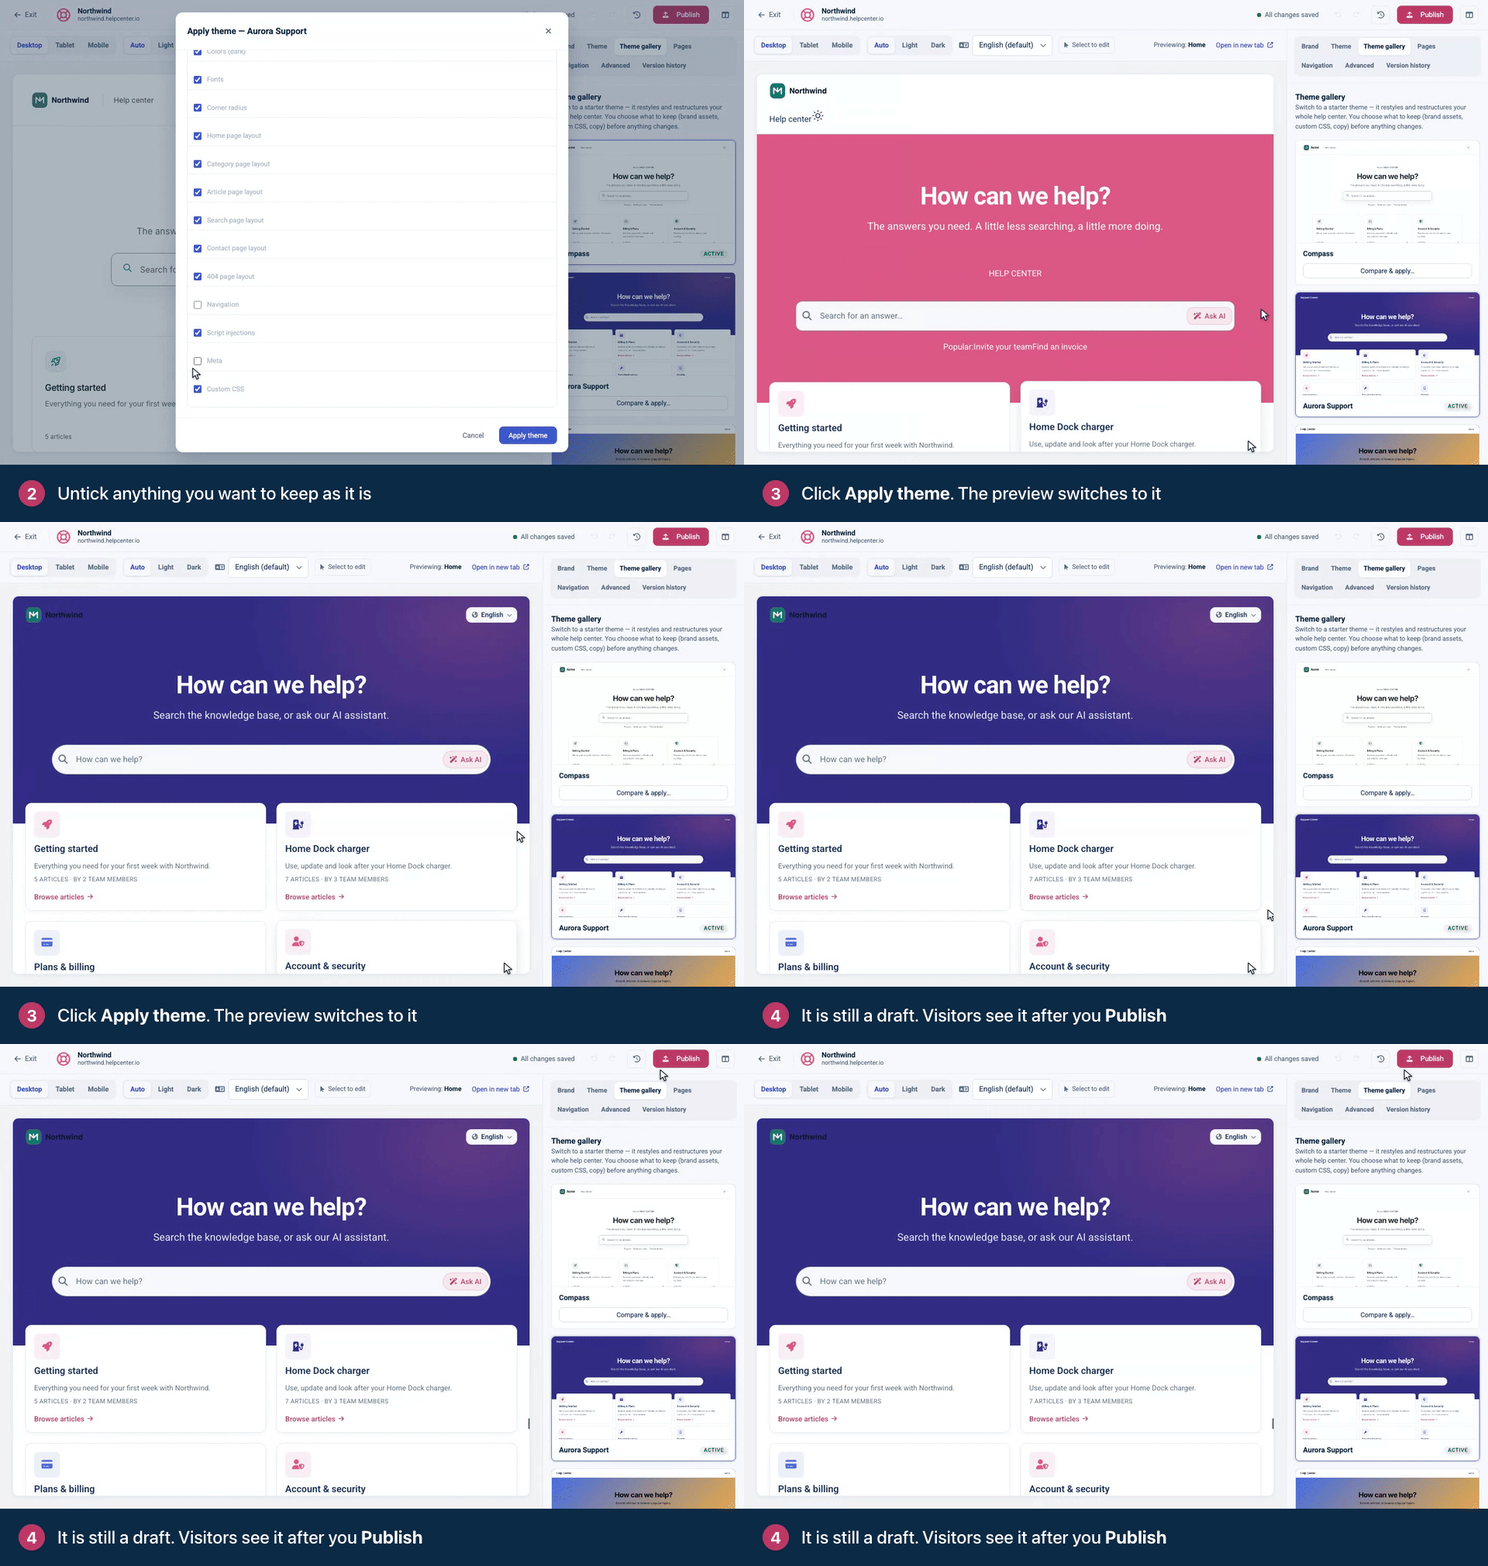
Nothing changes for visitors until you publish.
**Brand** starts unticked, so your logo and name stay as they are.
## Add your logo and favicon
1. Click **Brand**.
2. Check the **Site name**. It's your brand name everywhere your help center is named, including the widget.
3. Under **Logo**, click **Upload** and choose your logo. PNG or SVG works best.
4. If your logo is dark, upload a light version under **Dark-mode logo**. Set the preview's appearance to **Dark** to check it.
5. Under **Favicon**, upload the small icon that browser tabs show. A 32×32 PNG or ICO file works in every browser.
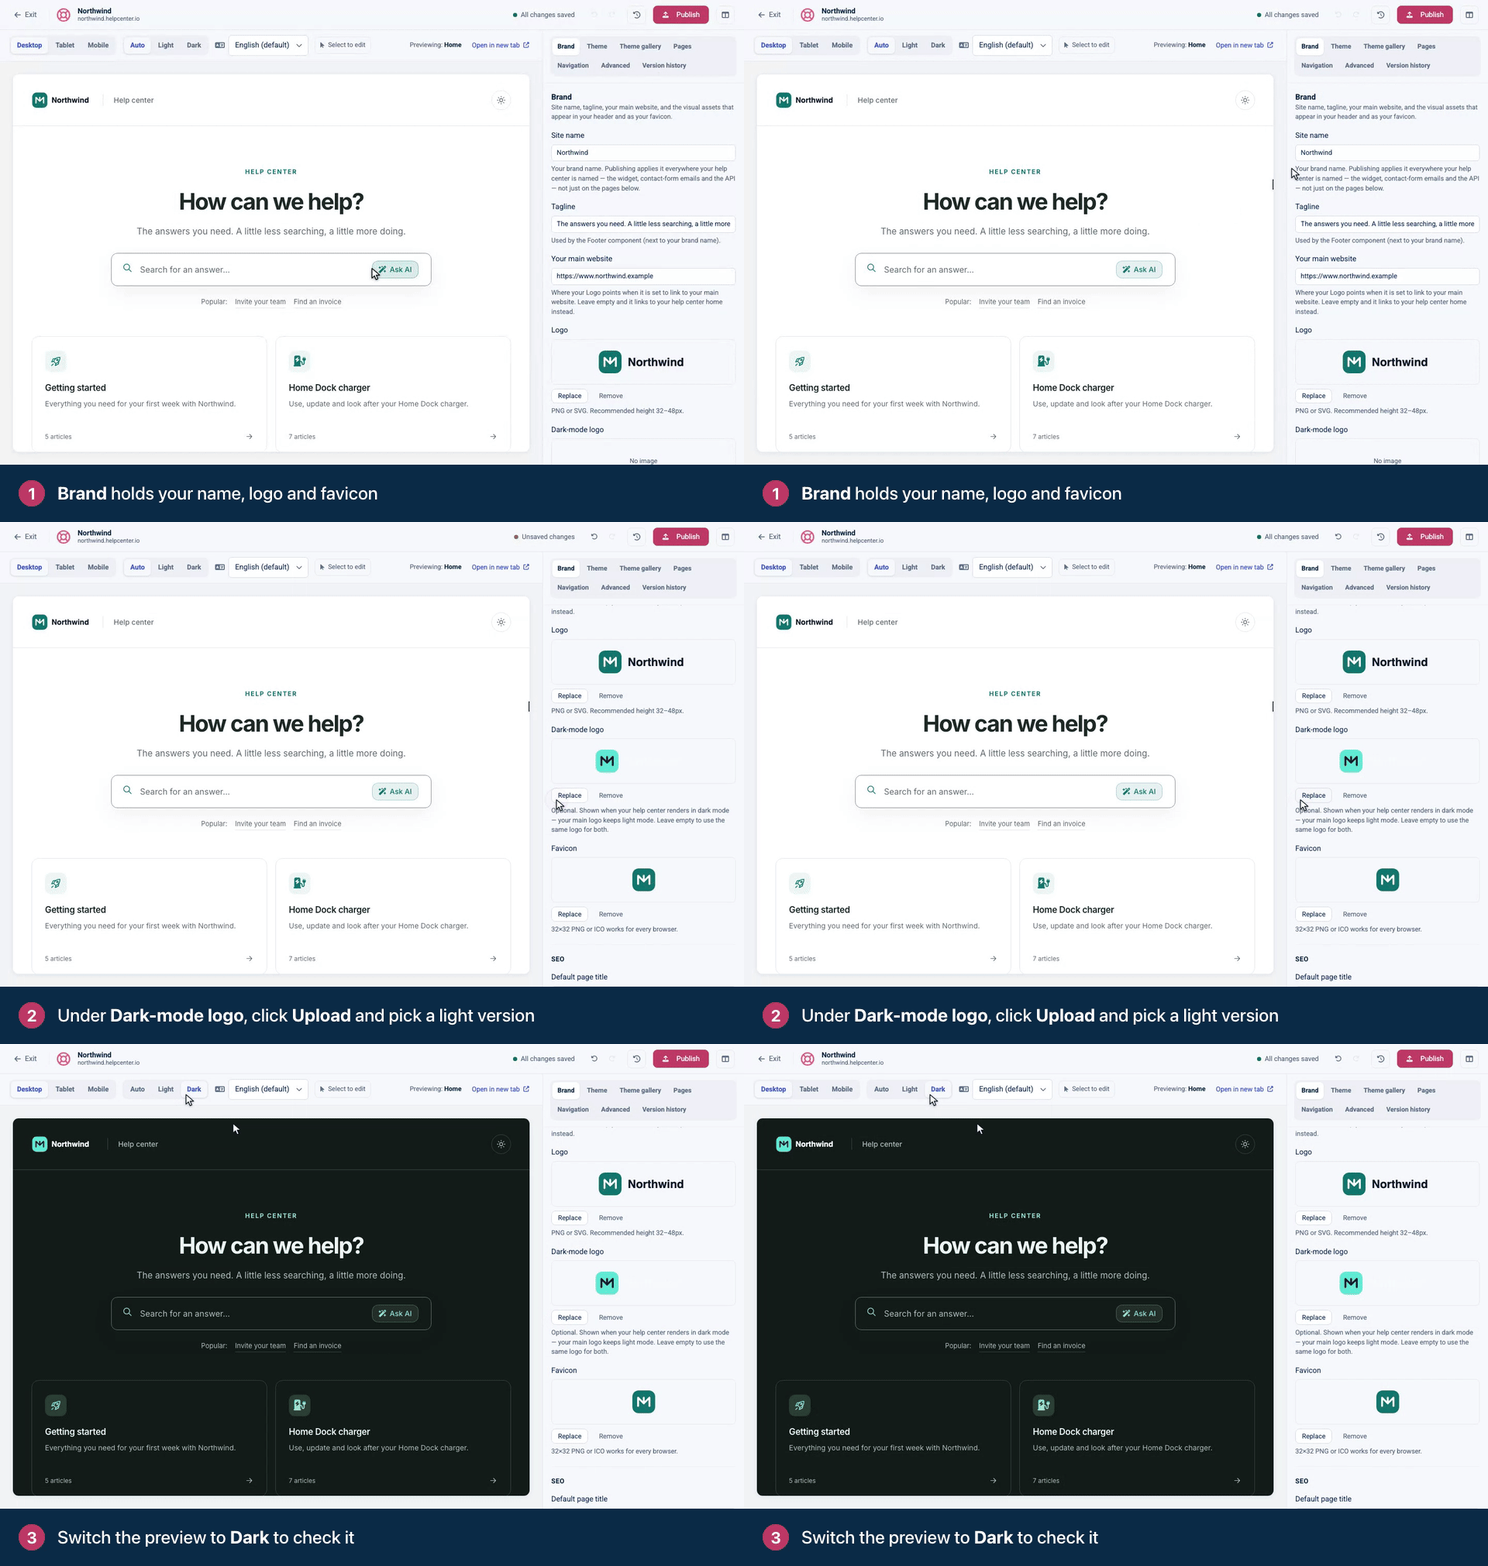
The dark-mode logo shows whenever your help center appears in dark mode.
## Set your colors and fonts
1. Click **Theme**.
2. Under **Light mode**, set **Primary** to your main brand color. Change the other colors if you like, and the **Dark mode** colors too.
3. Under **Typography**, choose a **Body font** and a **Heading font**.
The preview updates as you go. Where a color would make text hard to read, HelpCenter.io adjusts it automatically.
## Publish your design
1. Click **Publish** at the top of the template editor.
2. Check the list of changes, add a **Version note** if you like, then click **Publish**.
Your live help center switches to the new design. Every publish is kept in **Version history**, so you can go back to an earlier design.
Your changes save to a draft automatically, and the top bar shows **All changes saved**. Readers keep seeing your last published design until you click **Publish**.
## Next steps
- Rearrange what's on each page: [Add, move and remove components](https://self.helpcenter.io/content/components).
- Check your design on phones and in dark mode: [Preview on phones, tablets and in dark mode](https://self.helpcenter.io/content/preview-your-design).
## Related articles
- [Get started with the template editor](https://self.helpcenter.io/content/template-editor)
- [Choose a theme](https://self.helpcenter.io/content/choose-a-theme)
- [Add your logo, favicon and brand name](https://self.helpcenter.io/content/logo-and-brand)
- [Change colors, fonts and spacing](https://self.helpcenter.io/content/colors-and-fonts)
- [Publish your design](https://self.helpcenter.io/content/publish-your-design)
---
Source: https://self.helpcenter.io/content/set-up-your-help-center
# Set up your help center: a first-hour checklist
_Category: Getting started_
Your help center is ready to fill. Work through this checklist in order to go from a blank help center to one your customers can use. Each step links to a full guide.
**Who can do this:** Owners and Admins · **Plans:** All plans (AI Answers needs Catalyst or the AI add-on)
## Where you start
A new help center comes with a **General** category and a draft article to get you going. Edit them or delete them. It's also **Private** until you make it public, so nobody outside your team sees it while you work.
## The checklist
1. **Make it look like your brand.** Pick a theme, then add your logo, colors and fonts in the template editor, so readers know they're in the right place. See [Make your help center look like your brand](https://self.helpcenter.io/content/customize-your-help-center).
2. **Plan your categories.** Group articles the way your customers think about your product, and name categories in their words. See [Create and organize categories](https://self.helpcenter.io/content/organize-categories) and [Plan your help center's structure](https://self.helpcenter.io/content/plan-your-help-center).
3. **Write and publish your first articles.** Start with the questions your customers ask most. Click **View help center** at the top of the Articles page to see them the way readers will. See [Write and publish your first article](https://self.helpcenter.io/content/write-your-first-article) and [The first 10 articles every help center needs](https://self.helpcenter.io/content/first-articles).
4. **Make it public.** Open your help center to everyone once your first articles are live. See [Make your help center public](https://self.helpcenter.io/content/make-your-help-center-public). Building an internal knowledge base instead? Keep it private and invite your team: see [Use a private help center as an internal knowledge base](https://self.helpcenter.io/content/internal-knowledge-base).
5. **Connect your own domain.** Serve your help center from an address like help.yourcompany.com, with free SSL, on every plan. See [Use your own domain](https://self.helpcenter.io/content/custom-domain).
6. **Add the widget to your website or app.** Customers find answers without leaving the page they're on. See [Add the widget to your website](https://self.helpcenter.io/content/install-the-widget).
7. **Invite your team.** Give writers, translators and admins their own logins and the right role. See [Invite your team](https://self.helpcenter.io/content/invite-your-team).
8. **Turn on AI Answers.** Readers ask a question and get an answer written from your published articles, with its sources. It's included in Catalyst, and available as an add-on on Bootstrap and Growth. See [Turn on AI Answers](https://self.helpcenter.io/content/ai-answers).
9. **Watch your statistics.** See what people search for, what they don't find and which articles need work. See [Read your help center statistics](https://self.helpcenter.io/content/statistics).
## After launch
A help center is never quite finished. Check your statistics regularly, write articles for searches that found nothing, and update articles whenever your product changes. See [Keep your help center up to date](https://self.helpcenter.io/content/keep-your-help-center-up-to-date).
## Related articles
- [Write and publish your first article](https://self.helpcenter.io/content/write-your-first-article)
- [Make your help center look like your brand](https://self.helpcenter.io/content/customize-your-help-center)
- [Make your help center public](https://self.helpcenter.io/content/make-your-help-center-public)
- [Use your own domain](https://self.helpcenter.io/content/custom-domain)
- [Add the widget to your website](https://self.helpcenter.io/content/install-the-widget)
- [Invite your team](https://self.helpcenter.io/content/invite-your-team)
- [Turn on AI Answers](https://self.helpcenter.io/content/ai-answers)
---
Source: https://self.helpcenter.io/content/can-i-cancel-my-subscription-at-any-time
# How do I cancel my subscription?
_Category: Plans and billing_
You can cancel at any time: email support@helpcenter.io from the account owner's email address and tell us which help center to cancel. There's no cancel button in the dashboard, so our team does it for you.
- You won't be charged again after your current billing period.
- When the subscription ends, your help center goes offline and shows a "This Help Center is Taking a Break" page. Your content is kept, so you can come back by activating a plan again.
- Want your account and data deleted as well? Say so in the same email.
- If you agreed to a 12-month term, it runs until the end of the term. Tell us before it ends to stop it from renewing.
You can also delete a help center yourself in **Settings** → **Danger zone** (account owner only). Deleting cancels that help center's subscription straight away and permanently removes its content, so export it first. If you have more than one help center, contact support before you delete the first one you created, so the others stay online. See [Export or delete a help center](https://self.helpcenter.io/content/delete-a-help-center).
## Related articles
- [Export or delete a help center](https://self.helpcenter.io/content/delete-a-help-center)
- [Change your email, transfer ownership or delete your account](https://self.helpcenter.io/content/account-changes)
- [What happens when a trial or subscription ends?](https://self.helpcenter.io/content/when-a-subscription-ends)
---
Source: https://self.helpcenter.io/content/can-you-migrate-my-existing-help-center-to-helpcenter.io
# Can you move my existing help center to HelpCenter.io?
_Category: Why HelpCenter.io_
Yes. Our migration team moves your existing help center to HelpCenter.io for you, free on the Growth and Catalyst plans. You keep your content, your structure and the search traffic you've already earned.
## What we move
- **Articles**, with their formatting.
- **Categories** and subcategories, so your structure stays the same.
- **Images**, copied to HelpCenter.io so they keep working after you close your old account.
- **Old links**, through redirects. Once your domain points to HelpCenter.io, old article addresses lead to the right new pages, so bookmarks and search results keep working.
- **Your look**, if you ask: we can style your new help center like your old one.
Have several languages, content that isn't public, or a deadline? Mention it in your request so we can plan around it.
## Where we can move you from
We move help centers from platforms such as Zendesk, Intercom, Help Scout, Freshdesk, Zoho Desk, Document360, HelpJuice, HelpDocs, KnowledgeOwl, ProProfs, Confluence, Readme, Slite, Support Hero, Bloomfire, WordPress and Wix. If yours isn't on the list, choose **Something else** in the request form and we'll take a look.
## How it works
1. **You request it** on the free migration page. See [How do I get a free migration?](https://self.helpcenter.io/content/how-do-i-get-a-free-migration-of-my-existing-help-center)
2. **We review** your current help center and tell you how long the move will take.
3. **We move your content**, usually in under a week.
4. **You review and go live:** check the articles, [connect your domain](https://self.helpcenter.io/content/custom-domain) and [make your help center public](https://self.helpcenter.io/content/make-your-help-center-public).
## Prefer to move content yourself?
Paste articles from Google Docs, Word or Markdown into the editor, and the formatting comes with them. See [Paste content from Google Docs and Word](https://self.helpcenter.io/content/paste-content). Developers can also import articles in bulk through the API; start with [Create an API key](https://self.helpcenter.io/content/create-an-api-key) and [Import articles in bulk](https://developers.helpcenter.io/content/import-articles-in-bulk) on the developer portal. To send old addresses to new pages, see [Redirect old links to the right page](https://self.helpcenter.io/content/custom-redirects).
## Related articles
- [How do I get a free migration?](https://self.helpcenter.io/content/how-do-i-get-a-free-migration-of-my-existing-help-center)
- [Redirect old links to the right page](https://self.helpcenter.io/content/custom-redirects)
- [Plans and pricing](https://self.helpcenter.io/content/plans-and-pricing)
---
Source: https://self.helpcenter.io/content/write-your-first-article
# Write and publish your first article
_Category: Getting started_
Here's the quickest way from a blank page to a live help article: write it, save it as a draft, then publish it.
**Who can do this:** Owners, Admins and Editors · **Plans:** All plans
## Write your article
1. Sign in to HelpCenter.io and click **Articles** in the left menu. You can also go straight to [helpcenter.io/app/articles](https://helpcenter.io/app/articles).
2. Click **New article**.
3. Type a title your customers would search for, such as "How do I reset my password?"
4. Click below the title and start writing. To add headings, lists, images and more, type `/` on an empty line.
5. Click the category under the title and pick where the article belongs. If you had a category selected on the Articles page, it's already filled in.
6. Click **Save draft**.
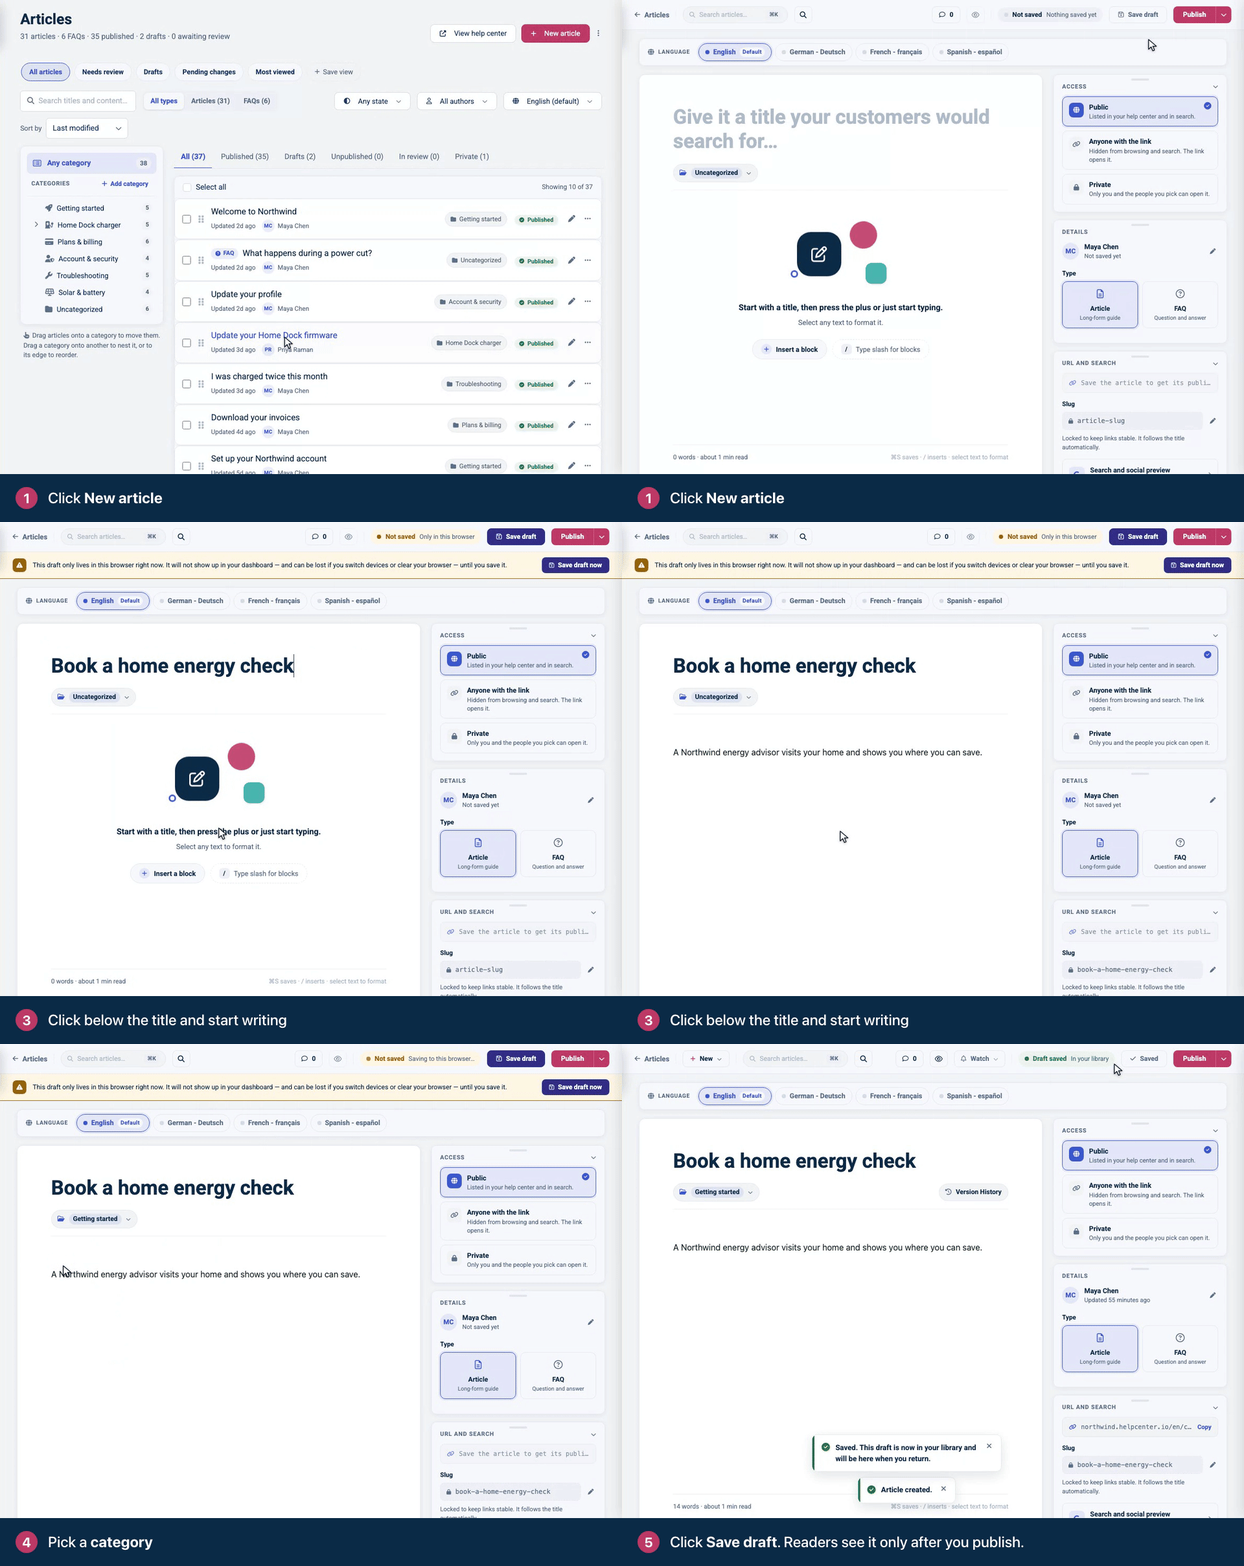
Until you click Save draft, a new article is kept only in your browser.
Your draft is now saved in your library, where your team can find it. Readers can't see it yet.
## Publish it
1. When the article is ready, click **Publish**.
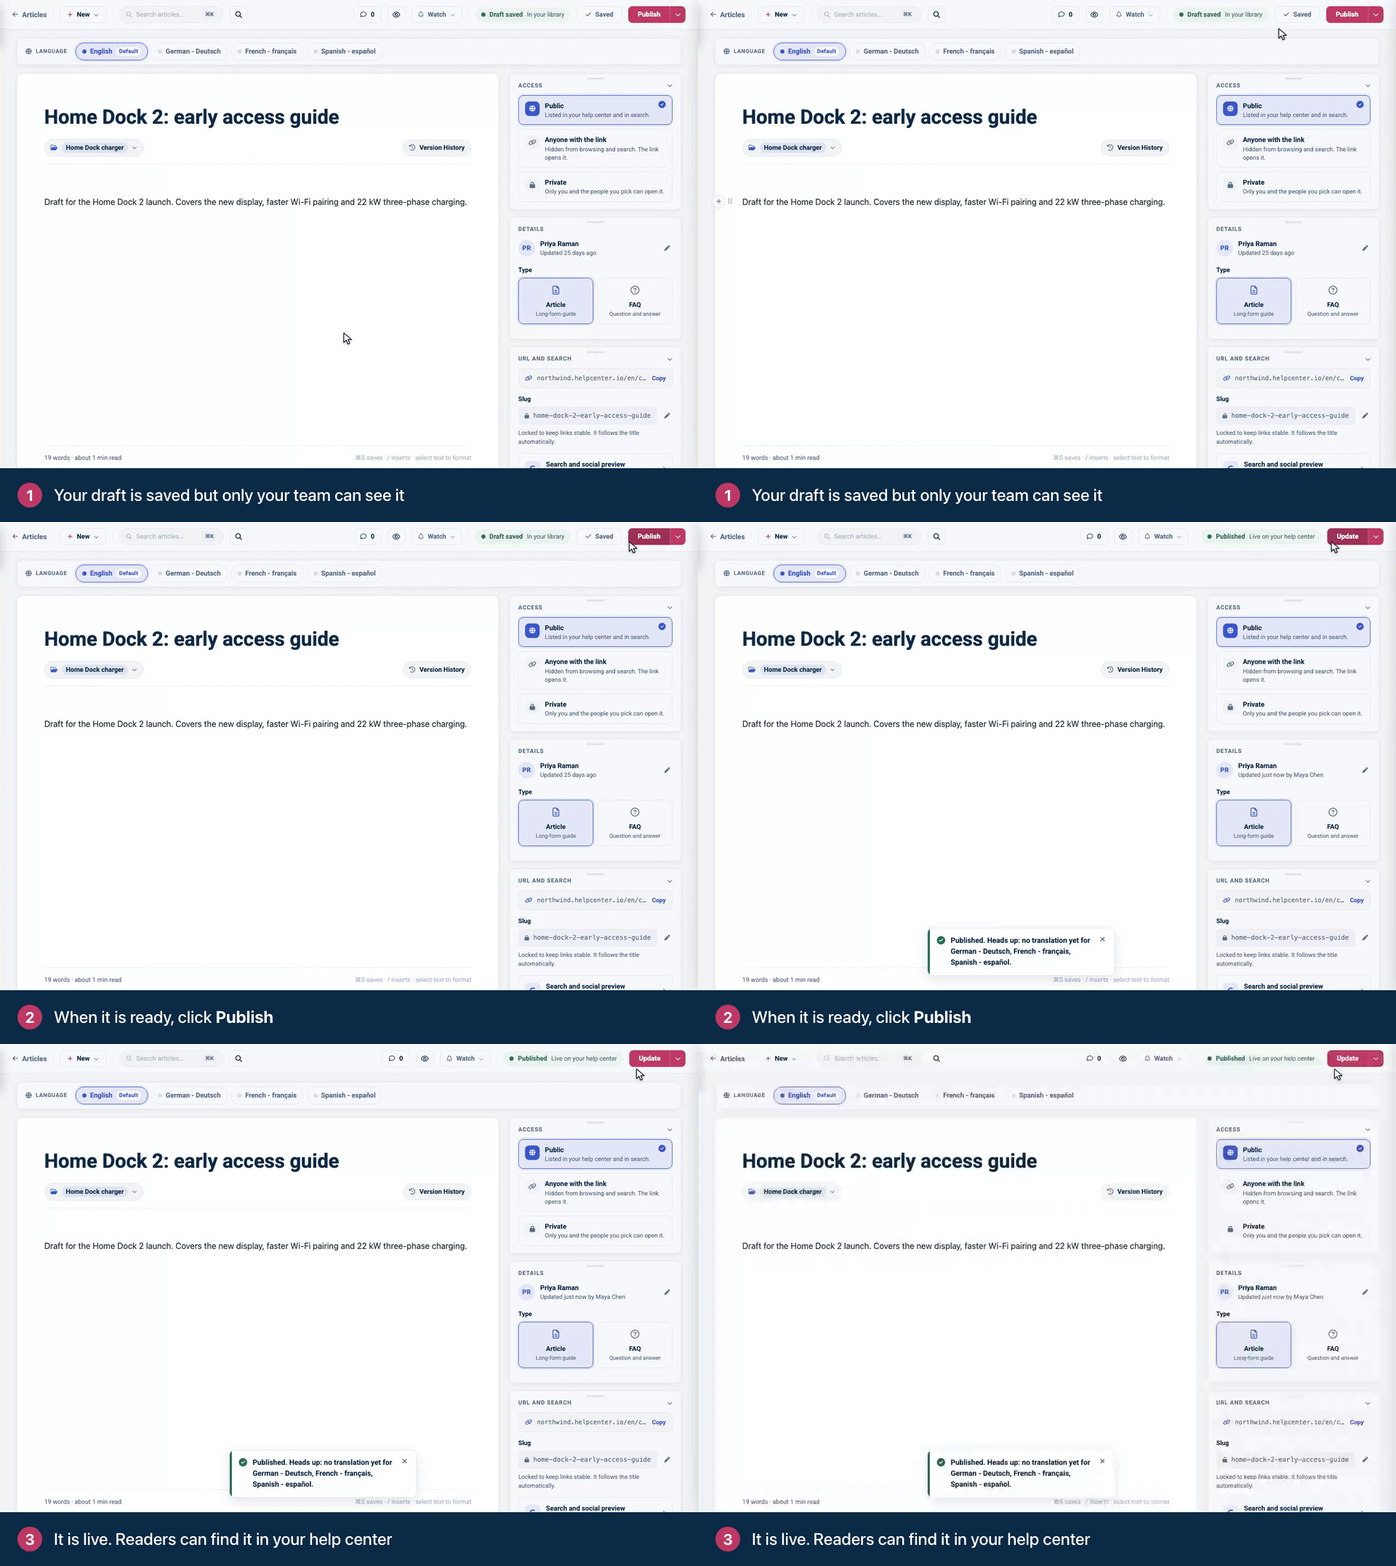
Once published, the article shows up in its category and in search.
**Is your help center still private?** New help centers start private, so only your team can read your articles for now. When you're ready for customers, [make your help center public](https://self.helpcenter.io/content/make-your-help-center-public).
## Tips for a great first article
- **One task per article.** "Change your password" and "Delete your account" are two articles, not one.
- **Steps as a numbered list.** Give each step one action, and name buttons exactly as they appear on screen.
- **Show it.** Add a screenshot or GIF where a step is hard to picture: type `/` and choose **Image**.
- **Preview before you publish.** Click the eye icon at the top of the editor to see the article the way readers will.
- **Keep going.** Use the **New** menu at the top of the editor to start your next article without going back to the list.
For more on writing articles people finish reading, see [How to write help articles people actually read](https://self.helpcenter.io/content/how-to-write-help-articles).
## Troubleshooting
**"Title is required. Please add a title before saving the article."** Add a title, then click **Save draft** again.
**Readers can't see the article.** Check that it's published, that your help center is public, and that its category isn't private. See [Someone can't see an article or the help center](https://self.helpcenter.io/content/cant-see-an-article).
## Related articles
- [Get to know the article editor](https://self.helpcenter.io/content/article-editor)
- [Add headings, lists and other blocks](https://self.helpcenter.io/content/add-blocks)
- [Publish an article](https://self.helpcenter.io/content/publish-an-article)
- [How to write help articles people actually read](https://self.helpcenter.io/content/how-to-write-help-articles)
---
Source: https://self.helpcenter.io/content/translate-design-texts
# Translate texts in your design
_Category: Languages_
The texts you type into your design, like your hero heading, search placeholder, navigation links, footer and custom HTML blocks, can have a version for each language. Translate them in the template editor so readers see your whole help center in their language.
**Who can do this:** Owners and Admins (Editors through **Customize** on your help center) · **Plans:** Growth and Catalyst (your help center needs more than one language)
## Translate a text in the template editor
1. In the left menu, click **Template editor**.
2. Open **Pages**, or **Navigation** for the links in your header and footer.
3. In the **Editing texts in** bar at the top of the panel, choose the language.
4. Select the component and type the translation into its text fields.
5. To check the result, choose the language in the preview's language menu.
6. Click **Publish**, then **Publish** again to confirm.
Each text field that can be translated also shows a language code with a globe icon. Switching the language there switches every field at once, the same as the **Editing texts in** bar.
A field you leave empty in a language shows your default-language text, both in the editor and on your help center. Your translations are part of your design draft, so readers see them only after you publish.
Translate in the settings panel, not in the preview. Text you edit directly in the preview is saved as your default-language text, even while the preview shows another language.
## What you can translate here
- **Headings and texts in components**: the hero heading and subheading, the search bar's placeholder and helper text, list headings, the FAQs heading and intro, and the prompt of **Was this helpful?**
- **Contact texts**: the **Contact form** heading, button label, success message and confirmation email, and the texts of the **Contact CTA**.
- **Rich text** and **Custom HTML** blocks: each language gets its own version of the whole block. Write it again in each language, for example for an announcement or a banner.
- **Navigation link labels** on the **Navigation** tab, and the texts in your footer columns.
Your site name and tagline on the **Brand** tab have one version for all languages.
## What is translated where
| What | Where you translate it |
| --- | --- |
| Articles | The language bar in the article editor. See [Translate an article](https://self.helpcenter.io/content/translate-an-article). |
| Category names and descriptions | **Articles** → select the category → **Edit category**. |
| Texts you typed into your design | The template editor, as described above. |
| Built-in buttons, labels and messages, like "On this page", "Skip to content", the page-not-found texts and "Powered by HelpCenter.io" | **Localization** → **Interface translations**. See [Translate buttons and labels](https://self.helpcenter.io/content/interface-translations). |
| The widget's buttons and messages | **Localization** → **Interface translations**, in the **Widget** group. |
Some component fields, like the search placeholder, use a built-in phrase when you leave them empty. For those, you can translate the built-in phrase once under **Interface translations** instead of filling in the field for every language.
## Related articles
- [Translate buttons and labels](https://self.helpcenter.io/content/interface-translations)
- [Edit text right in the preview](https://self.helpcenter.io/content/edit-in-preview)
- [Publish your design](https://self.helpcenter.io/content/publish-your-design)
- [How readers see other languages](https://self.helpcenter.io/content/languages-for-readers)
---
Source: https://self.helpcenter.io/content/what-payment-methods-do-you-support
# What payment methods do you accept?
_Category: Plans and billing_
We accept credit and debit cards, including Visa and Mastercard, and PayPal. Payments are processed by Braintree, a PayPal service, and charged in US dollars.
- **Cards:** your bank may ask you to confirm the payment (3-D Secure).
- **PayPal:** connect your PayPal account once, and renewals are charged to it.
You add a payment method when you [activate your subscription](https://self.helpcenter.io/content/activate-your-subscription). To change it later, open **Billing & Invoices**, pick or add a method under **Payment Method** and click **Save payment method**. Your active subscriptions move to the new method automatically.
## Related articles
- [Are my payment details secure?](https://self.helpcenter.io/content/are-my-payment-details-securely-stored)
- [Download invoices and update billing details](https://self.helpcenter.io/content/invoices)
---
Source: https://self.helpcenter.io/content/reorder-articles-and-categories
# Change the order of articles and categories
_Category: Organize and publish_
Put your most important categories first, and arrange the articles in each category in the order readers should read them, such as setup steps from first to last.
**Who can do this:** Owners, Admins and Editors · **Plans:** All plans
## Reorder categories
1. Click **Articles** in the left menu.
2. In the **Categories** panel, drag a category up or down and drop it at the top or bottom edge of another category.
Drop it at the edge, not on top: dropping a category onto another one makes it a subcategory. The new order is saved right away, and your help center lists your categories in this order, for example on the home page.
## Arrange the articles in a category
1. In the **Categories** panel, click the category.
2. Set **Sort by** to **Custom order**.
3. Drag the articles into the order you want.
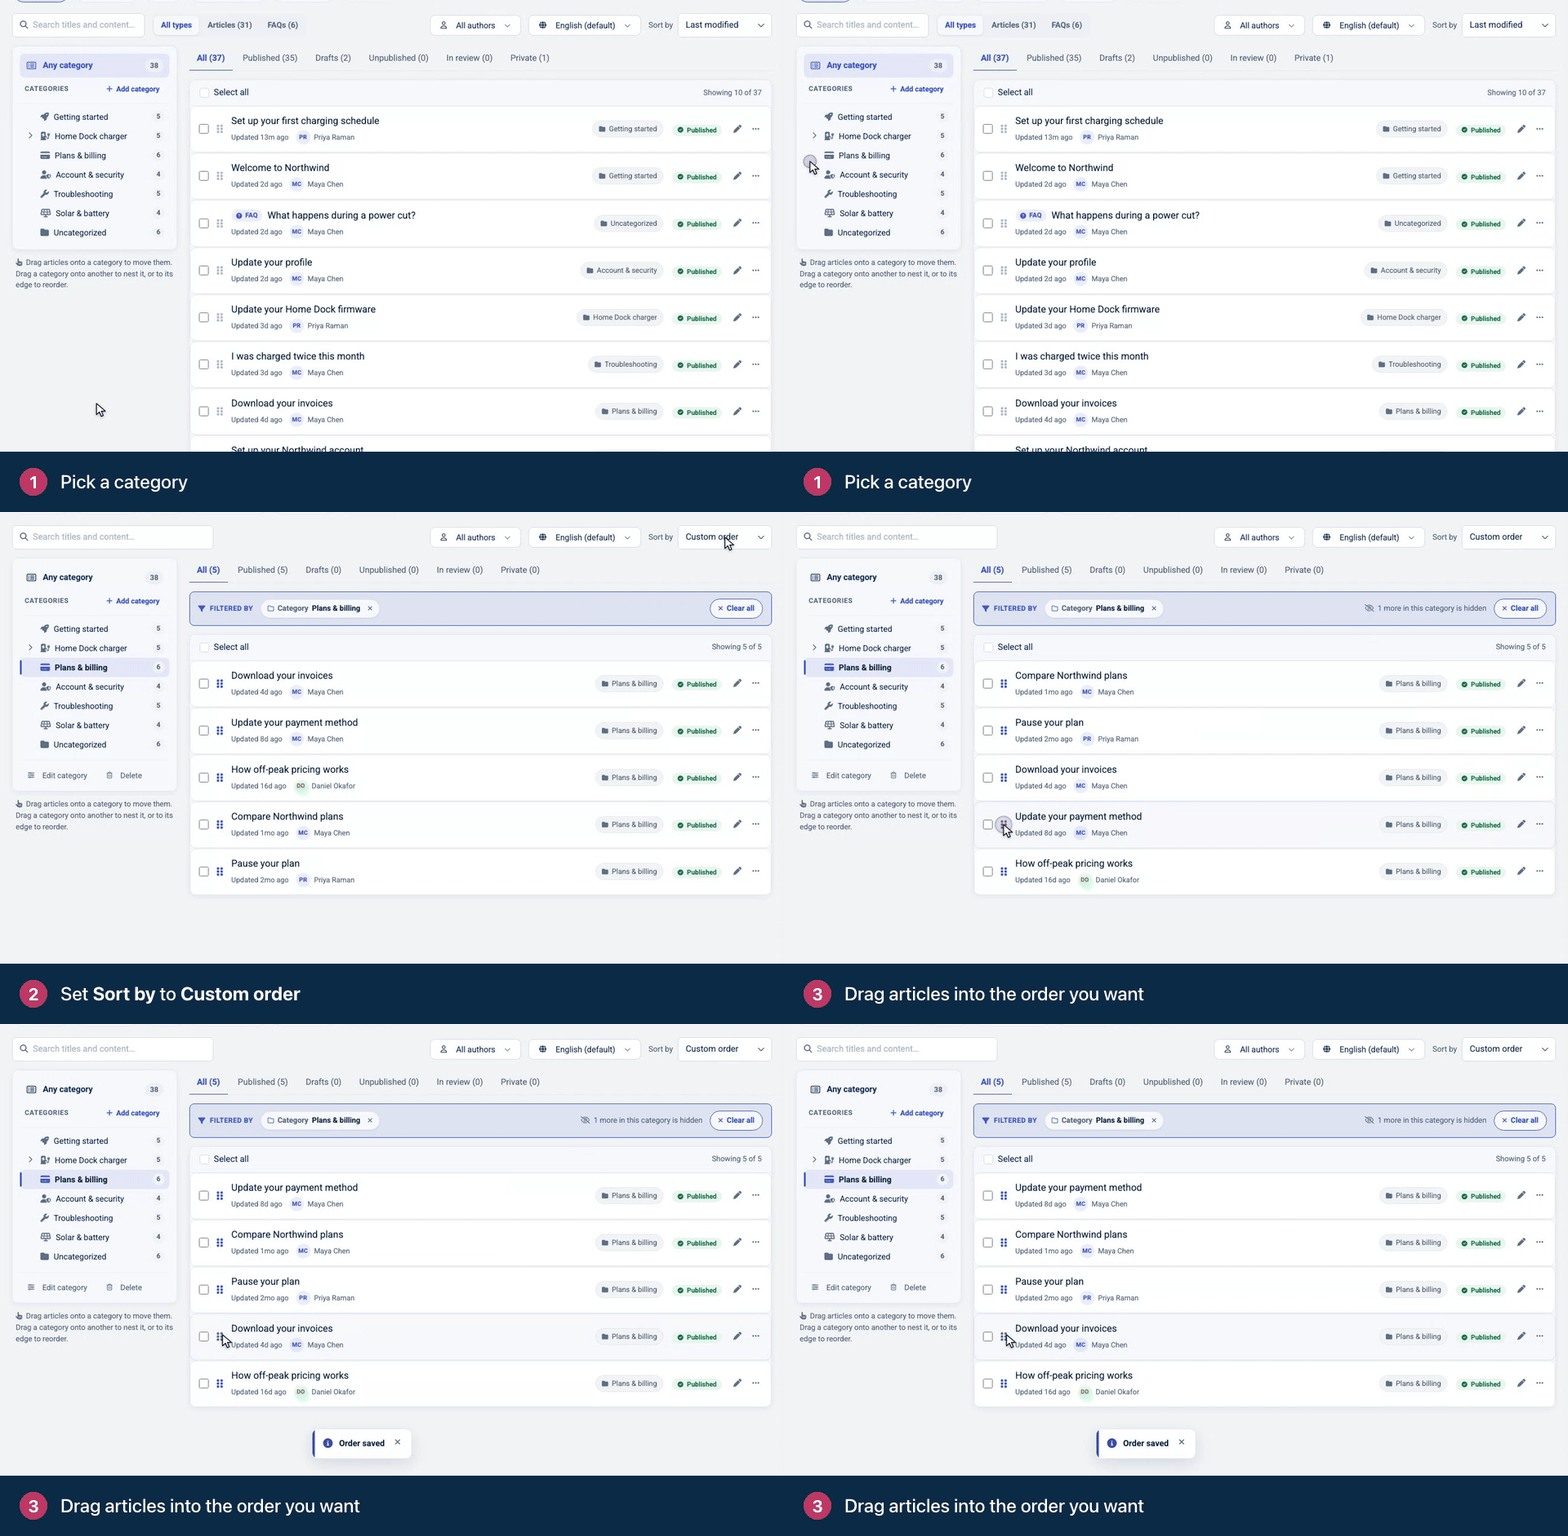
Each drop saves the new order.
You'll see "Order saved" after each drop. Custom order works inside one category at a time, and you move one article at a time. It isn't available for **Any category** or **Uncategorized**.
## Show your order on the help center
Whether category pages follow your order depends on a setting of the Category page in the template editor. Compass, the theme new help centers start with, uses your order. The other themes list the most recently updated articles first. To check or change it:
1. Open **Template editor** from the left menu, click **Pages** and choose the **Category** page.
2. Find **Category articles** and set **Order articles by** to **Custom (drag to reorder)**, or pick another order.
3. If you pick **Alphabetically**, set the **Direction** to **A → Z**. It starts at Z → A.
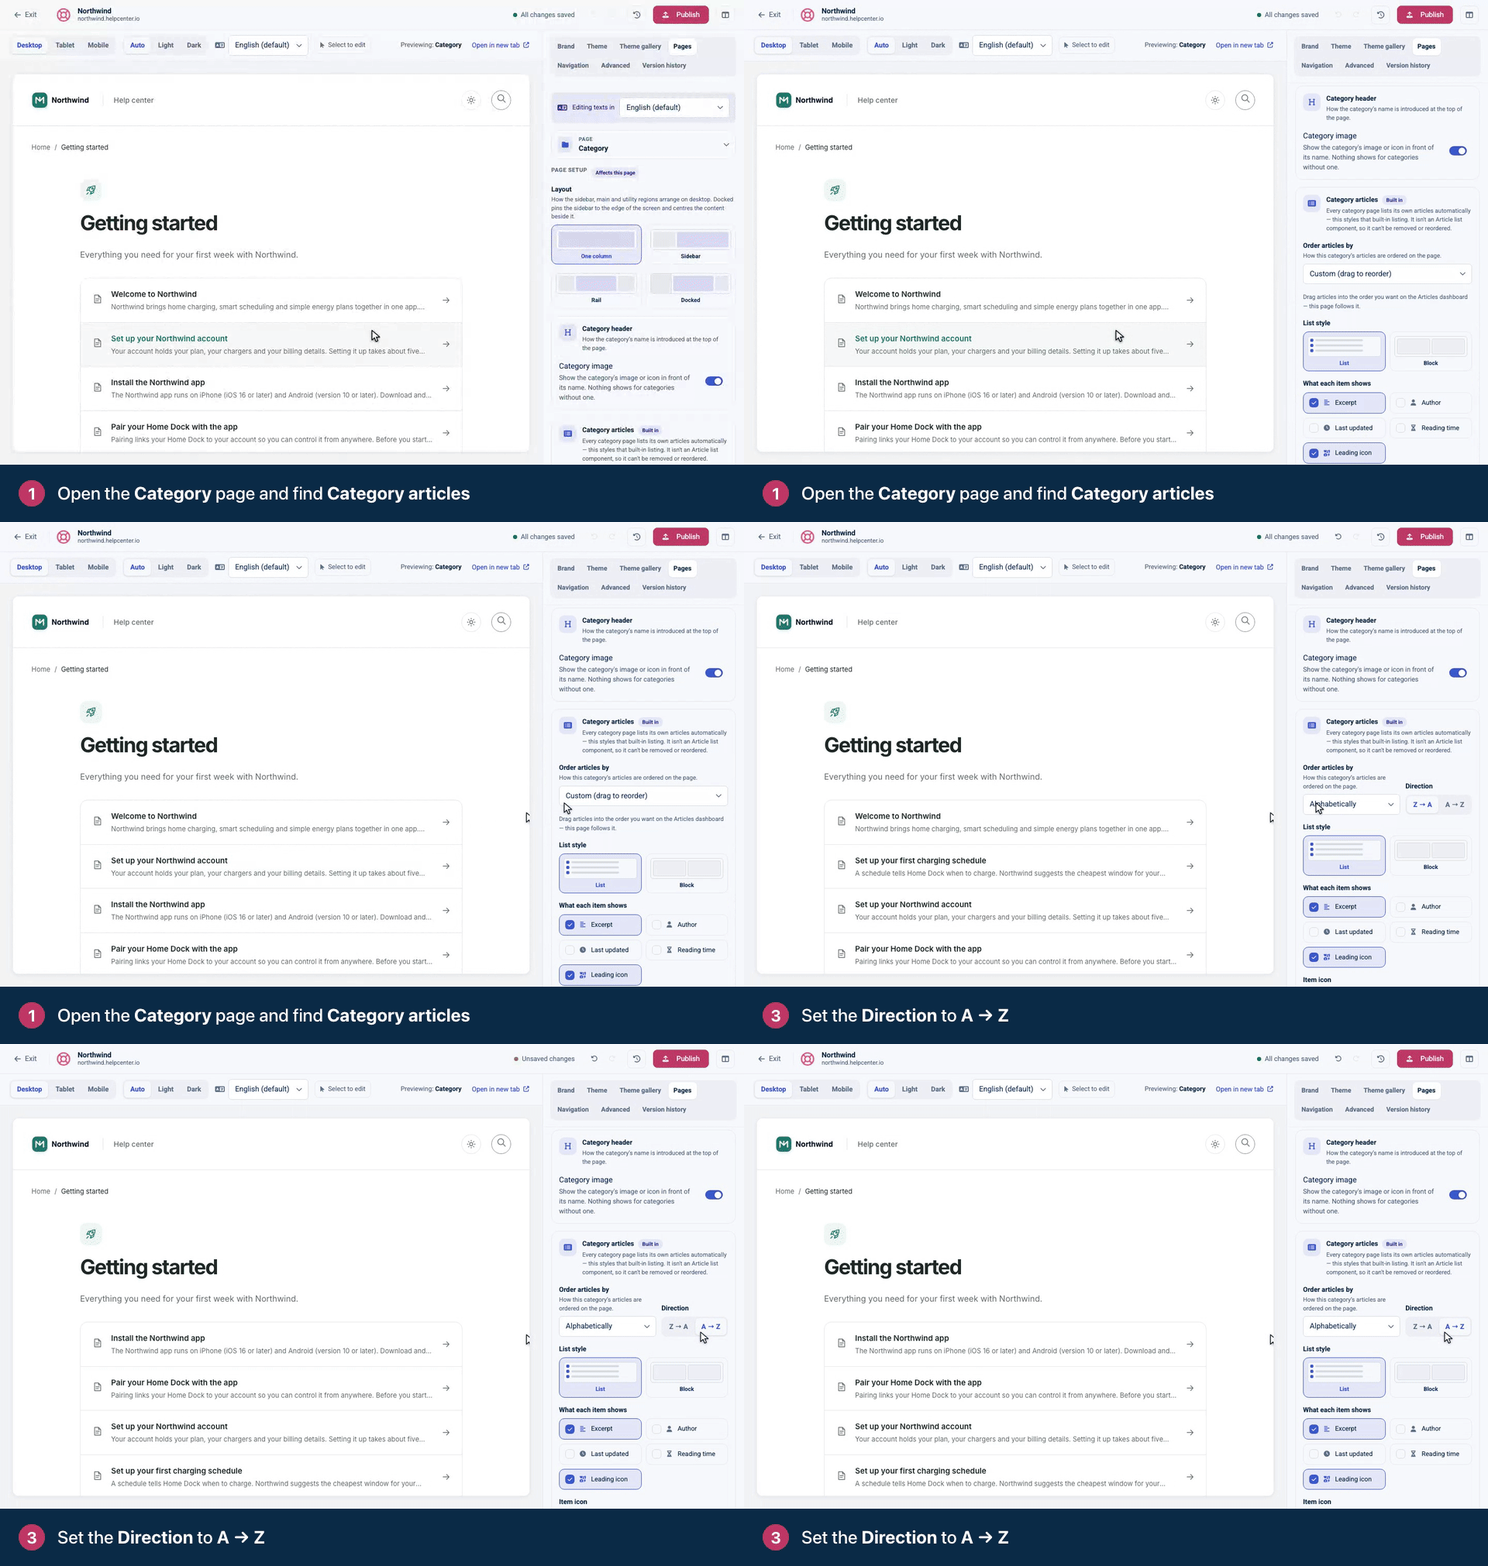
One setting orders the articles on every category page.
1. Click **Publish** so readers see the new order. See [Publish your design](https://self.helpcenter.io/content/publish-your-design).
| Order articles by | Direction |
| --- | --- |
| **Last updated** | **Newest first** or **Oldest first** |
| **Create date** | **Newest first** or **Oldest first** |
| **Alphabetically** | **A → Z** or **Z → A** |
| **Custom (drag to reorder)** | Your order from the Articles page |
The same order applies wherever your help center lists a category's articles, such as a content tree. Article lists you add to other pages have their own sort setting. See [Customize category and article lists](https://self.helpcenter.io/content/category-and-article-lists).
Owners and Admins open **Template editor** from the left menu. Editors can open it with **Customize** in the team toolbar that shows on your help center while they're signed in. Opened from a category page, it goes straight to the Category page's settings.
## Related articles
- [Create and organize categories](https://self.helpcenter.io/content/organize-categories)
- [Customize category and article lists](https://self.helpcenter.io/content/category-and-article-lists)
- [Publish your design](https://self.helpcenter.io/content/publish-your-design)
---
Source: https://self.helpcenter.io/content/help-center-vs-knowledge-base
# Help center vs knowledge base: what's the difference?
_Category: Help center best practices_
A knowledge base is a collection of articles. A help center is the website your customers visit when they need help, built around that collection, with search, navigation and a way to reach your team. People often use the two words interchangeably, and in HelpCenter.io they mean the same thing.
Here's the difference in more detail, and how internal and external knowledge bases compare.
## What a knowledge base is
A knowledge base is an organized library of information: how-to articles, troubleshooting guides, FAQs, policies and reference material, grouped into categories so people can browse and search it.
The term describes the content and how it's organized, not who reads it. A knowledge base can serve your customers, your own team, or both.
## What a help center is
A help center is where people go when they need help. At its heart is a knowledge base, and around it are the things that turn content into support:
- **Search,** often with AI answers written from your articles.
- **Navigation:** a home page, categories and related articles.
- **A way to contact your team,** such as a contact form.
- **Your branding,** usually on your own domain.
- **Extras** such as a help widget inside your product, announcements or a community forum.
In short, the knowledge base is what you know, and the help center is where customers go to find it.
## Side by side
| Compare | Knowledge base | Help center |
| --- | --- | --- |
| What it is | An organized collection of articles | The website people visit for help |
| Made of | Articles, FAQs and categories | A knowledge base, plus search, contact options and more |
| The question it answers | "What do we know?" | "Where do I go for help?" |
| Readers | Customers, your team, or both | Mostly customers |
| Access | Public or private | Usually public, sometimes behind a login |
| Example | All your articles about billing | help.yourcompany.com, with a search bar, categories and a contact form |
## Internal vs external knowledge bases
The biggest difference between knowledge bases is who they're written for.
| Compare | External | Internal |
| --- | --- | --- |
| Readers | Customers, prospects and partners | Your employees |
| Typical content | How-tos, troubleshooting, FAQs, policies | Processes, support playbooks, HR policies, onboarding guides |
| Access | Public, or behind your customers' login | Private, with sign-in |
| Writing style | Plain words, no internal jargon | Can use internal terms and project names |
| Found by search engines | Yes, when public | No |
Many companies run both, and it's usually best to keep them apart. Customers shouldn't stumble on internal procedures, and your team shouldn't have to dig through customer articles to find a process. When only a few internal articles sit next to customer content, a private section inside your help center can be enough. See [Use a private help center as an internal knowledge base](https://self.helpcenter.io/content/internal-knowledge-base).
## How they work with your support team
A knowledge base, a help center and your support inbox each do one part of the job. Here's how a question moves through them:
1. A customer gets stuck and opens your help center, or the help widget inside your product.
2. They search, and the help center finds the right article in your knowledge base.
3. If the article doesn't solve it, they contact your team from the help center.
4. Your team answers, and links to an article where one exists.
5. When the same new question keeps arriving, someone writes an article for it, and the knowledge base grows.
The last step is what keeps the whole thing useful. Without it, the knowledge base stops matching what customers ask.
## Other terms you'll hear
- **FAQ page:** one page of short questions and answers. Handy for a handful of questions, and often one part of a help center.
- **Documentation, or docs:** detailed reference material, often for developers, such as API guides.
- **Self-service portal:** another name for a help center, sometimes with account features such as ticket status.
- **Wiki:** a knowledge base that anyone on the team can edit. Usually internal and loosely structured.
- **Help desk:** usually the software your support team uses to answer tickets, not the articles customers read.
## Which one do you need?
Three questions settle it:
1. **Who reads it?** If customers do, you need a help center, and its knowledge base is where you'll spend most of your time. If only your team does, you need an internal knowledge base.
2. **Does it need a sign-in?** Public content helps new customers and search engines find you. Content for paying customers or employees needs access control.
3. **Should search engines and AI assistants find it?** If yes, make it public and write it for people who don't know your product yet.
## How HelpCenter.io helps
In HelpCenter.io, "help center" and "knowledge base" mean the same thing. Each help center holds your knowledge base (articles, FAQs and categories) and publishes it as a website on your subdomain or your own domain, and inside the widget on your website or app. Make it public for customers, or private for your team, and keep team-only sections in private categories. See [Control who can see your help center](https://self.helpcenter.io/content/who-can-see-your-help-center) and [Make a category private](https://self.helpcenter.io/content/private-categories).
## Related articles
- [What is a help center?](https://self.helpcenter.io/content/what-is-a-help-center)
- [Use a private help center as an internal knowledge base](https://self.helpcenter.io/content/internal-knowledge-base)
- [Control who can see your help center](https://self.helpcenter.io/content/who-can-see-your-help-center)
---
Source: https://self.helpcenter.io/content/are-my-payment-details-securely-stored
# Are my payment details secure?
_Category: Plans and billing_
Yes. Your card details go straight from the payment form to our payment processor, Braintree, a PayPal service. HelpCenter.io never stores your card number.
- We keep only the card type and its last four digits, or your PayPal email address, so you can see which method you're billed with.
- Braintree follows PCI DSS, the security standard for handling card data.
- Card payments can be confirmed with your bank through 3-D Secure.
- Only the account owner can see or change billing details.
For how we protect the rest of your account and content, see [Security and privacy at HelpCenter.io](https://self.helpcenter.io/content/security-and-privacy).
## Related articles
- [What payment methods do you accept?](https://self.helpcenter.io/content/what-payment-methods-do-you-support)
- [Security and privacy at HelpCenter.io](https://self.helpcenter.io/content/security-and-privacy)
---
Source: https://self.helpcenter.io/content/will-i-get-immediately-charged-when-i-activate-my-subscription-plan
# Will I be charged as soon as I activate?
_Category: Plans and billing_
Not if you're still in your free trial. When you activate during the trial, you keep the days you have left, and your first payment is taken when the trial ends.
If your trial has already ended, you're charged as soon as you activate, and your help center comes back online right away.
- **Yearly plans** are paid for the whole year up front.
- **Monthly plans** are charged once a month.
- Both renew automatically for the same period, and you get an invoice for every payment in **Billing & Invoices**.
Ready to go? See [Choose a plan and start your subscription](https://self.helpcenter.io/content/activate-your-subscription).
## Related articles
- [Choose a plan and start your subscription](https://self.helpcenter.io/content/activate-your-subscription)
- [How the free trial works](https://self.helpcenter.io/content/free-trial)
---
Source: https://self.helpcenter.io/content/activate-your-subscription
# Choose a plan and start your subscription
_Category: Plans and billing_
Choose a plan and add a payment method to keep your help center online after the free trial. You can do it at any time during the trial without losing the days you have left.
**Who can do this:** The account owner · **Plans:** All plans
## Pick your plan
1. At the bottom of the left menu, click your avatar, then **Billing & Invoices**.
2. You see the plan you're trying and the days left in your trial. To pick a different plan or billing period, click **Change**.

Change shows every plan, so you can compare them before you choose.
1. Choose **Yearly** or **Monthly**, then click **Choose** on the plan you want.
## Add your details and activate
1. Under **Billing Details**, fill in **Company Name**, your country, **City**, **Address** and **Postal Code**. These are required. If you're not a company, use your own name. The country list starts on Australia, so check that it shows yours.
2. If your company is in the EU, enter your VAT number in **VAT Number/Company Id**. Without a valid one, 20% VAT is added.
3. Enter a **Billing Email**. Invoices are emailed to this address.
4. Under **Payment Method**, add a card or choose PayPal.
5. Have a discount code? Click **Apply a Discount**, enter the code and click **Apply**.
6. Check the **Total**, then click **Activate**. Keep the page open until the confirmation appears.
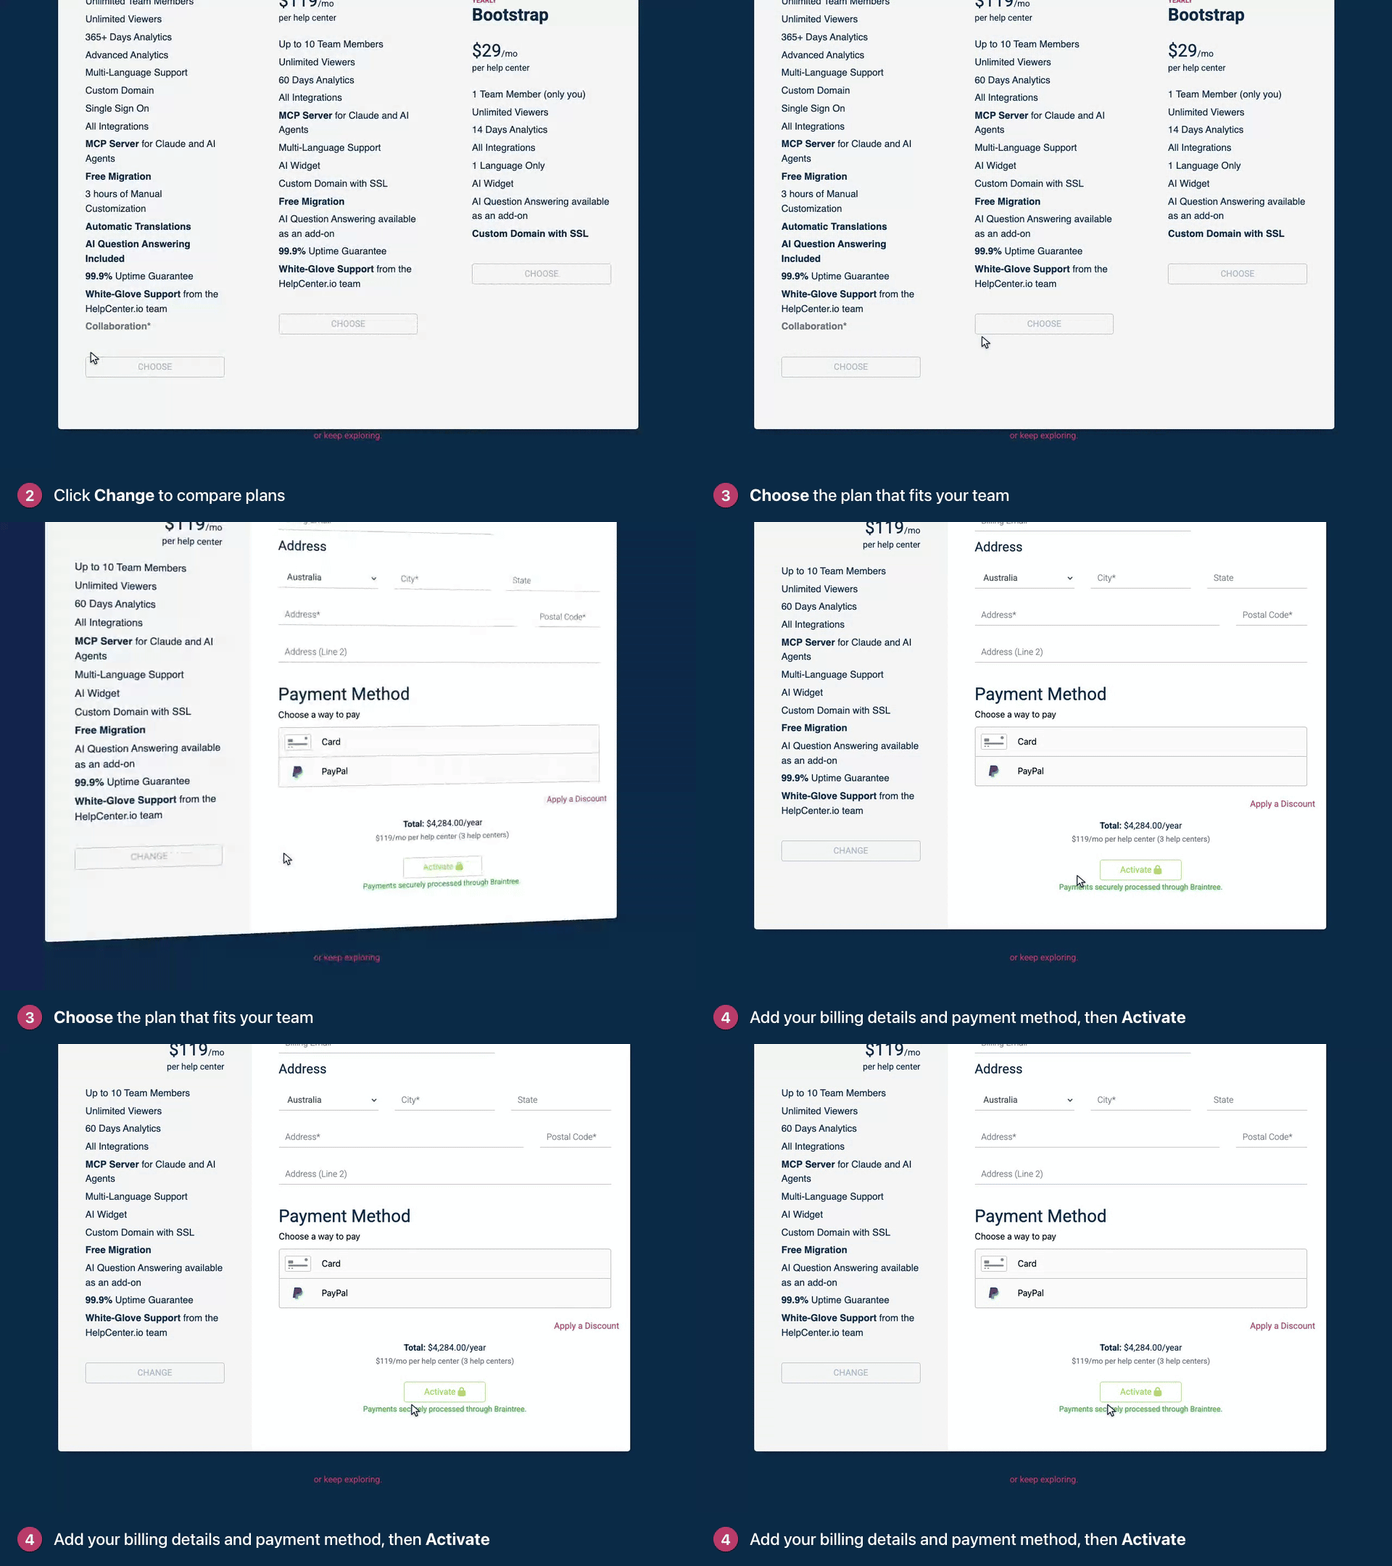
Your subscription is active as soon as the confirmation appears.
## What happens next
- **Still in your trial?** You keep the remaining trial days. Your first payment is taken when the trial ends.
- **Trial already over?** You're charged right away, and your help center is back online immediately.
- **Renewals:** monthly plans are charged every month and yearly plans once a year, up front. Your subscription renews automatically.
- **Invoices** appear under **Invoices** on the same page and are emailed to your Billing Email. See [Download invoices and update billing details](https://self.helpcenter.io/content/invoices).
Payments are processed by Braintree, a PayPal service. HelpCenter.io doesn't store your card number.
## Troubleshooting
**You see "Verify Your Email" instead of a payment form.** You need a verified email address before you can add a payment method. Click the link in the verification email we sent you, or click **resend it** on the page.
**"Only the account owner can manage the help center subscription and billing details."** Billing belongs to the person who created the account. Ask them to activate the plan.
**"Please correct the data above and try again."** A required billing field is empty. Fill in the fields marked in red.
**"3D Secure verification failed."** Your bank couldn't confirm the payment. Try again, or use another card or PayPal.
**"Your card was declined."** Check the card with your bank, or use another payment method.
**"Discount not available."** The code is wrong, has expired, has already been used, or doesn't apply to the plan and billing period you picked.
## Related articles
- [Plans and pricing](https://self.helpcenter.io/content/plans-and-pricing)
- [Will I be charged as soon as I activate?](https://self.helpcenter.io/content/will-i-get-immediately-charged-when-i-activate-my-subscription-plan)
- [What payment methods do you accept?](https://self.helpcenter.io/content/what-payment-methods-do-you-support)
- [Do you charge VAT?](https://self.helpcenter.io/content/vat)
---
Source: https://self.helpcenter.io/content/jwt-sso
# Sign readers in with your own login (JWT SSO)
_Category: Domain, access and SEO_
Let readers into your private help center with the account they already have in your product. Your app signs them in the way it always does and hands HelpCenter.io a signed token, so readers never see a second login or need a second password.
**Who can do this:** Owners and Admins · **Plans:** Catalyst
## Before you start
- **Your help center is on the Catalyst plan.** On other plans, the **Single sign-on** card says SSO isn't available and offers **View plans**. A setup you've already saved keeps working, and stays manageable, if your help center later moves to another plan. New setups need Catalyst.
- **Your help center is set to Private.** SSO is how readers get into a private help center. A public help center needs no sign-in, and a password-protected one shows its password page instead.
- **Your developers can add a sign-in endpoint to your app.** It signs JSON Web Tokens (JWT) with HS256, which most languages have a library for. See What your developers build, below.
## Turn on single sign-on
1. In the left menu, click the gear icon, then **Settings**.
2. In the **Single sign-on** card, switch on **Enable Single Sign-On**. The provider is **JWT (HS256)**.
3. In **Login URL**, enter the address of your sign-in endpoint, for example `https://app.yourcompany.com/auth/helpcenter`.
4. Next to **Shared secret**, click **Generate**. Copy the secret into your server's configuration. Keep it on the server: it must never reach a browser.
5. If you like, fill in **Issuer (iss claim)**, **Audience (aud claim)** and **Token TTL (seconds)**, and choose how long a sign-in lasts under **Reader sign-in lasts**. See the table below.
6. Click **Save JWT settings**.
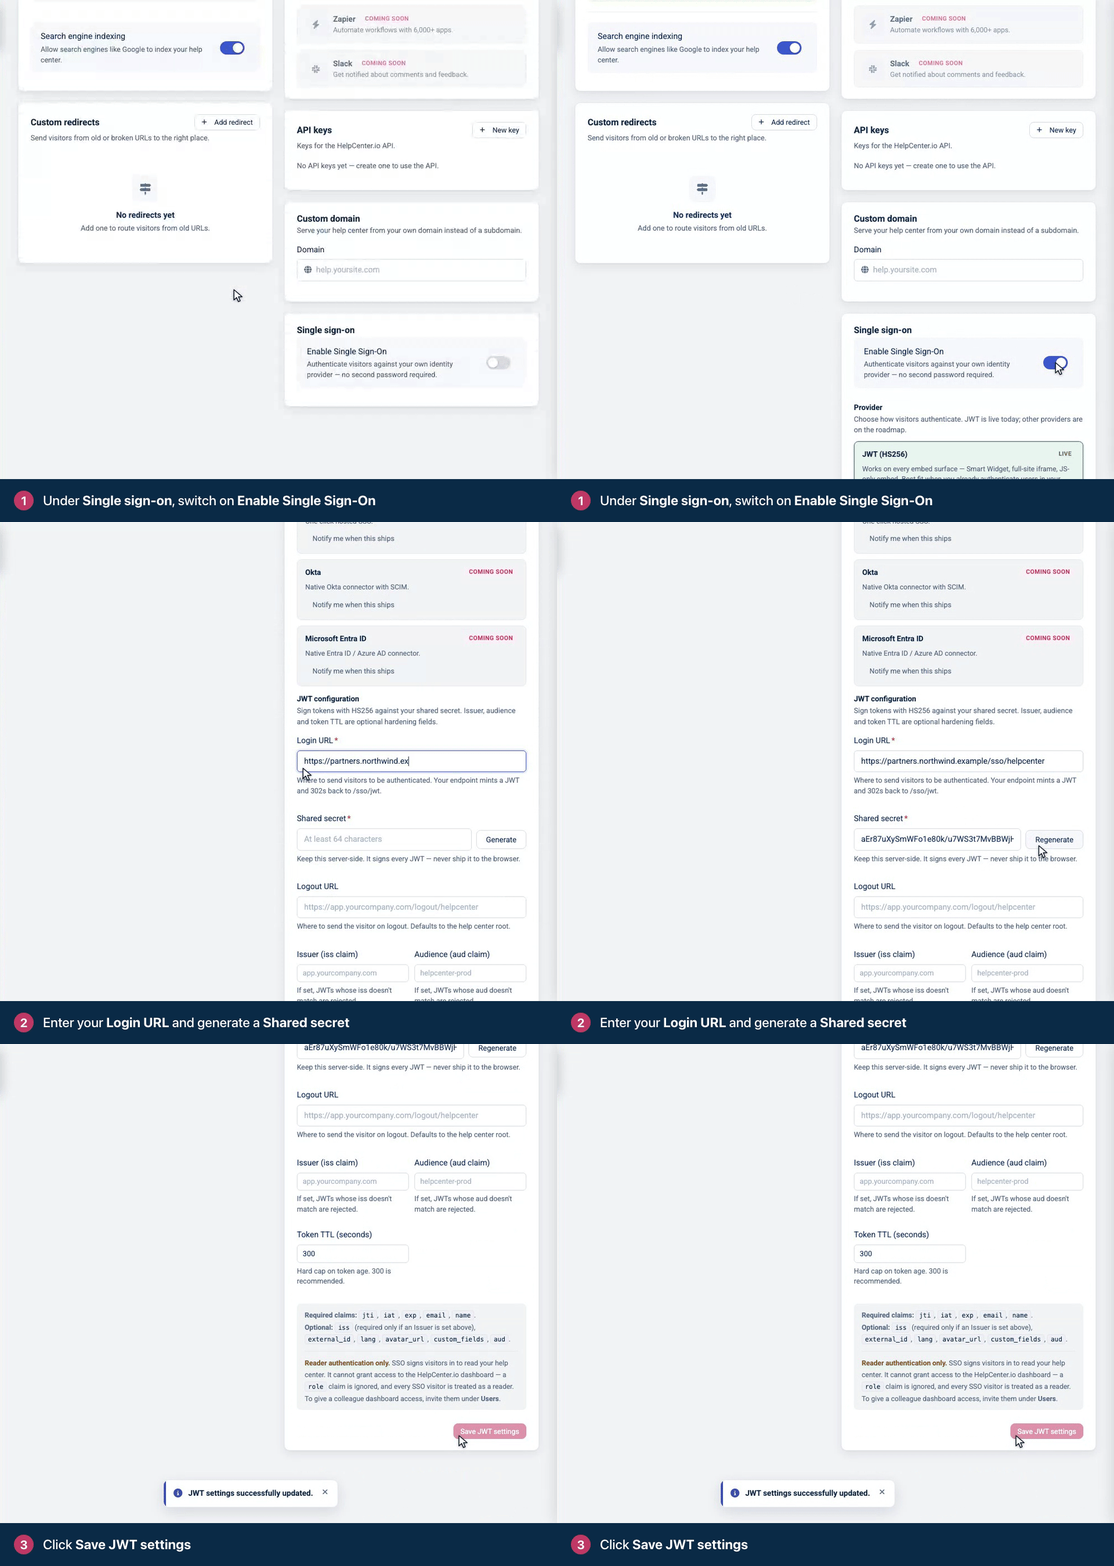
Generate creates a 64-character secret for you.
You'll see "JWT settings successfully updated." If your help center isn't private yet, go to **General** → **Access & visibility**, choose **Private** and click **Save changes**.
## The settings
| Setting | What it does |
| --- | --- |
| **Login URL** (required) | Where HelpCenter.io sends readers who aren't signed in. Your endpoint signs them in and sends them back with a token. HelpCenter.io adds its own `?subdomain=` and `&key=` to this address, so use one without a `?` or `#` of its own. |
| **Shared secret** (required) | Signs every token. At least 64 characters. **Generate** creates one, or you can paste your own. Your server signs with it exactly as shown. |
| **Issuer (iss claim)** | Optional. When set, tokens whose `iss` claim doesn't match are rejected. |
| **Audience (aud claim)** | Optional. When set, tokens whose `aud` claim doesn't match are rejected. |
| **Token TTL (seconds)** | The oldest token the widget accepts, counted from `iat`, from 30 to 86,400 seconds. 300 is recommended. Sign-in through your Login URL or an iframe relies on the token's `exp` instead. |
| **Reader sign-in lasts** | How long a reader stays signed in to your help center: **1 hour**, **8 hours**, **24 hours** (the default), **7 days** or **30 days**. The time counts from the sign-in and visits don't extend it. After that, the reader goes through your Login URL again, so someone you've removed from your own login loses access to the help center too. |
| **Logout URL** | HelpCenter.io doesn't use this field, so you can leave it empty. |
**Regenerating the secret breaks sign-in until your server has the new one.** The new secret takes effect when you click **Save JWT settings**, and tokens signed with the old secret stop working at that moment. Changing the secret also signs out every reader, who then sign in again through your Login URL. See [Can I rotate the SSO shared secret without downtime?](https://self.helpcenter.io/content/can-i-rotate-the-shared-secret-without-downtime)
## What your developers build
When a reader who isn't signed in opens your help center, HelpCenter.io sends them to your Login URL with a one-time `key`. Your endpoint signs them in with your usual login, creates a token signed with the shared secret, with `jti` set to that key, and sends them to `https:///sso/jwt?jwt=`. HelpCenter.io checks the token, signs the reader in and opens the page they first asked for.
Every token needs `jti`, `iat`, `exp`, `email` and `name`. Send `external_id` too, so readers keep their account when their email changes. The developer portal has the rest:
- [Build your Login URL](https://developers.helpcenter.io/content/build-your-login-url): tested code in Node.js, PHP, Python and Ruby.
- [How JWT single sign-on works](https://developers.helpcenter.io/content/how-jwt-sso-works): each sign-in flow step by step, on your help center, in the widget and in an iframe.
- [JWT claims and validation rules](https://developers.helpcenter.io/content/jwt-claims): every claim, and how HelpCenter.io checks a token.
## Test it
Open your help center in a private browser window, so your own HelpCenter.io sign-in doesn't get in the way (see Troubleshooting). You should land on your login, then come back to the help center signed in, without seeing a HelpCenter.io sign-in page.
## SSO signs in readers, not your team
Everyone who signs in through SSO is a reader. SSO can't open the HelpCenter.io dashboard, and a `role` claim in the token is ignored. Your team keeps using their HelpCenter.io accounts. To give a colleague dashboard access, invite them under **Users**. See [Invite your team](https://self.helpcenter.io/content/invite-your-team).
SSO readers see everything that's open to all readers of your help center. Categories shared with team members only, and content shared with selected team members, stay hidden from them. See [Can different readers get different access?](https://self.helpcenter.io/content/can-different-users-get-different-roles)
## Use it in the widget or an iframe
The same settings sign readers in to the widget inside your product and to your help center shown in an iframe: your server creates the tokens. See [Sign readers into the widget with a JWT](https://developers.helpcenter.io/content/widget-jwt) and [Embed your help center in your app](https://developers.helpcenter.io/content/embed-your-help-center) on the developer portal. **Token TTL** applies to widget tokens only.
## Troubleshooting
**Readers see the HelpCenter.io sign-in page or a password page instead of your login.** Check that the help center is set to **Private** and that you clicked **Save JWT settings**. If you limit access by IP address, readers from other addresses land on the HelpCenter.io sign-in page too. See [Restrict access by IP address](https://self.helpcenter.io/content/ip-allowlist).
**Readers go back and forth between your login and the help center.** The browser is signed in to a HelpCenter.io account, such as your team's dashboard or a help center on helpcenter.io, and HelpCenter.io doesn't complete an SSO sign-in in a browser that's already signed in. Sign out of HelpCenter.io in that browser, or use a private window.
**"Missing jwt parameter."** Your endpoint redirected to `/sso/jwt` without the `?jwt=` part.
**"Invalid SSO token."** HelpCenter.io rejected the token. Check that it's signed with HS256 and the exact secret you saved, that every required claim is there, and that `exp` isn't in the past and `iat` isn't in the future. HelpCenter.io allows 30 seconds of clock difference, so keep your server's clock in sync. If you set an Issuer or Audience, `iss` and `aud` must match them exactly.
**"SSO is not properly configured."** No shared secret is saved. Enter one and click **Save JWT settings**.
**After your login, readers land on the HelpCenter.io sign-in page.** The token's `jti` isn't the `key` HelpCenter.io sent, or that key has already been used. Each key works for one sign-in, so the reader should start again from the help center.
**You switched off Enable Single Sign-On, but readers still go to your login.** The switch only hides the settings; your saved setup stays active. To stop using SSO, change the help center's visibility or [contact support](https://self.helpcenter.io/content/contact-support) to remove the setup.
More causes and fixes are in [Troubleshoot single sign-on](https://developers.helpcenter.io/content/troubleshoot-sso) on the developer portal.
## Related articles
- [Can different readers get different access?](https://self.helpcenter.io/content/can-different-users-get-different-roles)
- [Can I rotate the SSO shared secret without downtime?](https://self.helpcenter.io/content/can-i-rotate-the-shared-secret-without-downtime)
- [Control who can see your help center](https://self.helpcenter.io/content/who-can-see-your-help-center)
- [Build your Login URL](https://developers.helpcenter.io/content/build-your-login-url) on the developer portal
- [How JWT single sign-on works](https://developers.helpcenter.io/content/how-jwt-sso-works) on the developer portal
---
Source: https://self.helpcenter.io/content/organize-categories
# Create and organize categories
_Category: Organize and publish_
Categories group your articles by topic, so readers can browse your help center instead of guessing what to search for. You create and arrange them on the Articles page.
**Who can do this:** Owners, Admins and Editors · **Plans:** All plans, with no limit on the number of categories
## Add a category
1. Click **Articles** in the left menu. Your categories are in the **Categories** panel beside the article list.
2. Click **Add category**.
3. Type a name and press Enter.
4. To make it a subcategory, drag it onto the category it belongs in.
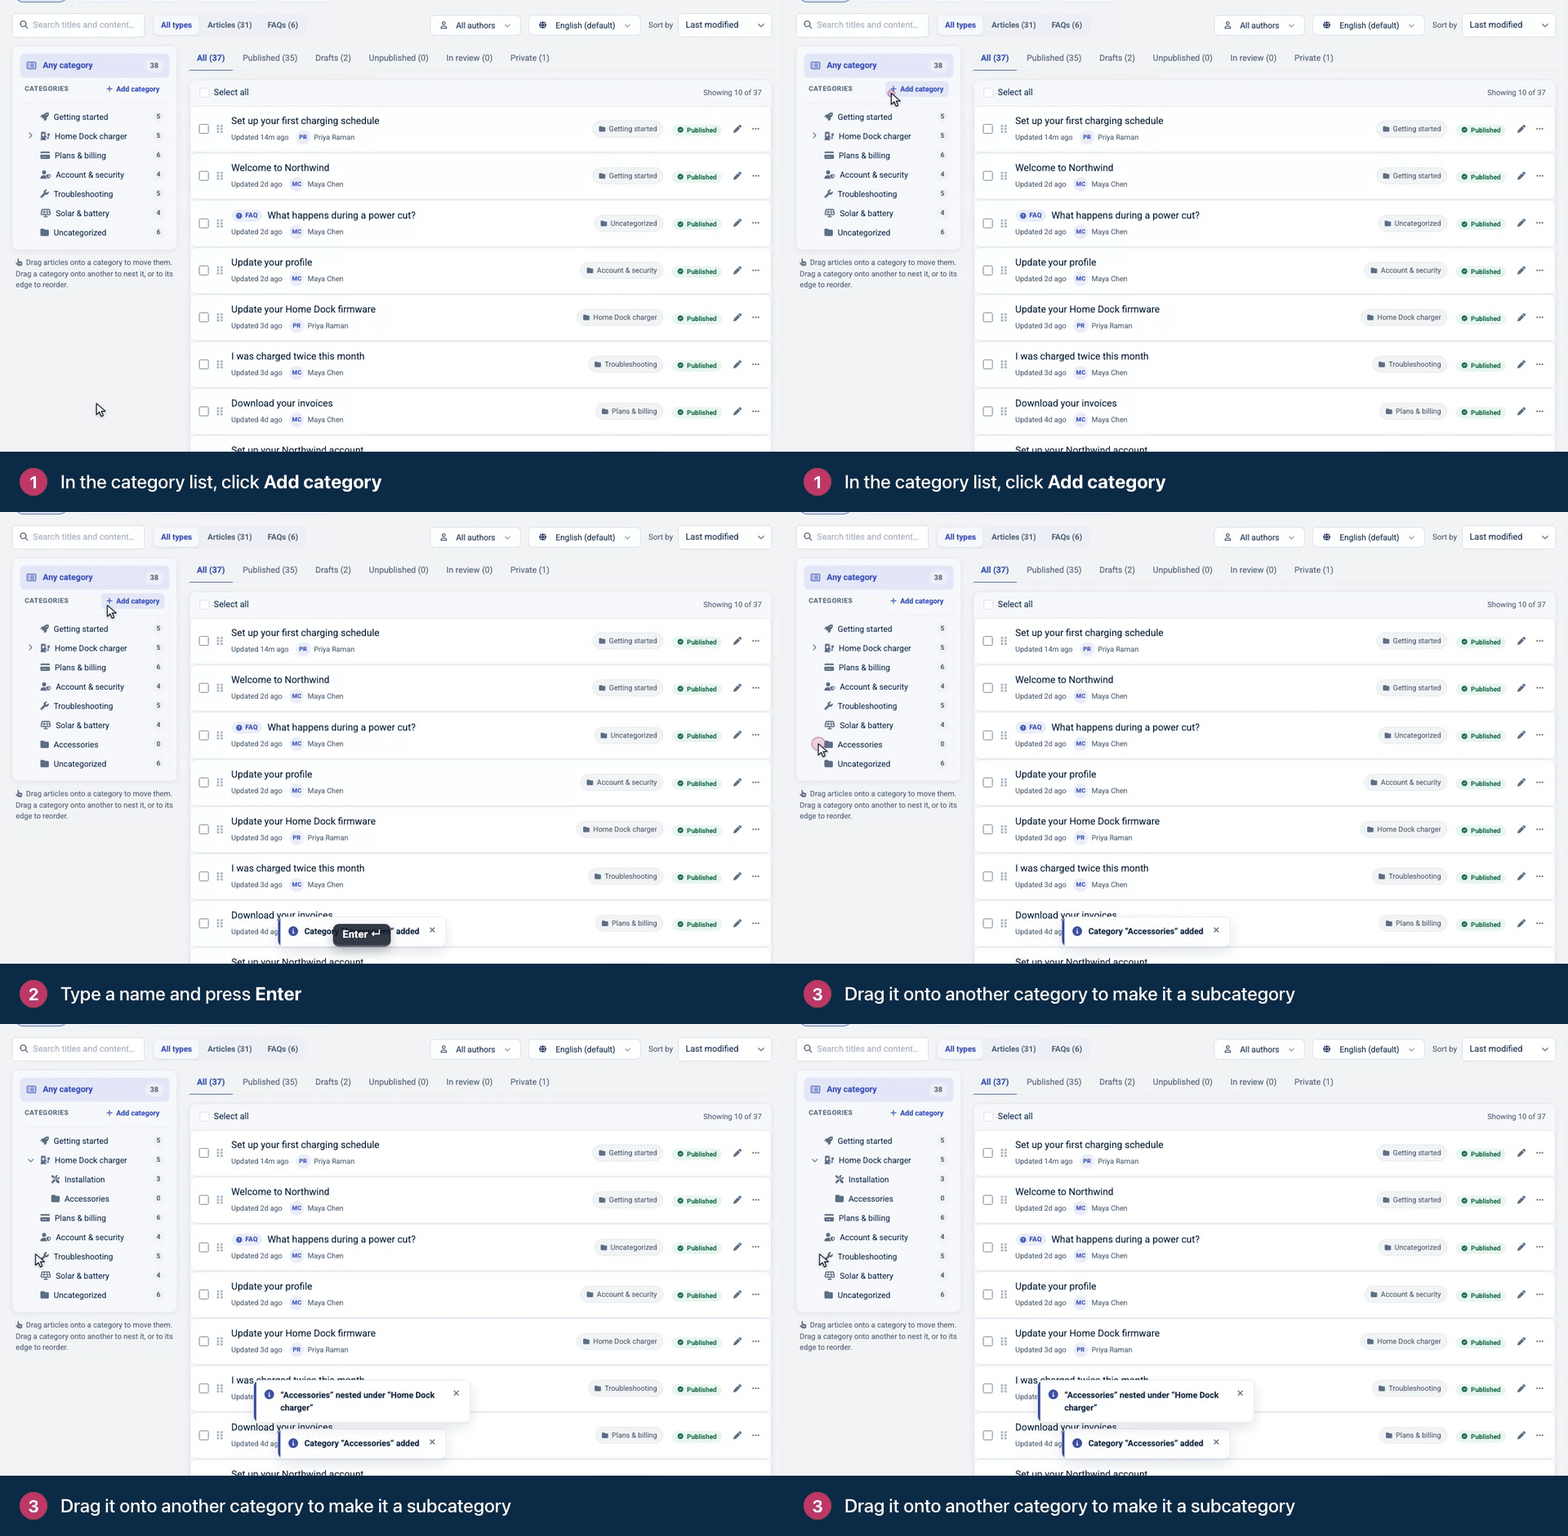
Drop a category onto another one to nest it.
New categories start at the top level and are visible to everybody. To limit who can see one, see [Make a category private](https://self.helpcenter.io/content/private-categories).
## Nest and arrange categories
- **Nest:** drag a category onto another one. It becomes a subcategory.
- **Reorder:** drag a category to the top or bottom edge of another one instead of onto it. See [Change the order of articles and categories](https://self.helpcenter.io/content/reorder-articles-and-categories).
- **Pick a parent from a list:** select the category, click **Edit category**, choose a **Parent category** and click **Update category**.
A category can't be moved into one of its own subcategories. You can nest as deep as you like, but readers find their way faster with no more than two levels. See [Plan your help center's structure](https://self.helpcenter.io/content/plan-your-help-center).
## Put articles in a category
- **In the editor:** click the category under the article's title and pick one.
- **On the Articles page:** drag articles onto a category in the panel, or choose **Move to…** from an article's **…** menu.
An article can sit in more than one category. See [Show an article in more than one category](https://self.helpcenter.io/content/multiple-categories).
Click a category in the panel to list only its articles. **Any category** shows them all again.
## Rename a category
1. Select the category in the panel and click **Edit category**.
2. Change the **Name** and click **Update category**.
The same panel is where you add a description and an icon or image. See [Add a category icon, image and description](https://self.helpcenter.io/content/category-icons-and-images).
## Delete a category
1. Select the category in the panel.
2. Click **Delete** under the category list, then **Delete category** to confirm.
Your articles are kept. An article that is also in another category stays there, and only an article left with no category becomes uncategorized, so readers can still open it. Its subcategories move to the top level.
A **Category deleted** message sums up what happened, for example "3 articles moved to Uncategorized · 1 subcategory moved to the top level".
### Undo a delete
Click **Undo** in that message. The category comes back with its articles, their order and its subcategories, as they were. Anything you changed after the delete stays as it is, and the message tells you how many items that was.
Undo is offered only in the message that appears right after the delete, for about ten seconds. Once it's gone, the delete can't be undone.
## Articles without a category
Articles that aren't in any category are grouped under **Uncategorized** in the panel. If they're published, readers can still open them and find them with search, but they aren't listed under any category on your help center.
## How categories appear on your help center
- Top-level categories show in the category list on your home page, in the same order as the panel.
- Subcategories show on their parent category's page.
- Empty categories still show, unless you turn on **Hide empty categories** for the category list in the template editor. See [Customize category and article lists](https://self.helpcenter.io/content/category-and-article-lists).
## Related articles
- [Add a category icon, image and description](https://self.helpcenter.io/content/category-icons-and-images)
- [Make a category private](https://self.helpcenter.io/content/private-categories)
- [Change the order of articles and categories](https://self.helpcenter.io/content/reorder-articles-and-categories)
- [Plan your help center's structure](https://self.helpcenter.io/content/plan-your-help-center)
---
Source: https://self.helpcenter.io/content/multiple-categories
# Show an article in more than one category
_Category: Organize and publish_
When an article belongs to more than one topic, list it in each category instead of keeping copies. Readers find it wherever they look, and you have one article to keep up to date.
**Who can do this:** Owners, Admins and Editors · **Plans:** All plans
## Add an article to several categories
1. Open the article from **Articles**.
2. Click the category under the title.
3. Turn on **Multiple**.
4. Click each category the article belongs in. A check mark shows the ones you picked. Click a category again to remove it.
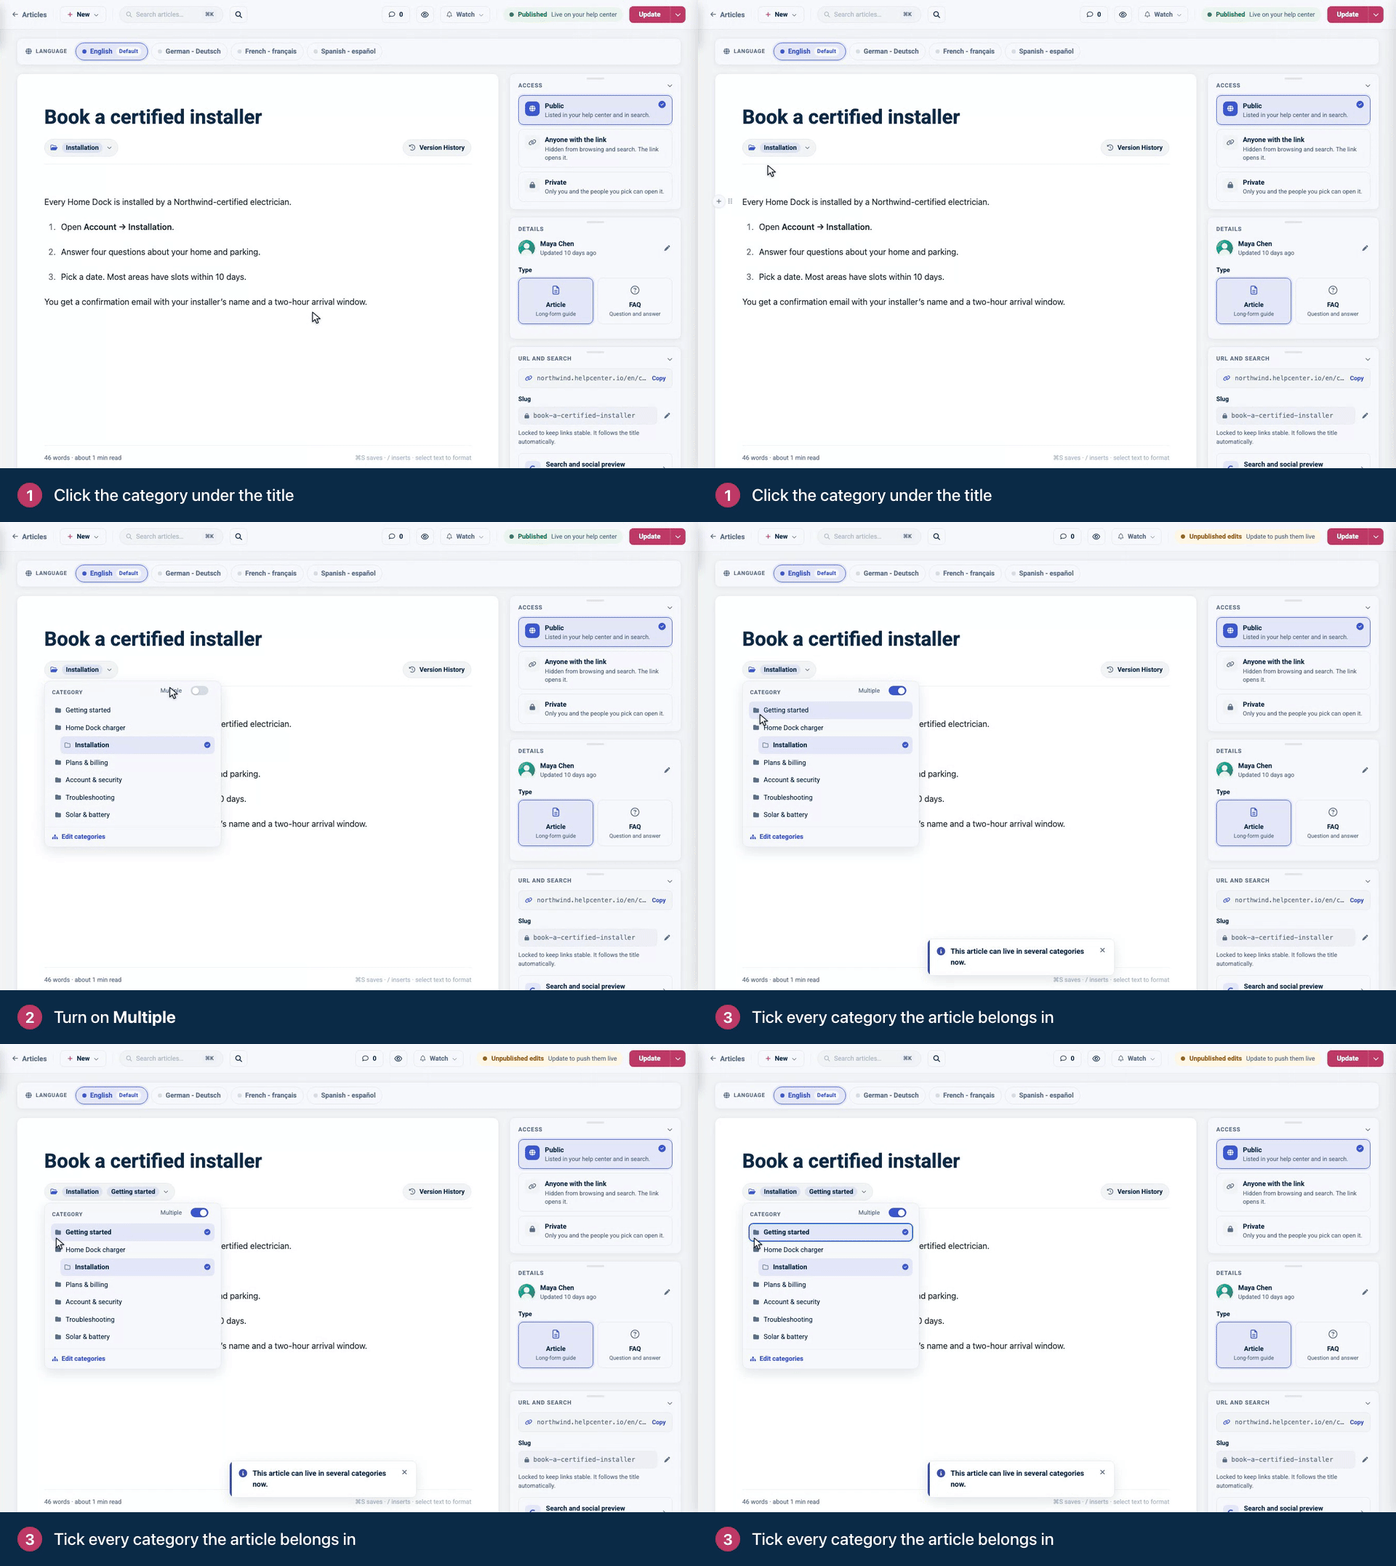
With Multiple on, pick as many categories as you need.
1. Save the article: click **Update** if it's live, or **Save draft** if it isn't.
While **Multiple** is on, an article needs at least one category.
## From the Articles page
Choose **Move to…** from the article's **…** menu. Its current categories are already ticked. Tick the others it belongs in and click the move button, for example **Move to 2 categories**. For several articles at once, tick them and click **Change category** in the bar. Either way, the articles end up in exactly the categories that are ticked, in place of the ones they had.
## What readers see
- The article is listed in every category you picked, and it keeps one address.
- In search suggestions that show categories (a search bar set to **Detailed** results), its category reads **Multiple categories**.
- Its breadcrumb shows your help center's home and the article, without a category.
- If your category pages use a custom order, the article can have its own position in each category. See [Change the order of articles and categories](https://self.helpcenter.io/content/reorder-articles-and-categories).
If one of its categories is private and another isn't, readers can still find the article through the one they can see. See [Make a category private](https://self.helpcenter.io/content/private-categories).
## Go back to one category
Turn off **Multiple**. The article keeps the first category in its list, and you can pick a different one. Then save the article.
## A second category or a link?
If an article only touches on another topic, a link to it from a related article may serve readers better than a second category. See [Link to another article or a website](https://self.helpcenter.io/content/add-links).
## Related articles
- [Create and organize categories](https://self.helpcenter.io/content/organize-categories)
- [Link to another article or a website](https://self.helpcenter.io/content/add-links)
- [Change the order of articles and categories](https://self.helpcenter.io/content/reorder-articles-and-categories)
---
Source: https://self.helpcenter.io/content/custom-domain-namecheap
# Set up your custom domain with Namecheap
_Category: Domain, access and SEO_
If your domain is registered with Namecheap, add one CNAME record there to put your help center on your own address, like help.mywebsite.com. Once the record is in place, HelpCenter.io verifies it and issues your SSL certificate automatically.
**Who can do this:** Owners and Admins, with access to your Namecheap account · **Plans:** All plans
## Before you start
Add your domain in HelpCenter.io first. Go to **Settings** → **Custom domain**, type the address you want, for example `help.mywebsite.com`, and click **Apply**. The card then shows the value for your record: your help center's current address, like `mycompany.helpcenter.io`. See [Use your own domain](https://self.helpcenter.io/content/custom-domain) for the full walkthrough.
New DNS records usually work within 30 minutes, but they can take up to a few hours to reach everyone on the internet.
## Add the CNAME record in Namecheap
1. Go to [Namecheap](https://www.namecheap.com/myaccount/login/) and sign in. If your account uses 2-step verification, complete it.
2. Open your **Domain List** from the account menu (**Account** → **Domain List**).
3. Find the domain you want to use with HelpCenter.io and click **Manage** on the right of its row.
4. Open the **Advanced DNS** tab.
5. Click **Add New Record** below your current records. A new, empty row appears.
6. Fill in the row:
- **Type:** **CNAME Record**.
- **Host:** the subdomain for your help center, for example `help` for help.mywebsite.com or `support` for support.mywebsite.com.
- **Value:** your help center's address from HelpCenter.io, for example `mycompany.helpcenter.io`.
7. Click the green check mark at the end of the row to save the record.
That's everything on the Namecheap side.
## Verify the domain in HelpCenter.io
1. Go back to **Settings** → **Custom domain**.
2. Check that **Domain** is the **Host** you entered plus your domain. For example, `help` on mywebsite.com is `help.mywebsite.com`.
3. Click **Verify DNS** and follow **Domain status** until **DNS verification**, **SSL certificate issued** and **Domain connected** are all checked.
If the record hasn't spread yet, you don't need to wait on the page. HelpCenter.io keeps checking your domain on its own.
## Troubleshooting
**The Advanced DNS tab doesn't let you add host records.** Your domain uses custom nameservers, so its DNS is managed somewhere else, such as Cloudflare. Add the CNAME record with that provider instead.
**"The DNS record seems to be incorrect."** Check that **Host** holds only the subdomain part (`help`) and **Value** is your helpcenter.io address with no `https://`. Delete any other record with the same Host. Then give the change time to spread. See [My custom domain isn't working](https://self.helpcenter.io/content/custom-domain-not-working).
## Related articles
- [Use your own domain](https://self.helpcenter.io/content/custom-domain)
- [My custom domain isn't working](https://self.helpcenter.io/content/custom-domain-not-working)
---
Source: https://self.helpcenter.io/content/custom-domain
# Use your own domain
_Category: Domain, access and SEO_
Serve your help center from your own address, like help.example.com, instead of yourname.helpcenter.io. Readers stay on your brand, and HelpCenter.io sets up a free SSL certificate for the new address automatically.
**Who can do this:** Owners and Admins · **Plans:** All plans
Want your help center at a path of your website instead, like www.example.com/docs? On Growth and Catalyst, see [Host your help center in a subfolder of your website](https://self.helpcenter.io/content/host-your-help-center-in-a-subfolder).
## Before you start
- **Pick a subdomain of your domain**, such as help.example.com, support.example.com or docs.example.com. Your bare domain (example.com) won't work, because it can't take the CNAME record HelpCenter.io needs. Leave out www too: HelpCenter.io removes it from the address you enter.
- **Make sure you can edit your domain's DNS records.** They usually live where you bought the domain, or with a service like Cloudflare if your domain uses one.
## Add your domain
1. In the left menu, click the gear icon, then **Settings**.
2. In the **Custom domain** card, type your address in **Domain**, for example `help.example.com`. Leave out `https://` and any slash at the end.
3. Click **Apply**. You'll see "Custom domain successfully applied." and, under **Configure your DNS**, the record to create.
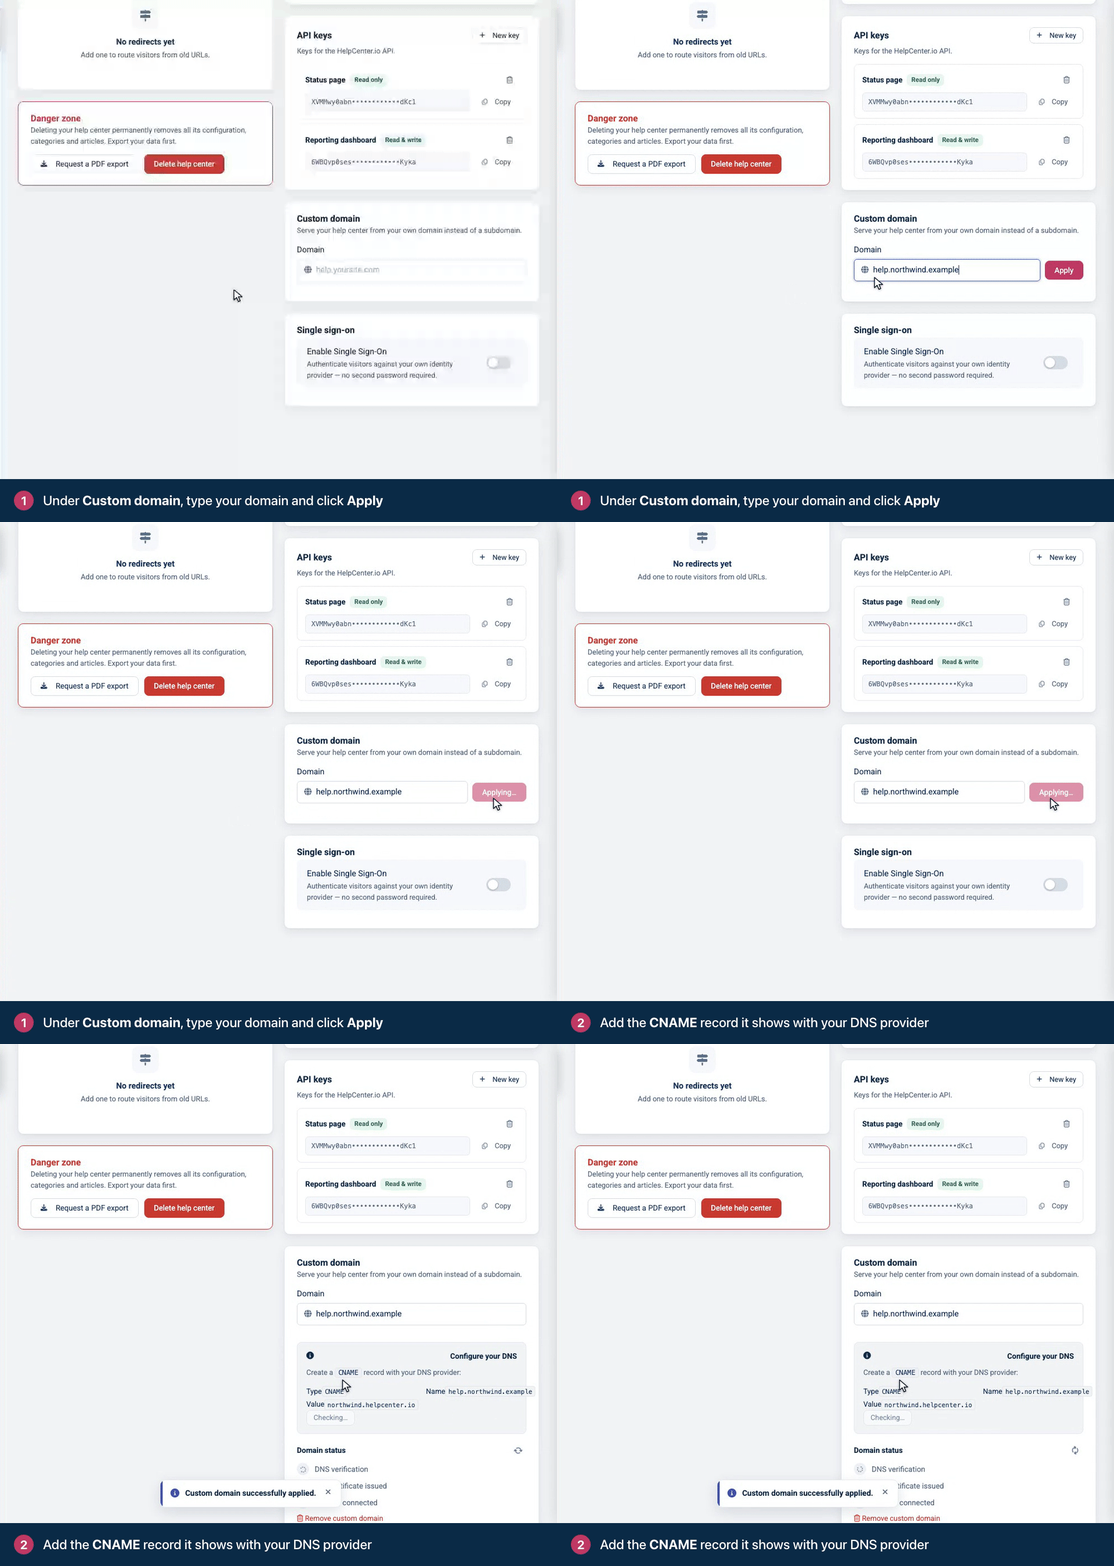
The card shows the exact CNAME record your domain needs.
## Add the CNAME record
Sign in to your DNS provider and create this record:
| Type | Name | Value |
| --- | --- | --- |
| CNAME | Your subdomain, for example `help` | Your help center's current address, for example `yourname.helpcenter.io` |
- Most providers want only the first part of the name (`help`) and add your domain for you. A few want the full `help.example.com`. The card shows the full name.
- Copy the value from the card. It has no `https://` and no slash.
- If an A, AAAA or another CNAME record already uses the same name, delete it first. A name with a CNAME record can't have any other record.
Step-by-step guides: [Cloudflare](https://self.helpcenter.io/content/custom-domain-cloudflare), [Namecheap](https://self.helpcenter.io/content/custom-domain-namecheap), [GoDaddy](https://self.helpcenter.io/content/custom-domain-godaddy) and [NameBright](https://self.helpcenter.io/content/custom-domain-namebright). For other providers, search their help for "add a CNAME record".
**Using Cloudflare?** Set the record's proxy status to **DNS only** (grey cloud). With the proxy on, HelpCenter.io can't see your CNAME record, so it can't verify your domain or issue its SSL certificate.
## Verify DNS and go live
1. Back in the **Custom domain** card, click **Verify DNS**.
2. Follow **Domain status** as it moves through **DNS verification**, **SSL certificate issued** and **Domain connected**. When all three are checked, the card says "Your custom domain is fully configured and live."
If you see "The DNS record seems to be incorrect.", the record isn't visible yet. DNS changes can take a while to spread, so give it time. You don't have to keep the page open: HelpCenter.io checks your domain on its own every 5 minutes on the first day, every hour for the rest of the first week, and then once a day. Click the refresh button next to **Domain status** to see where things stand.
Once DNS verifies, the SSL certificate is issued and connected for you. This can take several minutes. From then on, your helpcenter.io address redirects to your own domain, so links to the old address keep working.
## Change or remove your domain
- **To change it,** type the new address in **Domain**, click **Apply**, and create a CNAME record for the new name.
- **To remove it,** click **Remove custom domain**, then **Yes, remove**. Your help center goes back to its helpcenter.io address, and links that use your own domain stop working. Delete the CNAME record at your DNS provider too.
Changing your domain several times within a month can be refused, even though the card confirms the change. If a new domain passes DNS verification but never gets its SSL certificate, [contact support](https://self.helpcenter.io/content/contact-support).
If you rename your help center's subdomain, point the CNAME record at the new name. See [Change your help center's address](https://self.helpcenter.io/content/change-your-subdomain).
## Troubleshooting
**"Invalid domain name. Please do not include http(s):// or trailing slash. Multiple subdomain levels are supported."** Enter only the address, like `help.example.com`.
**The card says your address isn't a custom domain.** You entered a .helpcenter.io address. Those are managed for you; enter an address on your own domain.
**"The DNS record seems to be incorrect."** Check the record's name and value, delete any other record with the same name, switch off Cloudflare's proxy, and allow time for the change to spread. See [My custom domain isn't working](https://self.helpcenter.io/content/custom-domain-not-working).
**The card says custom domains are not available on your current plan.** Every current plan includes a custom domain. Click **Upgrade your plan** to move your help center to one.
## Related articles
- [Set up your custom domain with Cloudflare](https://self.helpcenter.io/content/custom-domain-cloudflare)
- [Set up your custom domain with Namecheap](https://self.helpcenter.io/content/custom-domain-namecheap)
- [Set up your custom domain with GoDaddy](https://self.helpcenter.io/content/custom-domain-godaddy)
- [Set up your custom domain with NameBright](https://self.helpcenter.io/content/custom-domain-namebright)
- [My custom domain isn't working](https://self.helpcenter.io/content/custom-domain-not-working)
- [Host your help center in a subfolder of your website](https://self.helpcenter.io/content/host-your-help-center-in-a-subfolder)
---
Source: https://self.helpcenter.io/content/front
# Connect Front
_Category: Integrations and API_
Bring your help center into Front. Your team can search your articles, insert them into replies and create new articles from a conversation, and on plans with AI, draft a reply from your articles in one click.
**Who can do this:** Owners and Admins · **Plans:** All plans (**Generate AI Reply** needs the Catalyst plan, or the AI add-on on Bootstrap and Growth)
## Step 1: Enable the HelpCenter.io app in Front
1. In Front, open your company settings, go to the **App Store** and search for HelpCenter.io.
2. Click **See details** on the HelpCenter.io app, then **Enable app** in the top-right corner.
3. Front shows a **Secret key** in the **Configure app** window. Copy it.
Closed the window too soon? Go back to the **App Store**, open HelpCenter.io and click **Configure app** to see the key again.
## Step 2: Connect Front in HelpCenter.io
1. In the left menu, click the gear icon, then **Settings**.
2. Under **Integrations**, switch on **Front**.
3. Paste the key into **Secret key** and click **Save**.
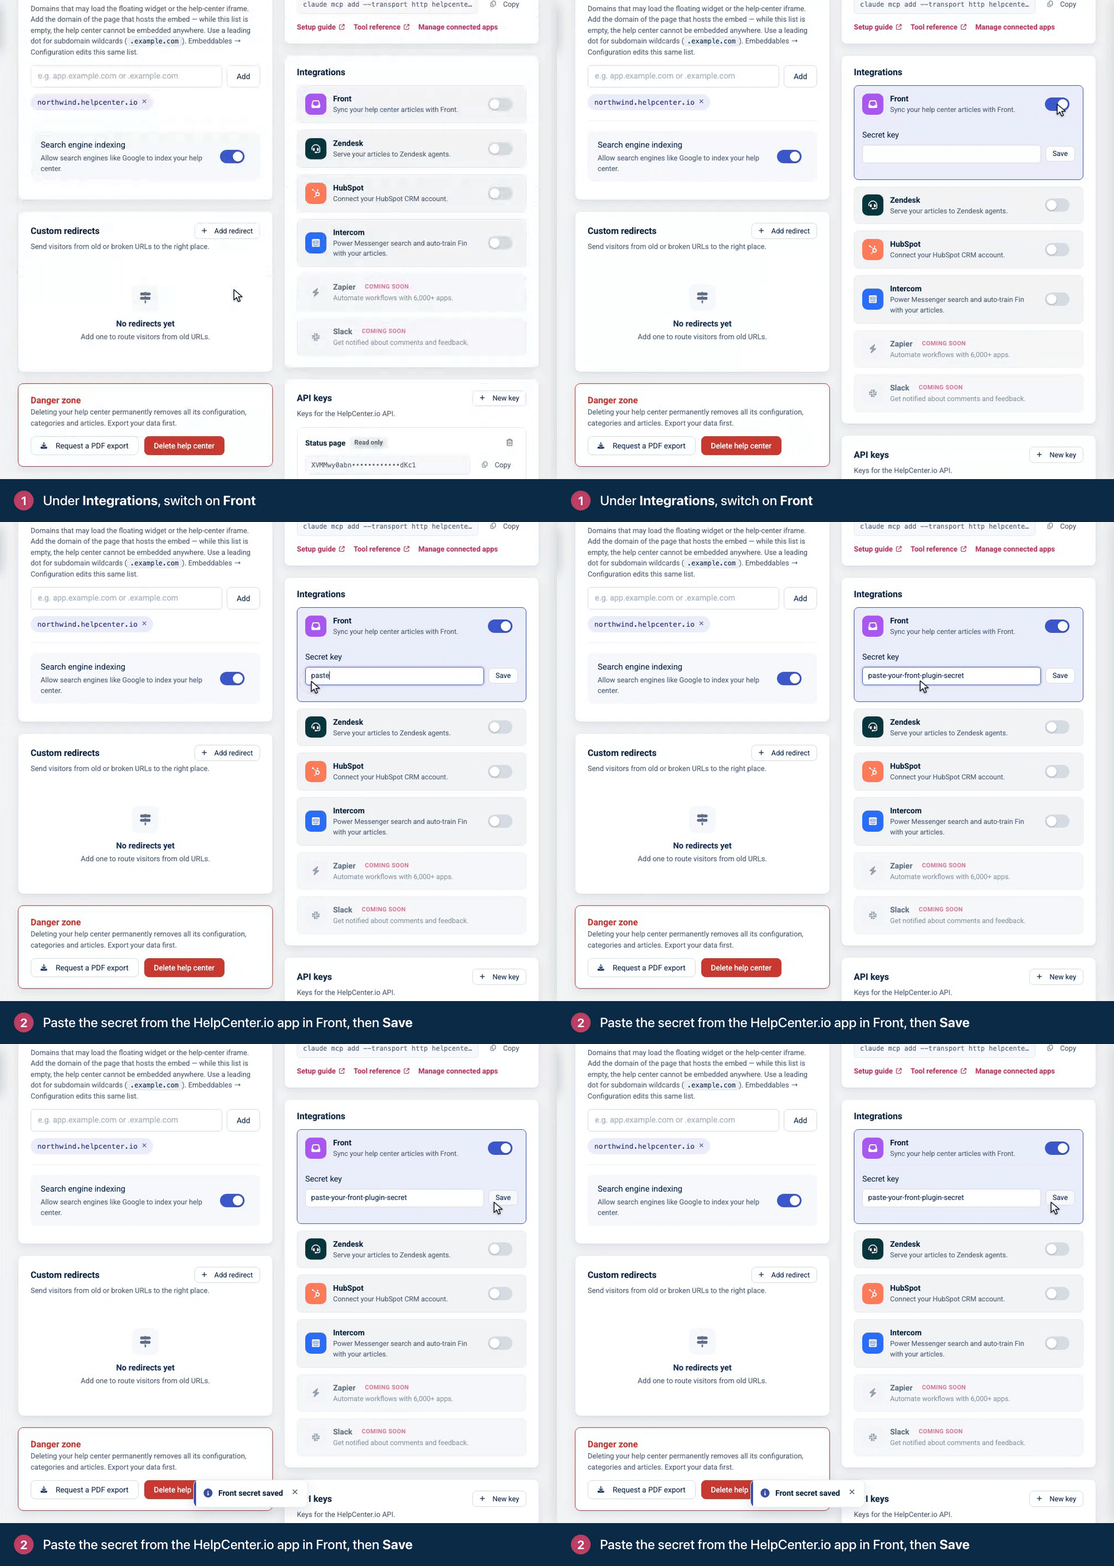
A message confirms Front secret saved.
Go back to Front and open a conversation. The HelpCenter.io sidebar is ready to use.
## What your team can do in Front
- **Find articles**: type in **Search here...** or browse your categories.
- **Use an article in a reply**: open it, select the text you need and insert it into your reply, or insert a link to the article. For an FAQ, you can insert the whole answer. A selection that includes one of your team's internal notes isn't inserted.
- **Copy or edit**: copy the article's address, or open it in HelpCenter.io to edit it.
- **Go to help center** opens your help center.
- **Create an Article**: the **+** button opens a form with a title, type (**Article** or **FAQ**), category and content. The article is saved as a draft for you to finish in HelpCenter.io. This works when your email address in Front matches a HelpCenter.io account that can edit this help center (Owner, Admin or Editor).
- **Generate AI Reply**: drafts a reply to the conversation from your articles and lists its **Sources**. Click **Use** to put it in your reply, and rate it with a thumbs up or down. When your articles don't cover the question, it tells you, so you can answer by hand. There's a daily allowance of AI replies, and the button shows how many you've used.
## Troubleshooting
**The sidebar says "The Front plugin doesn't seem to be configured with your help center."** Switch on Front under **Settings** → **Integrations**, paste the secret key from Front and click **Save**. Then reload the sidebar.
**Creating an article doesn't work.** Your Front email address needs to match your HelpCenter.io account, and that account needs the Owner, Admin or Editor role on this help center. See [Roles and permissions](https://self.helpcenter.io/content/roles-and-permissions).
**There's no Generate AI Reply button.** AI replies need the Catalyst plan or the AI add-on, and they appear inside a conversation. See [Add AI Answers to your plan](https://self.helpcenter.io/content/ai-add-on).
## Related articles
- [Integrations overview](https://self.helpcenter.io/content/integrations)
- [Connect Zendesk](https://self.helpcenter.io/content/zendesk)
- [Roles and permissions](https://self.helpcenter.io/content/roles-and-permissions)
---
Source: https://self.helpcenter.io/content/using-the-helpcenter-io-api
# The HelpCenter.io API
_Category: Integrations and API_
The HelpCenter.io API lets your own code and tools work with your help center. Keep articles in sync with your product docs or a Git repository, import content in bulk, publish a release's changes together, answer reader comments and pull your statistics into your own reports. It's a REST API at `https://api.helpcenter.io/v1` that sends and receives JSON.
**Who can create keys:** Owners and Admins · **Plans:** All plans
## Get started
1. Create an API key in **Settings** → **API keys**. See [Create an API key](https://self.helpcenter.io/content/create-an-api-key).
2. Give the key to whoever builds the integration. Keys belong on your servers: never in a web page, an app's front end or a public repository.
3. Make a first request with [Quickstart: your first API request](https://developers.helpcenter.io/content/quickstart-your-first-request) on the developer portal.
The API is included in every plan. A few endpoints act on features of a particular plan, such as staged changes on Catalyst, and connecting AI agents needs Growth or Catalyst.
## The developer portal
The developer portal, [developers.helpcenter.io](https://developers.helpcenter.io), documents every endpoint, field, limit and error, with code samples in several languages. The full API specification that used to be on this page lives there now.
- [Build on HelpCenter.io](https://developers.helpcenter.io/content/developer-platform): what you can build, and which part of the platform fits each job.
- [REST API reference](https://developers.helpcenter.io/category/17844): articles, categories, images, staged changes, comments, team notes, statistics and more.
- [Webhooks](https://developers.helpcenter.io/content/webhooks): get a request on your server when articles or categories change.
- [Connect an AI assistant to your help center](https://developers.helpcenter.io/content/connect-an-ai-assistant-to-your-help-center): let Claude, ChatGPT and other AI agents work in your help center.
## Related articles
- [Create an API key](https://self.helpcenter.io/content/create-an-api-key)
- [Connect Claude, ChatGPT and other AI agents](https://self.helpcenter.io/content/connect-ai-agents)
- [Integrations overview](https://self.helpcenter.io/content/integrations)
---
Source: https://self.helpcenter.io/content/integrate-the-helpcenter-io-widget-with-the-chatra-chat-widget
# Integrate the widget with Chatra
_Category: Integrations and API_
Show the widget first and open your Chatra live chat only when a visitor can't find what they need. Visitors get instant answers from your help center, and your team only hears the questions your articles don't cover yet.
**Who can do this:** Owners and Admins, with access to your website's code · **Plans:** All plans
## Step 1: Install Chatra on your website
If Chatra already runs on your website, skip to the next step.
1. Sign in to your Chatra dashboard at [app.chatra.io](https://app.chatra.io/).
2. Go to **Settings**. Under **Channels**, click **Chat widget**.
3. Click **Show setup instructions** below the **Chat widget** heading.
4. Follow the instructions to place your Chatra snippet right before the closing `` tag on every page where you want the chat.
## Step 2: Hide Chatra until it's needed
Visitors should only see the chat once they've asked for help, so Chatra starts hidden. Paste this code right before your Chatra snippet:
```
```
The style hides Chatra's chat button, and `startHidden` tells Chatra to load hidden. The widget opens the chat when it's needed.
## Step 3: Add the widget and connect it to Chatra
1. In your HelpCenter.io dashboard, click the gear icon in the left menu, then **Embeddables**.
2. On the **Widget** tab, click **Copy** on the **Installation** card.
The code you copied looks like this, with your own widget ID in place of `ab12c3`:
```
```
Add a comma after `app_id: 'ab12c3'`, and on the next line add an `onContactsRequest` function that opens Chatra:
```
onContactsRequest: function(){if(window.Chatra){Chatra('show');Chatra('openChat',true);}else{console.error('Unable to find Chatra widget.');}}
```
The finished code looks like this:
```
```
Paste it right before the closing ` ` tag of your website or web app.
## How it works
Visitors see the widget first and can search your help center or read an article to solve the problem themselves. When they ask to contact you from the widget, for example by clicking **I can't find what I'm looking for**, the widget calls your `onContactsRequest` function instead of showing its own contact form, and Chatra opens.
Pay attention to what people ask in the chat, and add an article whenever a new question comes up. Over time, fewer visitors need to reach out with the same question.
## Good to know
- The widget stays open when the chat opens. To close it at the same time, add `window.hcWidget.hide();` inside your `onContactsRequest` function. See [Widget JavaScript API](https://developers.helpcenter.io/content/widget-javascript-api) on the developer portal.
- Not comfortable editing your website's code? Ask a developer, or [contact us](https://self.helpcenter.io/content/contact-support): we may be able to help.
## Related articles
- [Add the widget to your website](https://self.helpcenter.io/content/install-the-widget)
- [Integrations overview](https://self.helpcenter.io/content/integrations)
- [Handle contact requests yourself](https://developers.helpcenter.io/content/widget-custom-contact) on the developer portal
- [Widget JavaScript API](https://developers.helpcenter.io/content/widget-javascript-api) on the developer portal
---
Source: https://self.helpcenter.io/content/team-notes
# Leave notes for your team
_Category: Write articles_
Keep information for your team right inside an article: a script for your support agents, a reminder to update a screenshot, or a question for the writer. Readers never see any of it.
**Who can do this:** Owners, Admins and Editors, and Translators in the languages they translate · **Plans:** All plans
There are two ways to do it:
- **Internal notes** are blocks of text inside the article, for information your team should always have at hand.
- **Comments** are attached to a few selected words, for questions and feedback you resolve and move on from.
## Add an internal note
1. On an empty line, type `/internal note` and press Enter.
2. Type your note. It's marked **Internal note** and **Team only, never published**.
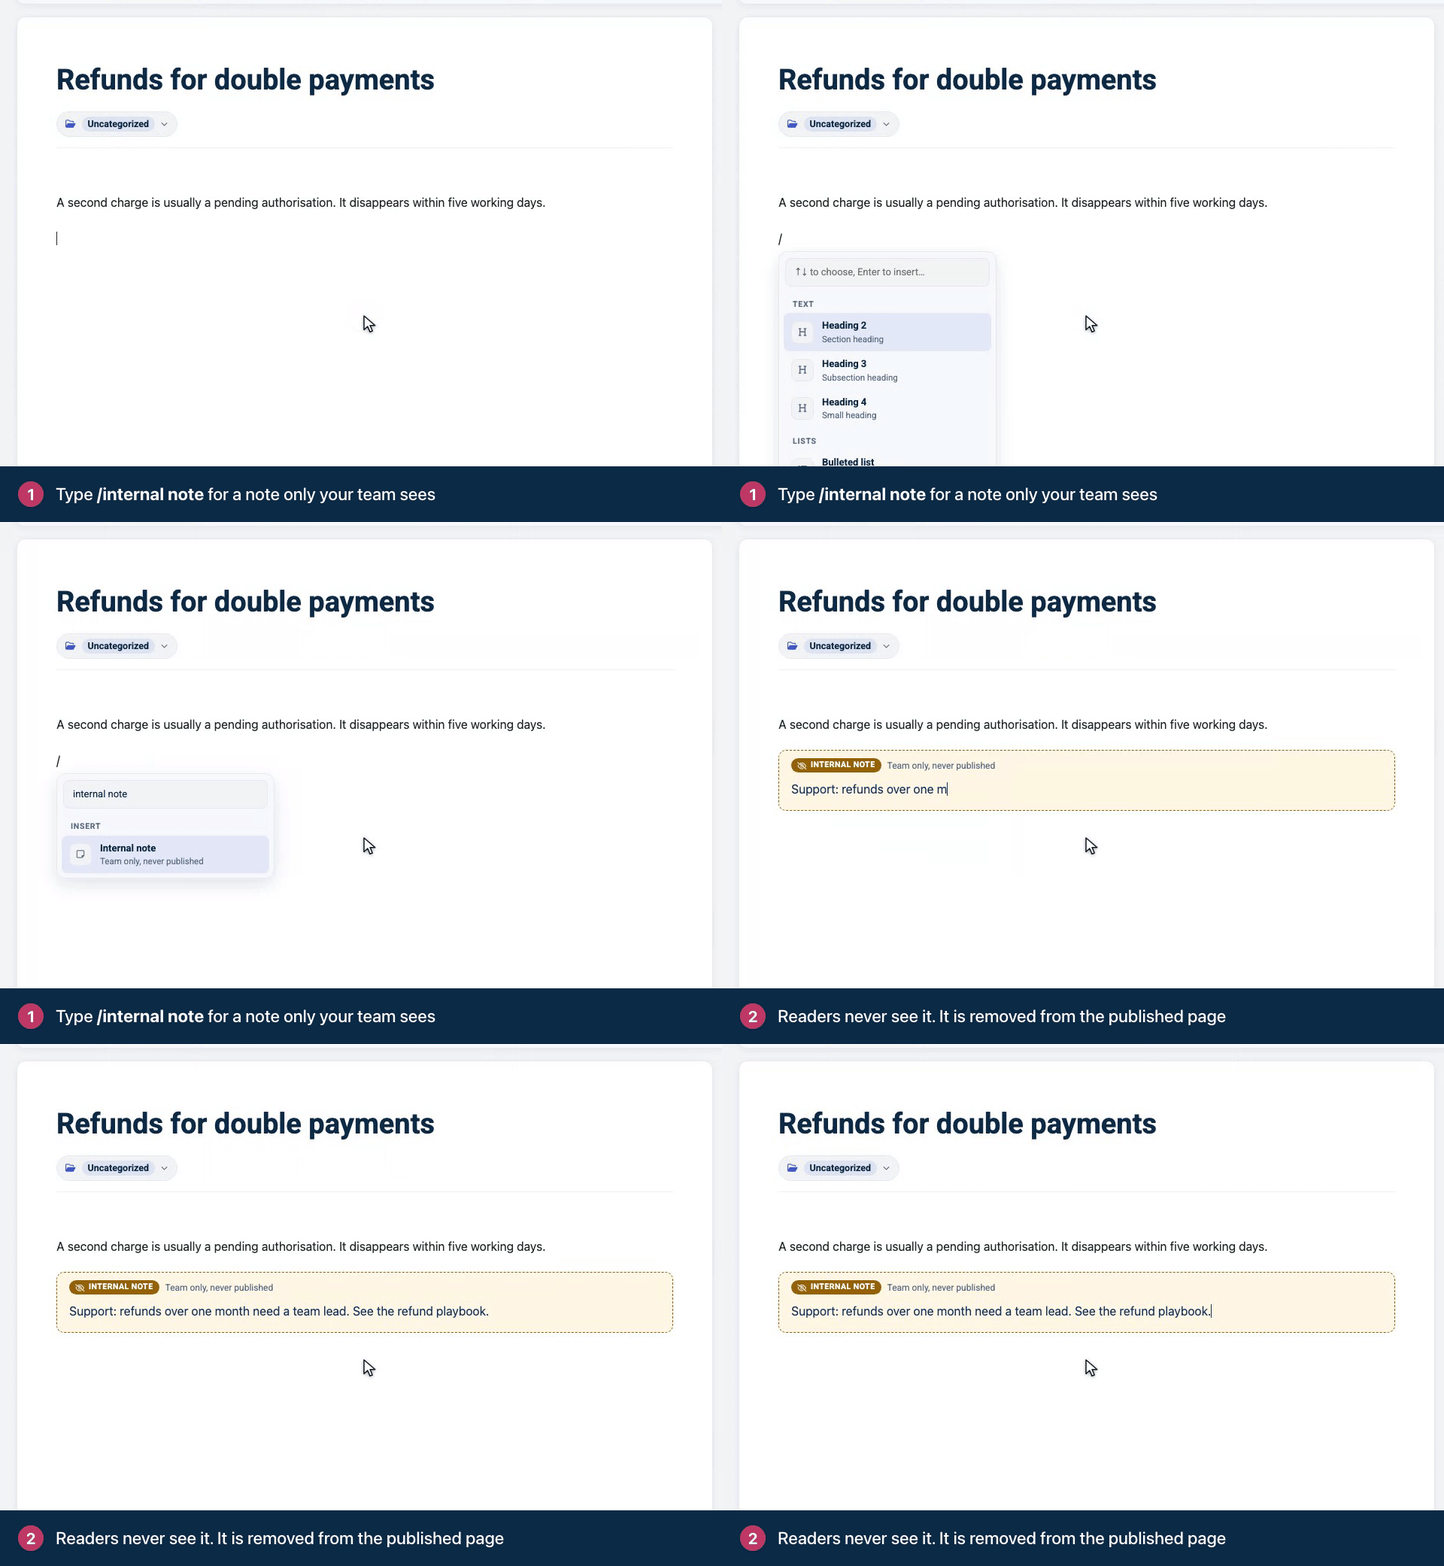
An internal note stays in the editor and never reaches readers.
A note can hold lists, links and other blocks, like the rest of the article. To remove a note, delete its text, then press Backspace once more in the empty note.
Picking **Internal note** in the menu again while your cursor is inside a note doesn't delete it. It turns the note back into normal text, which readers will see once you publish.
## Comment on a selection
1. Select the words you want to comment on.
2. In the toolbar, click **Comment on this selection (team only)** (the speech bubble).
3. Write your comment and click **Comment**, or press ⌘Enter (Ctrl+Enter on Windows).
The words stay highlighted for your team. Click the highlight to read the thread, add a **Reply**, or **Resolve** it, which removes the highlight. The comment count in the top bar opens the **Comments** panel, where the **Team** tab lists every open thread in the article.
Comments work once the article has been saved, and each comment can be up to 5,000 characters. Adding or resolving a comment saves the article. On a published article, that also publishes any edits you haven't published yet, unless your help center uses staged changes. If you're in the middle of an edit, finish it first.
## Where notes and comments stay hidden
Internal notes and comments are removed from everything readers can reach: the published article, help center search, AI Answers and the widget. Article content you fetch through the API leaves them out too. Three things to know:
- **Your team's view:** when you're signed in as a team member, the published article and its preview still show internal notes. Readers never see them.
- **Helpdesk sidebars:** in apps like Front and Zendesk, your agents can read internal notes next to the article. Notes are left out when an agent inserts the article into a reply.
- **PDF exports from the dashboard** are made for your team and include internal notes. Check them before you share one outside your team.
## Related articles
- [Flag articles for review](https://self.helpcenter.io/content/flag-for-review)
- [Get to know the article editor](https://self.helpcenter.io/content/article-editor)
---
Source: https://self.helpcenter.io/content/integrate-the-helpcenter-io-widget-with-the-intercom-messenger
# Integrate the widget with the Intercom Messenger
_Category: Integrations and API_
Show the widget first and open the Intercom Messenger only when a visitor can't find what they need. Visitors get instant answers from your help center, and your team only hears the questions your articles don't cover yet.
**Who can do this:** Owners and Admins, with access to your website's code · **Plans:** All plans
Want your articles inside Intercom instead, with Messenger search and Fin trained on them? That's the Intercom integration. See [Connect Intercom](https://self.helpcenter.io/content/intercom).
## Step 1: Install the Intercom Messenger
If the Intercom Messenger already runs on your website, skip to the next step. Otherwise, install it by following Intercom's instructions.
## Step 2: Hide the Intercom launcher
Visitors should only see the Messenger once they've asked for help, so hide Intercom's launcher and let the widget open the Messenger when it's needed.
If you use Intercom's JavaScript snippet, add `hide_default_launcher: true` to its `intercomSettings` object. If you haven't changed anything else, the first part of the snippet looks like this:
```
```
If you added Intercom some other way, for example through an integration, hide the launcher in your Intercom settings. Intercom explains how in [Turn off, show or hide the Intercom Messenger](https://www.intercom.com/help/en/articles/189-turn-off-show-or-hide-the-intercom-messenger).
## Step 3: Add the widget and connect it to Intercom
1. In your HelpCenter.io dashboard, click the gear icon in the left menu, then **Embeddables**.
2. On the **Widget** tab, click **Copy** on the **Installation** card.
The code you copied looks like this, with your own widget ID in place of `ab12c3`:
```
```
Add a comma after `app_id: 'ab12c3'`, and on the next line add an `onContactsRequest` function that opens the Messenger:
```
onContactsRequest: function(){if(window.Intercom) Intercom('show'); else console.error('Unable to find Intercom widget.')}
```
The finished code looks like this:
```
```
Paste it right before the closing `` tag of your website or web app.
## How it works
Visitors see the widget first and can search your help center or read an article to solve the problem themselves. When they ask to contact you from the widget, for example by clicking **I can't find what I'm looking for**, the widget calls your `onContactsRequest` function instead of showing its own contact form, and the Intercom Messenger opens.
Pay attention to what people ask in the Messenger, and add an article whenever a new question comes up. Over time, fewer visitors need to reach out with the same question.
## Good to know
- The widget stays open when the Messenger opens. To close it at the same time, add `window.hcWidget.hide();` inside your `onContactsRequest` function. See [Widget JavaScript API](https://developers.helpcenter.io/content/widget-javascript-api) on the developer portal.
- Not comfortable editing your website's code? Ask a developer, or [contact us](https://self.helpcenter.io/content/contact-support): we may be able to help.
## Related articles
- [Connect Intercom](https://self.helpcenter.io/content/intercom)
- [Add the widget to your website](https://self.helpcenter.io/content/install-the-widget)
- [Handle contact requests yourself](https://developers.helpcenter.io/content/widget-custom-contact) on the developer portal
- [Widget JavaScript API](https://developers.helpcenter.io/content/widget-javascript-api) on the developer portal
---
Source: https://self.helpcenter.io/content/write-faqs
# Write FAQs and add them to articles
_Category: Write articles_
FAQs are short question-and-answer articles. They answer the quick questions your customers ask most, and you can write them right next to the article they belong to.
**Who can do this:** Owners, Admins and Editors (only Owners and Admins can build new FAQ sections) · **Plans:** All plans (AI drafting: Catalyst plan, or the AI add-on on Bootstrap and Growth)
## Write an FAQ from an article
1. Open the article and save it, if it's new.
2. In the **Related FAQs** card on the right, click **New**.
3. Write the question the way a customer would ask it, then a short answer of up to 600 characters.
4. Click **Create FAQ**.
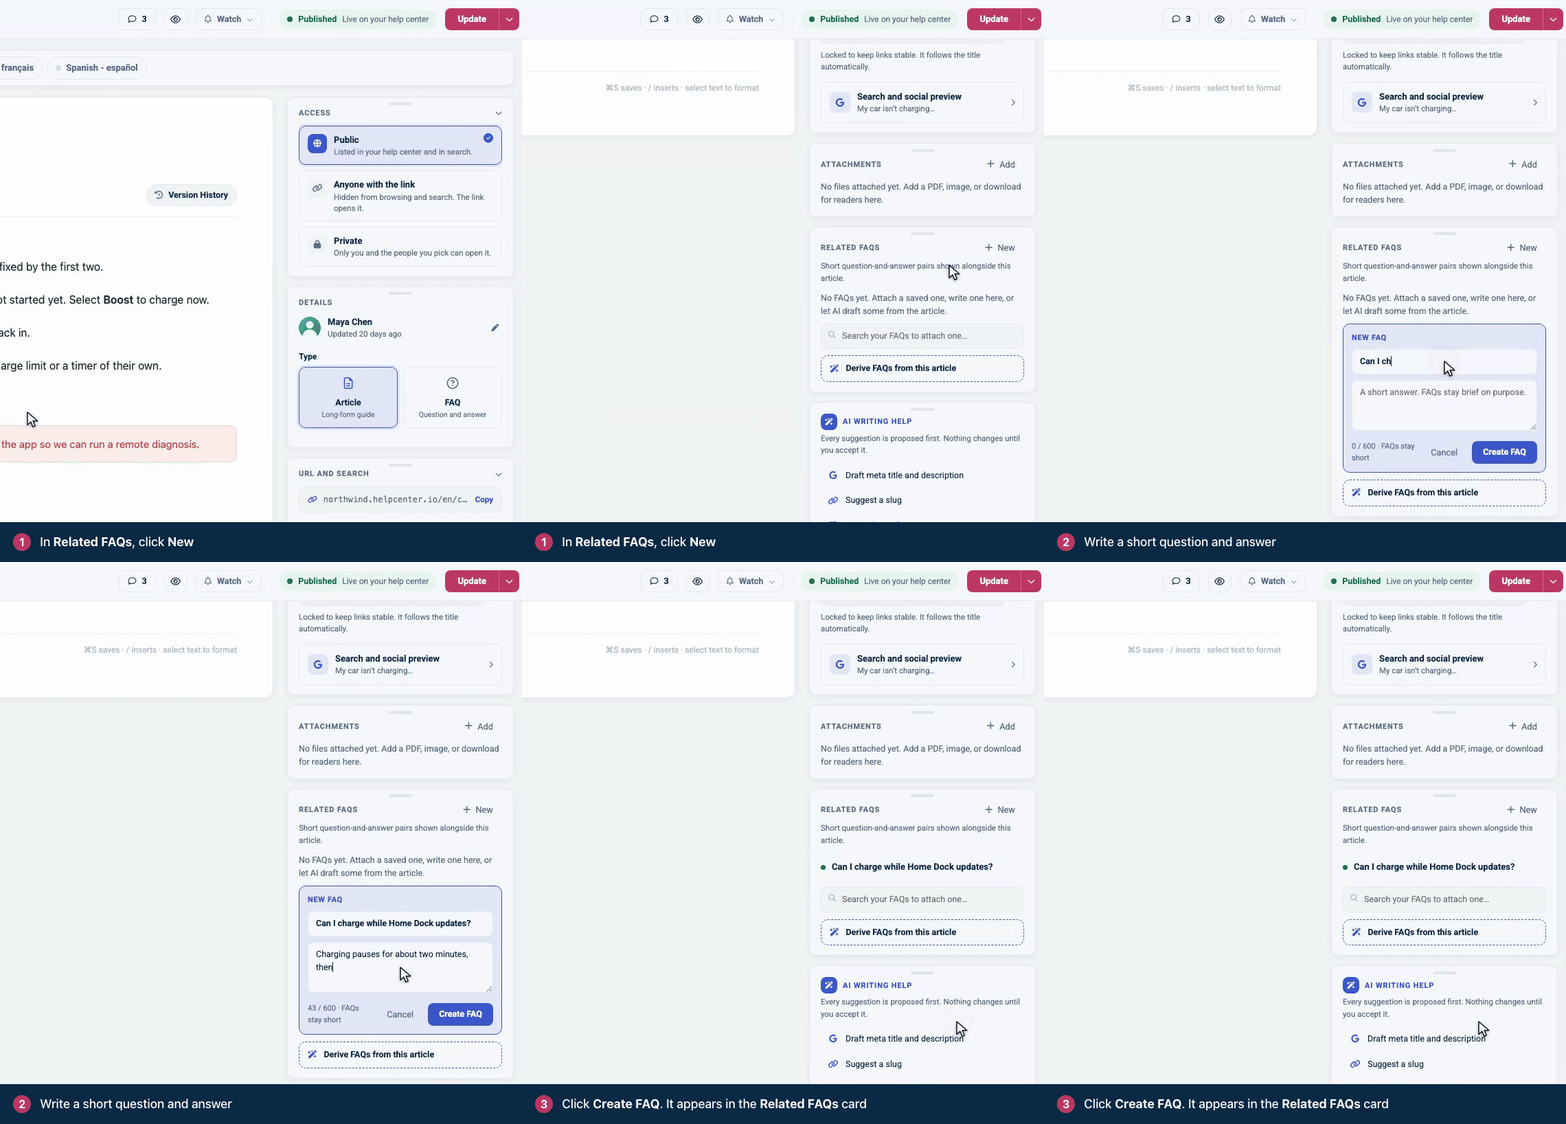
The new FAQ is attached to the article you're writing.
The FAQ is published straight away, in the same category as the article. If the article is in several categories, or in none, the FAQ goes into your help center's oldest category instead; open it in the editor to move it. To attach an FAQ you already have instead, type in **Search your FAQs to attach one…** and click it.
Each FAQ in the card has a **…** menu with **Publish** or **Unpublish**, **Edit**, **Open in editor** and **Detach**. Detaching only removes the FAQ from this article; the FAQ itself stays. When you edit an FAQ, the change shows everywhere it's attached.
A circular-arrows icon next to an FAQ means the article changed after the FAQ was last updated. Check the answer, then click the icon to mark the FAQ as up to date.
## Let AI draft FAQs
With AI writing help, click **Derive FAQs from this article** at the bottom of the card. AI reads the article and drafts FAQs, each marked with a wand icon. They're saved as drafts, so readers don't see them yet. Check each one, edit it if needed, and publish it from its menu. When several drafts are waiting, a button at the top of the card publishes them all at once.
## Turn an article into an FAQ
Any article can be an FAQ. In the **Details** card, set **Type** to **FAQ**. The title becomes the question and the content becomes the answer. FAQs are capped at 600 characters, so shorten a longer article first.
When you open an FAQ in the editor, its side panel shows **Attached to articles** instead of Related FAQs: every article it's attached to, each with **Open in editor** and **Detach**.
## Where readers find FAQs
- **Category pages:** the FAQs in a category appear as expandable questions at the top of the category page. You can change this in the template editor (**Pages** → **Category** → **Separate FAQs**). See [Customize category and article lists](https://self.helpcenter.io/content/category-and-article-lists).
- **The FAQs component:** add it to your home page, or to a category or search page, in the template editor. It lists every FAQ, or the FAQs of one section. See [Add, move and remove components](https://self.helpcenter.io/content/components).
- **FAQ sections:** sets of FAQs that you place inside an article or embed on your own website. See [Embed FAQ sections on your website](https://self.helpcenter.io/content/faq-sections).
- **Search:** FAQs show up in your help center's search results like any article.
The **Related FAQs** card keeps track of which FAQs belong with an article, but your published article page doesn't list them today. To show FAQs inside an article, add an FAQ section to it.
## Add an FAQ section to an article
1. On an empty line, type `/faq` and pick **FAQ section**.
2. Under **Saved sections**, pick a section. Owners and Admins can also switch to **Build custom**, give the section a title and search for the FAQs and articles to put in it.
3. Click **Insert section**.
## Related articles
- [Embed FAQ sections on your website](https://self.helpcenter.io/content/faq-sections)
- [Customize category and article lists](https://self.helpcenter.io/content/category-and-article-lists)
- [Write faster with AI writing help](https://self.helpcenter.io/content/ai-writing-help)
---
Source: https://self.helpcenter.io/content/delete-and-restore-articles
# Delete and restore articles
_Category: Organize and publish_
Deleting an article moves it to Trash, so a slip is never final. Restore it with its history whenever you need it, or delete it for good.
**Who can do this:** Owners, Admins and Editors (deleting permanently and redirects: Owners and Admins) · **Plans:** All plans
## Delete and restore an article
1. On **Articles**, open the **…** menu on the article and choose **Delete**.
2. Click **Delete** to confirm. The article moves to Trash.
3. To bring it back, click **Trash** in the left menu.
4. Open the **…** menu on the article and choose **Restore**.
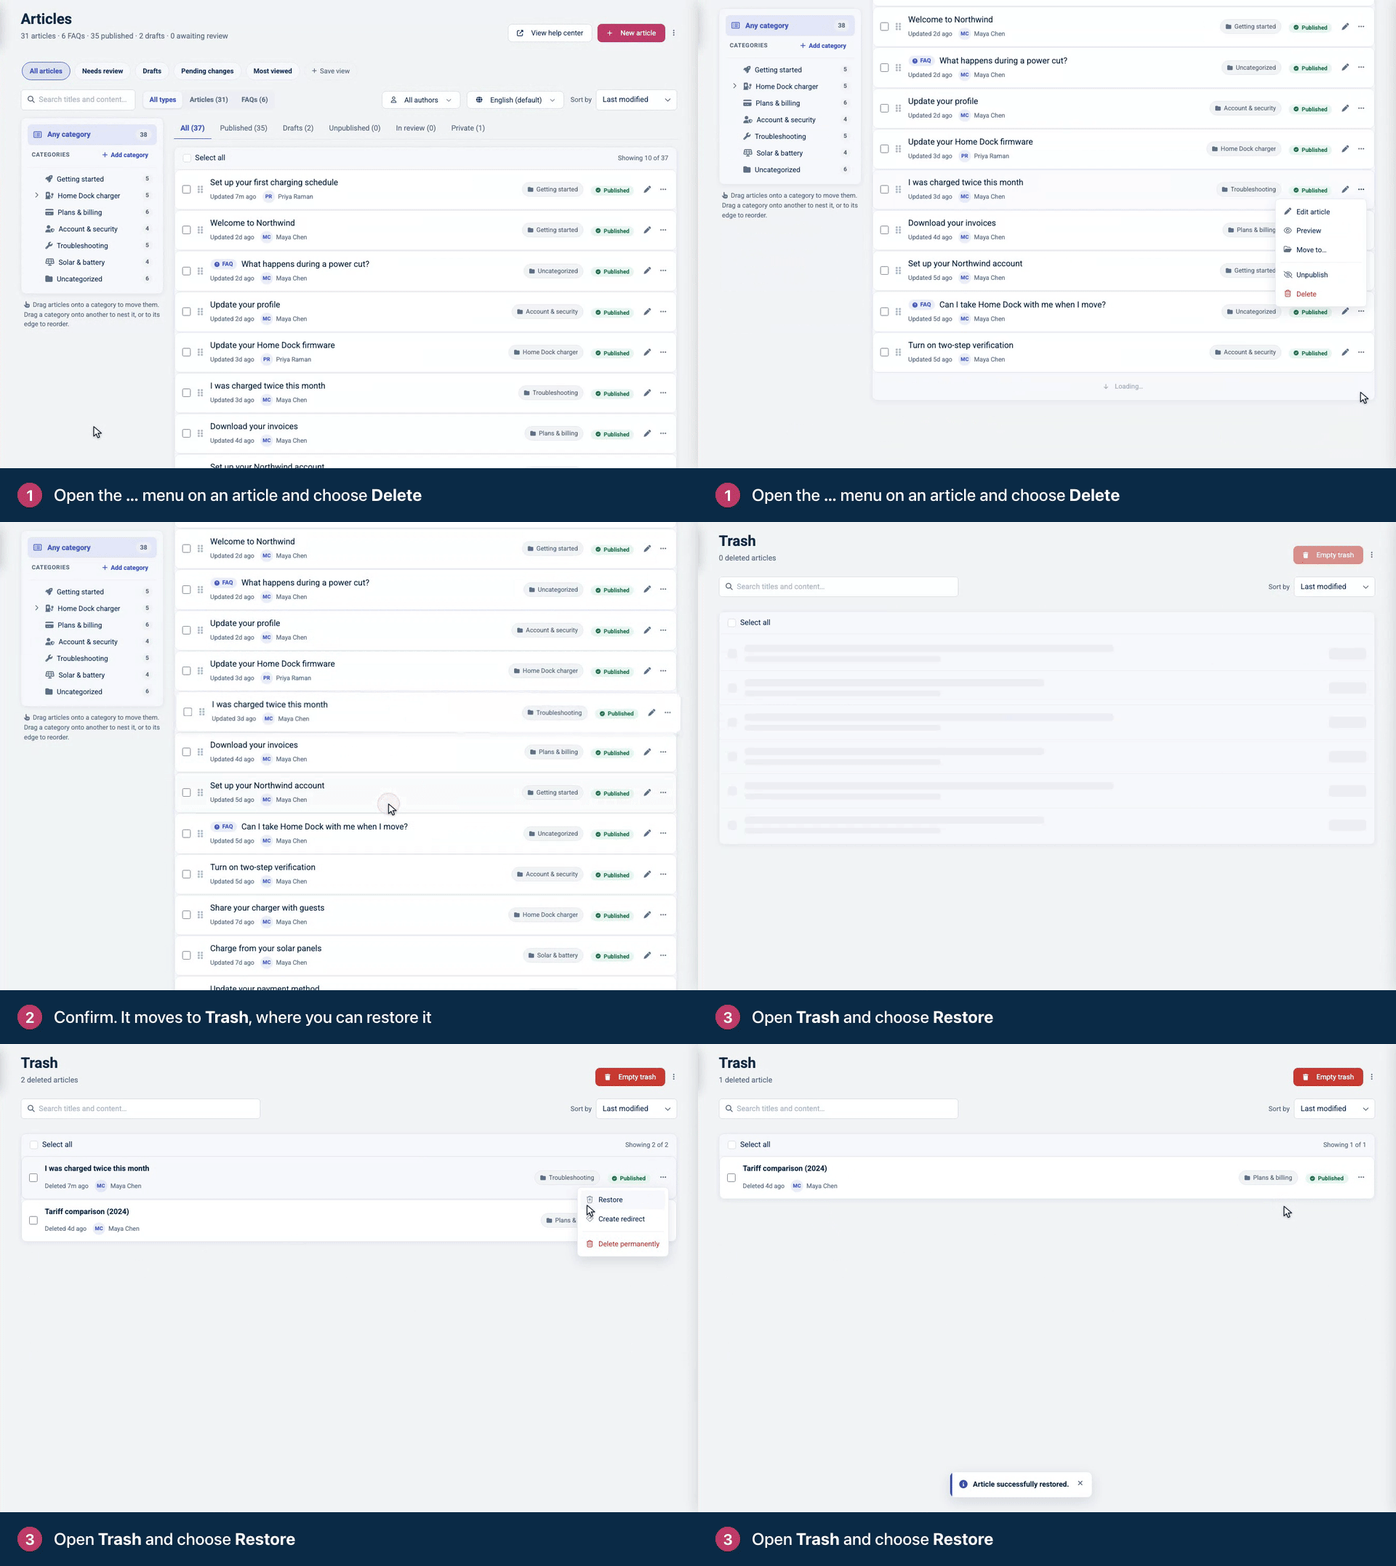
Restored articles come back as they were when you deleted them.
A restored article comes back with its content, category, settings and version history. If it was published when you deleted it, it's live again as soon as you restore it. A draft comes back as a draft.
You can also delete an article from the editor (the arrow next to **Publish** or **Update**, then **Move to trash**), or tick several articles and click **Delete** in the bar.
## What happens to a deleted article
- Readers get a not-found page at its address.
- It drops out of your help center's search, the widget and AI Answers.
- It stays in Trash, with its history, until an Owner or Admin deletes it permanently.
## Send visitors to another page
1. In **Trash**, open the **…** menu on the article and choose **Create redirect**.
2. Under **Redirect to**, enter the full address of the page that replaces it, starting with https://.
3. Click **Create**.
Anyone who opens the deleted article's address now lands on that page. For other old addresses, see [Redirect old links to the right page](https://self.helpcenter.io/content/custom-redirects).
## Delete permanently
- **One article:** in **Trash**, open the **…** menu, choose **Delete permanently** and confirm.
- **Everything in Trash:** click **Empty trash**, type your password and click **Empty trash**.
Permanently deleted articles can't be recovered, and neither can their version history.
## Troubleshooting
**Delete permanently or Create redirect doesn't work for me.** These need an Owner or Admin. **Empty trash** only shows for them too.
**A restored article went live straight away.** It was published when it was deleted. If it shouldn't be live, unpublish it. See [Unpublish an article](https://self.helpcenter.io/content/unpublish-an-article).
## Related articles
- [Unpublish an article](https://self.helpcenter.io/content/unpublish-an-article)
- [See and restore earlier versions of an article](https://self.helpcenter.io/content/article-versions)
- [Redirect old links to the right page](https://self.helpcenter.io/content/custom-redirects)
---
Source: https://self.helpcenter.io/content/article-editor
# Get to know the article editor
_Category: Write articles_
The article editor is where you write, format and publish your help articles. Here's what each part of the screen does, so you always know where to find a tool.
**Who can do this:** Owners, Admins and Editors (Translators work in your other languages) · **Plans:** All plans
## Open the editor
- **A new article:** go to **Articles** and click **New article**.
- **An existing article:** open the **…** menu on its row and choose **Edit article**. Or click the row, then **Open in editor**.
## Write in the canvas
The canvas in the middle of the screen is your article.
1. Type a title at the top. Use the words your customers would search for.
2. Pick a category from the pill under the title.
3. Click below the title and start writing. On an empty line, type `/` to insert a block, such as a heading, a list, an image or a table.
4. Select any text to format it or turn it into a link.
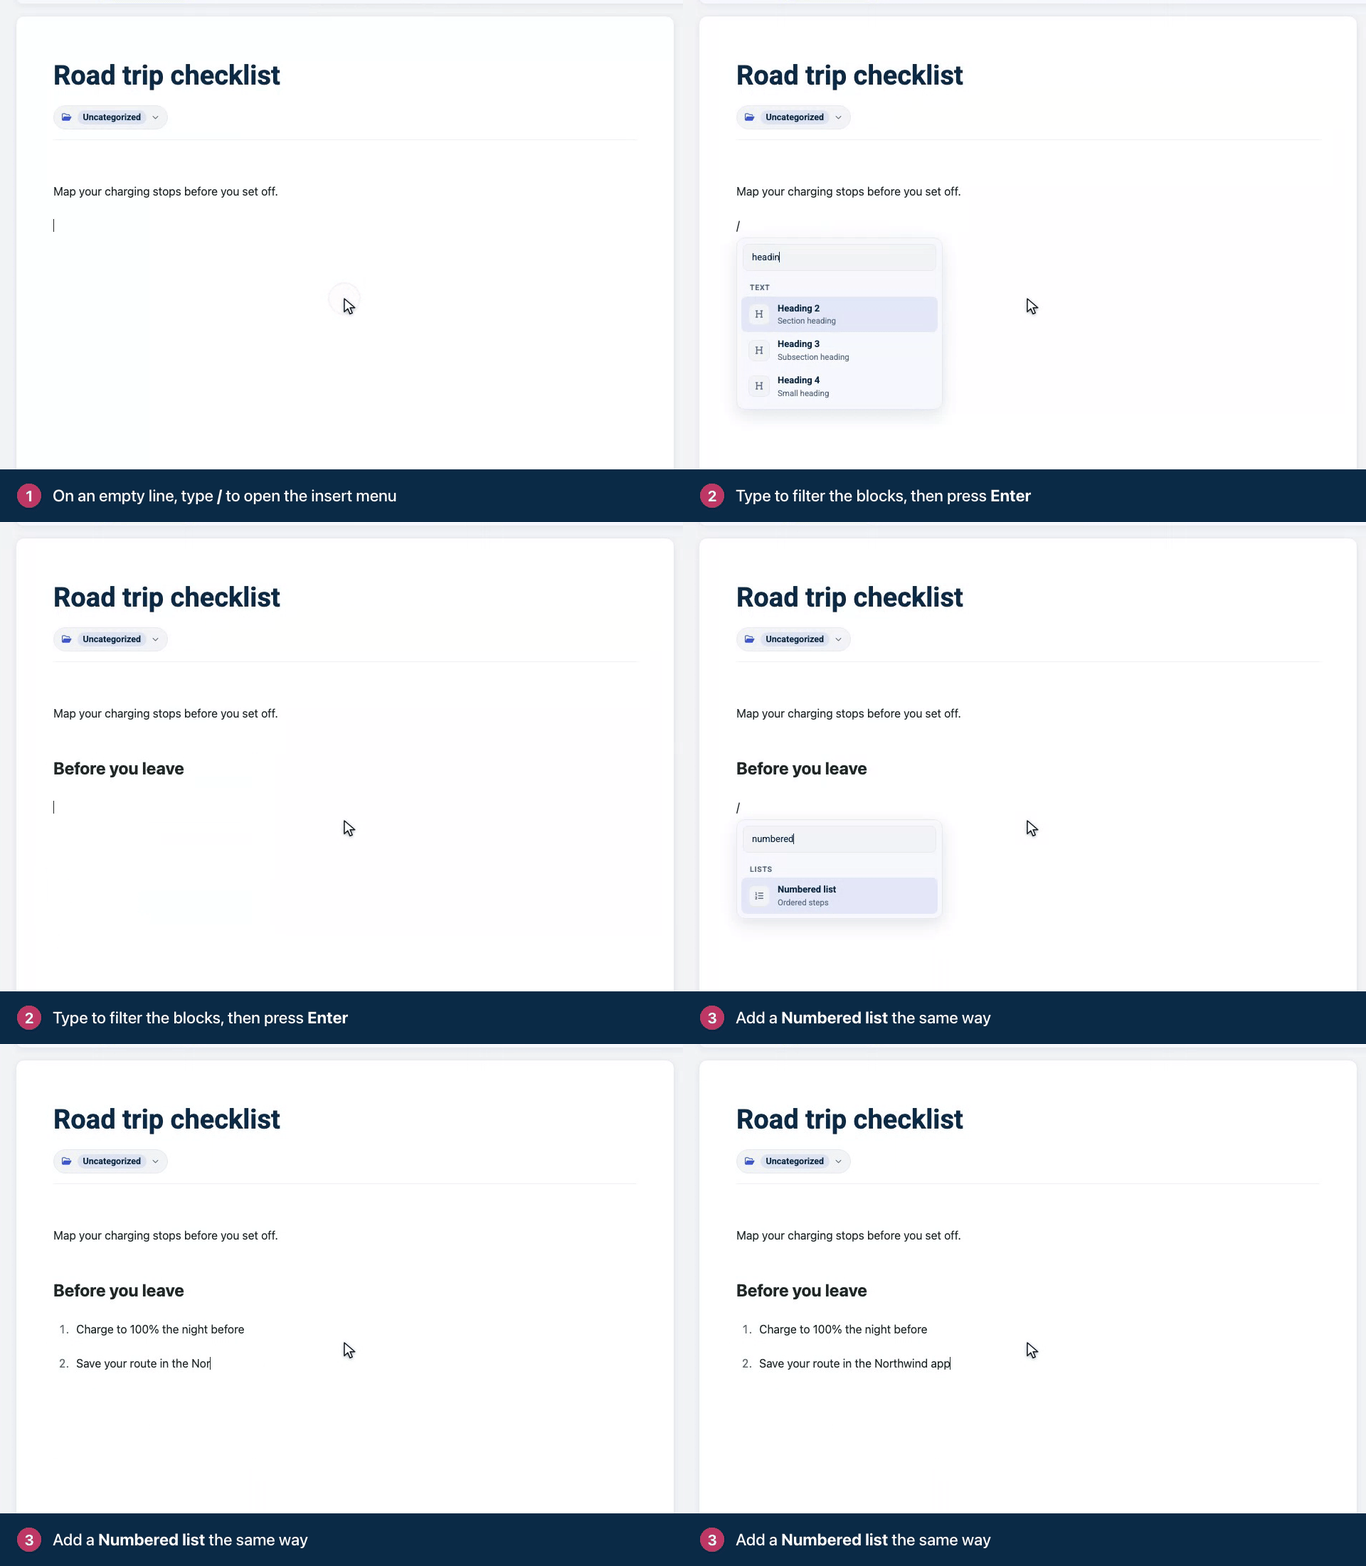
Type / on an empty line to add any block.
Once the article is saved, the **Version History** pill next to the category shows earlier versions. The line under the canvas counts your words and estimates the reading time.
## The top bar
- **Articles** (with the back arrow) returns to your article list.
- **New** starts another article in a new tab: **Blank article**, **From a template** or **Duplicate this article**. It appears once the article is saved.
- **Search articles…** finds and opens another article. Press ⌘K (Ctrl+K on Windows) to open it from anywhere in the editor.
- The speech bubble with a number opens **Comments**: your team's comments and the ones readers left.
- The eye icon (**Preview article**) opens the saved article in a new tab, the way readers will see it.
- **Watch** notifies you when someone changes the article.
- The status pill shows if your work is saved and live (see the table below).
- **Save draft** saves your work without publishing it. On a published article, it only appears if your help center uses staged changes.
- **Publish** makes a draft live. On a published article the button reads **Update**, or **Publish changes** when you have staged changes. The arrow next to it (**More publish actions**) holds **Insert template**, **Save as template**, the review options, **Unpublish (back to draft)** and **Move to trash**.
## What the status pill means
| Status | What it means |
| --- | --- |
| **Not saved** | The article only exists in this browser. Click **Save draft** to keep it. |
| **Unsaved changes** | You changed a saved draft. Click **Save draft** to keep the changes. |
| **Draft saved** | Saved to your account, and not published. |
| **Published** | Live on your help center. |
| **Unpublished edits** | The article is live, but your latest edits aren't. Click **Update** to publish them. |
| **Staged changes** | Only on help centers that use staged changes: your edits are saved, and readers still see the live version until you publish them. |
A brand-new article stays in this browser until you save it, and a banner reminds you. If you switch devices or clear your browser first, the draft is lost, so save early.
## The right-hand panel
| Card | What you do there |
| --- | --- |
| **Access** | Choose who can read the article: **Public**, **Anyone with the link** or **Private**. |
| **Details** | Change the author, and set the type: **Article** or **FAQ**. |
| **URL and search** | Copy the article's link, change its slug, and set the title and description search engines show. |
| **Attachments** | See the files attached to the article and add more. |
| **Related FAQs** | Write or attach short questions and answers that belong with the article. |
| **AI writing help** | Draft the search title and description, suggest a slug, write alt text and check the structure. Catalyst plan, or the AI add-on on Bootstrap and Growth. |
Drag a card by its grip to rearrange the panel. The editor remembers your layout.
## Work in your other languages
If your help center has more than one language, a **Language** bar sits above the canvas. Click a language to write that version. The **Released** switch decides when readers can see a translation. See [Translate an article](https://self.helpcenter.io/content/translate-an-article).
## Related articles
- [Add headings, lists and other blocks](https://self.helpcenter.io/content/add-blocks)
- [Format text](https://self.helpcenter.io/content/format-text)
- [Publish an article](https://self.helpcenter.io/content/publish-an-article)
- [Keyboard shortcuts in the article editor](https://self.helpcenter.io/content/editor-shortcuts)
- [Preview an article before you publish](https://self.helpcenter.io/content/preview-an-article)
---
Source: https://self.helpcenter.io/content/publish-an-article
# Publish an article
_Category: Organize and publish_
Publish an article to put it on your help center, where readers can browse to it, search for it and get answers from it. Until you publish, it's a draft that only your team can see.
**Who can do this:** Owners, Admins and Editors · **Plans:** All plans
## Publish from the editor
1. Open the draft from **Articles**, or write a new one. Once a draft is saved, the status pill in the top bar reads **Draft saved**: it's in your account, and readers can't see it.
2. When it's ready, click **Publish** in the top right corner.

The status pill switches to Published as soon as the article is live.
You'll see "Published. Your customers can read this now." A new article doesn't need saving first: **Publish** saves and publishes it in one step. To check how it will look before you publish, save the draft and click the eye icon (**Preview article**) in the top bar.
## Publish from the Articles page
- **One article:** open the **…** menu on its row and choose **Publish**, or click the article and then **Publish** in **Article details**.
- **Several articles:** tick them and click **Publish** in the bar at the bottom. See [Change many articles at once](https://self.helpcenter.io/content/bulk-actions).
## What happens when you publish
- The article goes live at its own address on your help center and appears in its category.
- Readers can find it with your help center's search and in the widget, and AI Answers can use it if you have AI Answers turned on.
- It's added to your help center's sitemap, so search engines can find it.
- On a help center with more than one language, publishing puts your default language live. Each other language appears once its translation is released, and the confirmation names any language that has no translation yet. See [Translate an article](https://self.helpcenter.io/content/translate-an-article).
The article's **Access** setting and its category decide who can see it. An article set to **Anyone with the link** stays out of navigation and search. An article set to **Private**, or filed in a category that isn't shared with everybody, only shows to the people allowed to see it. See [Choose who can read an article](https://self.helpcenter.io/content/article-access).
## More actions in the Publish menu
The arrow next to **Publish** (or **Update**, once the article is live) opens more actions:
| Action | What it does |
| --- | --- |
| **Preview article** | Opens the saved article in a new tab, the way readers will see it. Only your team can open the preview. |
| **Insert template** | Adds one of your content templates to the end of the article. |
| **Save as template** | Saves the article's content as a template you can start new articles from. |
| **Schedule for review** | Sets a date to re-check the article. See [Flag articles for review](https://self.helpcenter.io/content/flag-for-review). |
| **Flag for review** | Asks a teammate to check the article now. |
| **Unpublish (back to draft)** | Takes a live article off your help center. See [Unpublish an article](https://self.helpcenter.io/content/unpublish-an-article). |
| **Move to trash** | Deletes the article. You can restore it from Trash. See [Delete and restore articles](https://self.helpcenter.io/content/delete-and-restore-articles). |
**Preview article**, the review actions and **Move to trash** appear once the article has been saved.
## Publish at a set time
**Publish** puts an article live straight away. To publish at a chosen date and time, add the article to a change set and schedule the release. Change sets are in early preview on the Catalyst plan. See [Release many changes together with change sets](https://self.helpcenter.io/content/change-sets).
## Troubleshooting
**"Title is required. Please add a title before saving the article."** Give the article a title, then click **Publish** again.
**The article doesn't show on my help center.** Refresh the page after a moment. If it's still missing, check the article's **Access**, its category's **Share with** setting and, on a multilingual help center, whether the translation is released. See [Someone can't see an article or the help center](https://self.helpcenter.io/content/cant-see-an-article).
## Related articles
- [Update a published article](https://self.helpcenter.io/content/update-a-published-article)
- [Unpublish an article](https://self.helpcenter.io/content/unpublish-an-article)
- [Preview an article before you publish](https://self.helpcenter.io/content/preview-an-article)
- [Edit live articles safely with staged changes](https://self.helpcenter.io/content/staged-changes)
---
Source: https://self.helpcenter.io/content/article-versions
# See and restore earlier versions of an article
_Category: Organize and publish_
Every article keeps a history of its changes: what changed, who changed it and when. Use it to see how an article evolved, or to undo a change that shouldn't have happened.
**Who can do this:** Owners, Admins and Editors · **Plans:** All plans (how far back the history goes depends on your plan)
## See an article's history
1. Open the article from **Articles**.
2. Click **Version History** above the article, next to its category.
3. Each entry says what changed, who made the change and how long ago. To see the change itself, click the compare icon next to it: you get the added and removed text for content edits, and the old and new value for everything else.
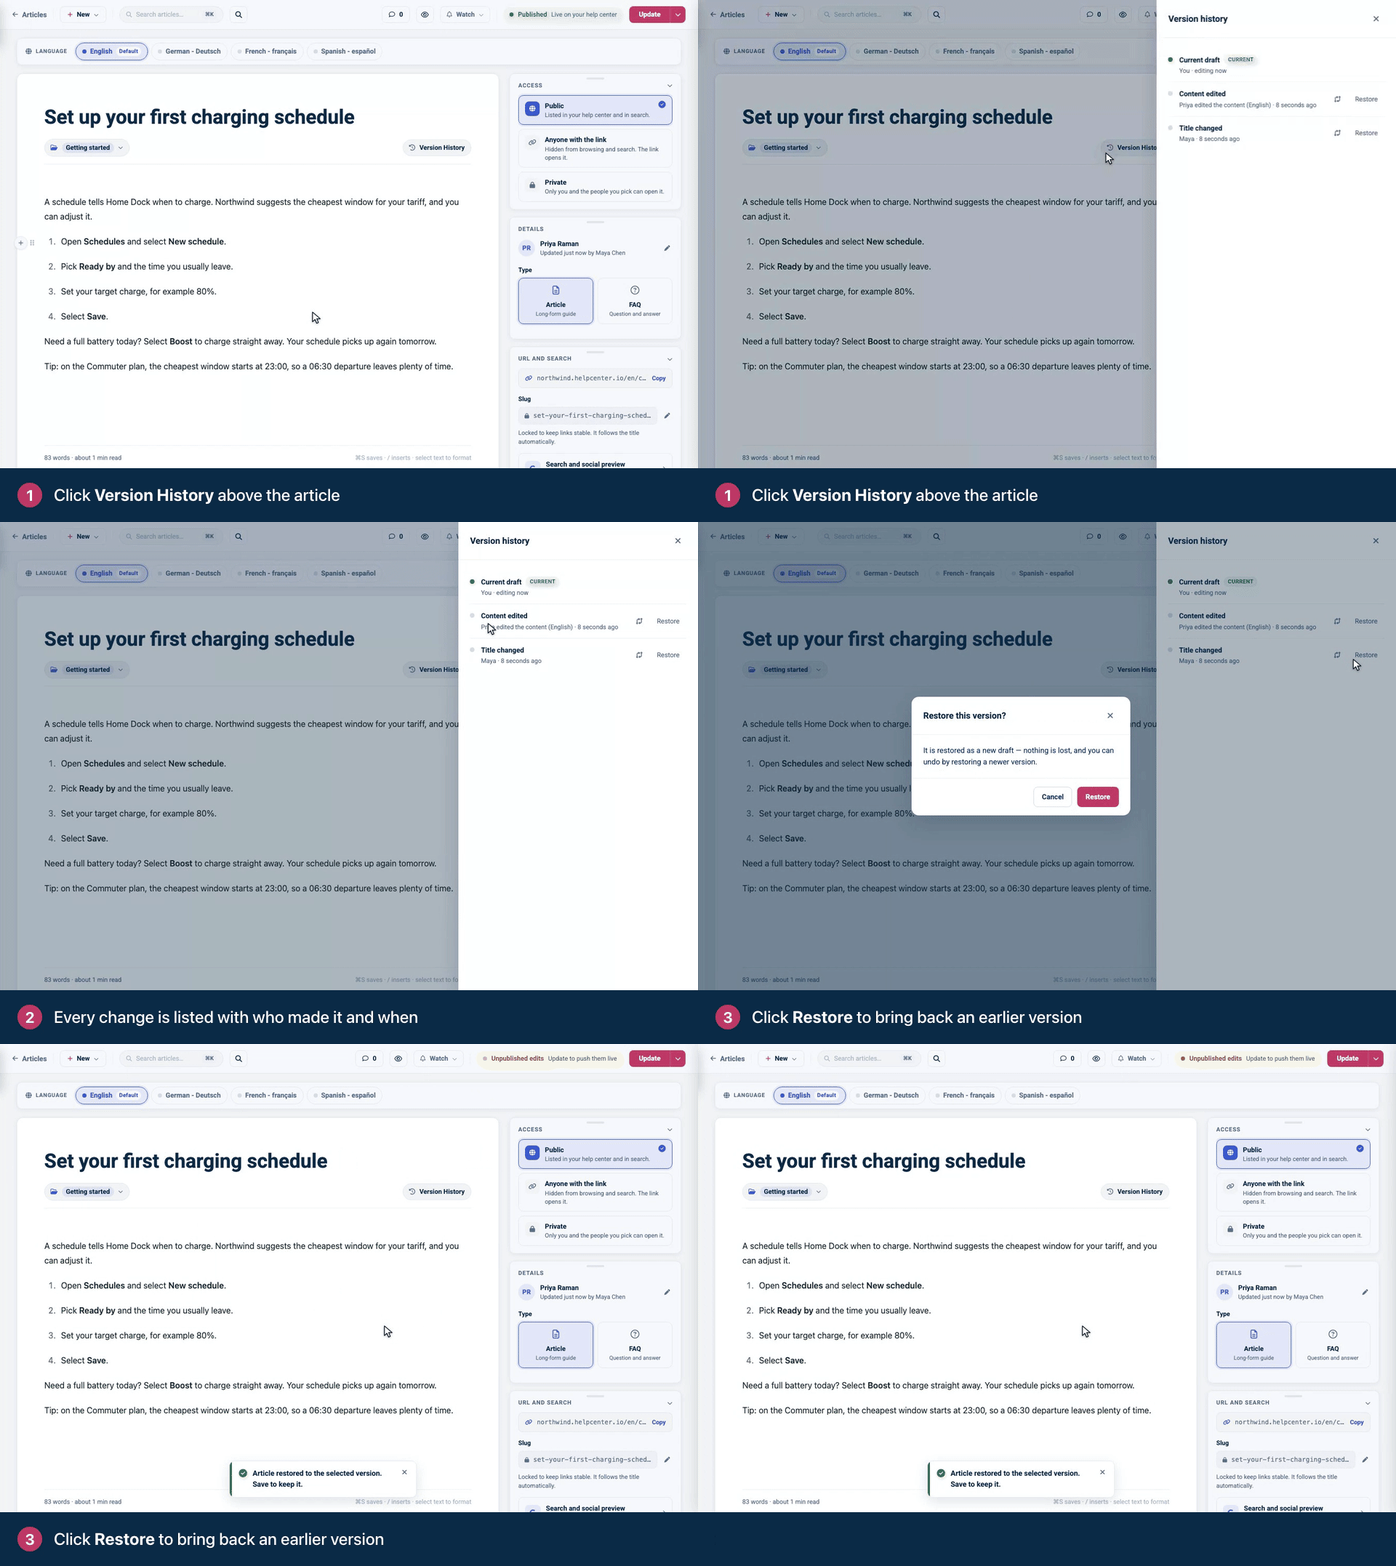
The newest changes are at the top.
## What the history tracks
| Entry | What changed |
| --- | --- |
| **Content edited** | The article's text, in the languages named in the entry. |
| **Title changed** | The title. |
| **Slug changed** | The article's URL. |
| **Category changed** | The category the article is filed in. |
| **Status changed** | The article was published or unpublished. |
| **Translation released** | A language was released to readers, or hidden again. |
Changes to other settings, such as the author or the article's access, aren't listed. The history shows 10 changes at a time: click **Load more** for older ones.
## Restore an earlier version
1. In **Version history**, find the change you want to undo and click **Restore** next to it.
2. Click **Restore** again to confirm.
Restore puts that part of the article back the way it was right before the change. For example, restoring a **Title changed** entry brings back the previous title, and the rest of the article stays as it is. The restore is recorded as a new entry, so you can undo it the same way.
**On a published article, Restore changes the live article right away.** The confirmation talks about a draft and the status pill then shows **Unpublished edits**, but readers see the restored version as soon as you confirm. Compare the change before you restore it.
Restoring a **Status changed** entry also switches the article back to its earlier status, so it can publish or unpublish the article. Restoring a **Translation released** entry releases or hides that language again.
## How far back the history goes
How much history you can see depends on your plan. When older changes fall outside it, a note at the bottom of the list tells you how many are hidden. See [Plans and pricing](https://self.helpcenter.io/content/plans-and-pricing).
## On help centers with staged changes
If your help center uses staged changes (Catalyst, early preview), **Version history** also shows:
- **Staged changes** at the top, marked **Not live**, with **Compare**, **Publish** and **Discard**.
- **Live version**: what readers see right now.
- **Previous live version** entries. Click **Restore**, then **Roll back**, to put that version live straight away. The version it replaces is archived first, so you can roll forward again.
See [Edit live articles safely with staged changes](https://self.helpcenter.io/content/staged-changes).
## Related articles
- [Update a published article](https://self.helpcenter.io/content/update-a-published-article)
- [Delete and restore articles](https://self.helpcenter.io/content/delete-and-restore-articles)
- [Edit live articles safely with staged changes](https://self.helpcenter.io/content/staged-changes)
---
Source: https://self.helpcenter.io/content/add-images
# Add images to an article
_Category: Write articles_
Screenshots show readers exactly where to click, and they cut down on follow-up questions. Add images from your computer, paste them from the clipboard or drag them in, and HelpCenter.io uploads them for you.
**Who can do this:** Owners, Admins and Editors · **Plans:** All plans
## Insert an image
1. On an empty line, type `/image` and press Enter.
2. Choose a file. It uploads straight into the article.
3. To add a caption, click under the image, where it says **Write a caption...**, and type.

Images upload as soon as you pick them.
## Paste or drag an image
- **Paste:** copy a screenshot or an image and press ⌘V (Ctrl+V on Windows) in the article.
- **Drag:** drag image files from your computer into the article. They land where you drop them.
A small picture, such as an icon or a button, that you paste or drop into a line of text stays in that line. Anything larger becomes a block image with room for a caption.
## Images inside a line of text
To show a button or an icon in the middle of a sentence ("Click the gear icon"), click in the sentence where the picture goes. Then click the **+** to the left of that line, pick **Inline image** and choose the file.
To switch any image between the two layouts, click it and choose **Inline** or **Block** in its toolbar. Only block images can have a caption, an alignment and zoom.
## What you can upload
JPEG, PNG, GIF and WebP images, up to 30 MB each. GIFs keep their animation, which makes them good for short screen recordings.
## Let readers zoom in
Readers can't zoom into an image unless you turn it on. Click the image and click **Zoom on click** in its toolbar. On the published article, readers then click the image to see it full size. Turn it on for detailed screenshots.
Instead of zoom, an image can link somewhere: click it, then **Link to**. An image can zoom or link, not both.
## Replace or remove an image
- **Replace:** click the image, click **Replace image** and pick the new file. The caption, alt text, size and alignment stay as they were.
- **Remove:** click the image and press Delete. For an image inside a line of text, click **Remove image** in its toolbar.
To resize an image, align it or add alt text, see [Resize images and add alt text](https://self.helpcenter.io/content/resize-images-and-add-alt-text).
## Troubleshooting
**"That file is not an image. Please choose a PNG, JPG, GIF or WebP."** The file isn't an image. Save it as one of those formats and try again.
**"Unsupported image type. Upload a JPEG, PNG, GIF, or WebP image."** Formats such as SVG and BMP aren't accepted. Convert the file to PNG first.
**"The maximum allowed image size is 30MB."** Make the image smaller, or crop it to the part readers need.
For other upload problems, see [An image or file won't upload](https://self.helpcenter.io/content/upload-problems).
## Related articles
- [Resize images and add alt text](https://self.helpcenter.io/content/resize-images-and-add-alt-text)
- [Use screenshots and GIFs well](https://self.helpcenter.io/content/screenshots-and-gifs)
- [An image or file won't upload](https://self.helpcenter.io/content/upload-problems)
---
Source: https://self.helpcenter.io/content/callouts
# Highlight tips and warnings with callouts
_Category: Write articles_
Callouts are colored boxes that lift a tip, a confirmation or a warning out of the flow of an article. Use them sparingly and readers will notice every one.
**Who can do this:** Owners, Admins and Editors · **Plans:** All plans
## Add a callout
1. On an empty line, type `/callout` and press Enter.
2. Under **Type**, pick a style: **Info**, **Success**, **Warning** or **Danger**. Each has its own icon, and you can pick a different one under **Icon**.
3. If you want a bold first line, add a **Title**. It's optional.
4. Write your text in **Message**. If you opened the menu by typing `/`, the message box starts with that slash, so delete it first.
5. Check the **Preview** and click **Add callout**.
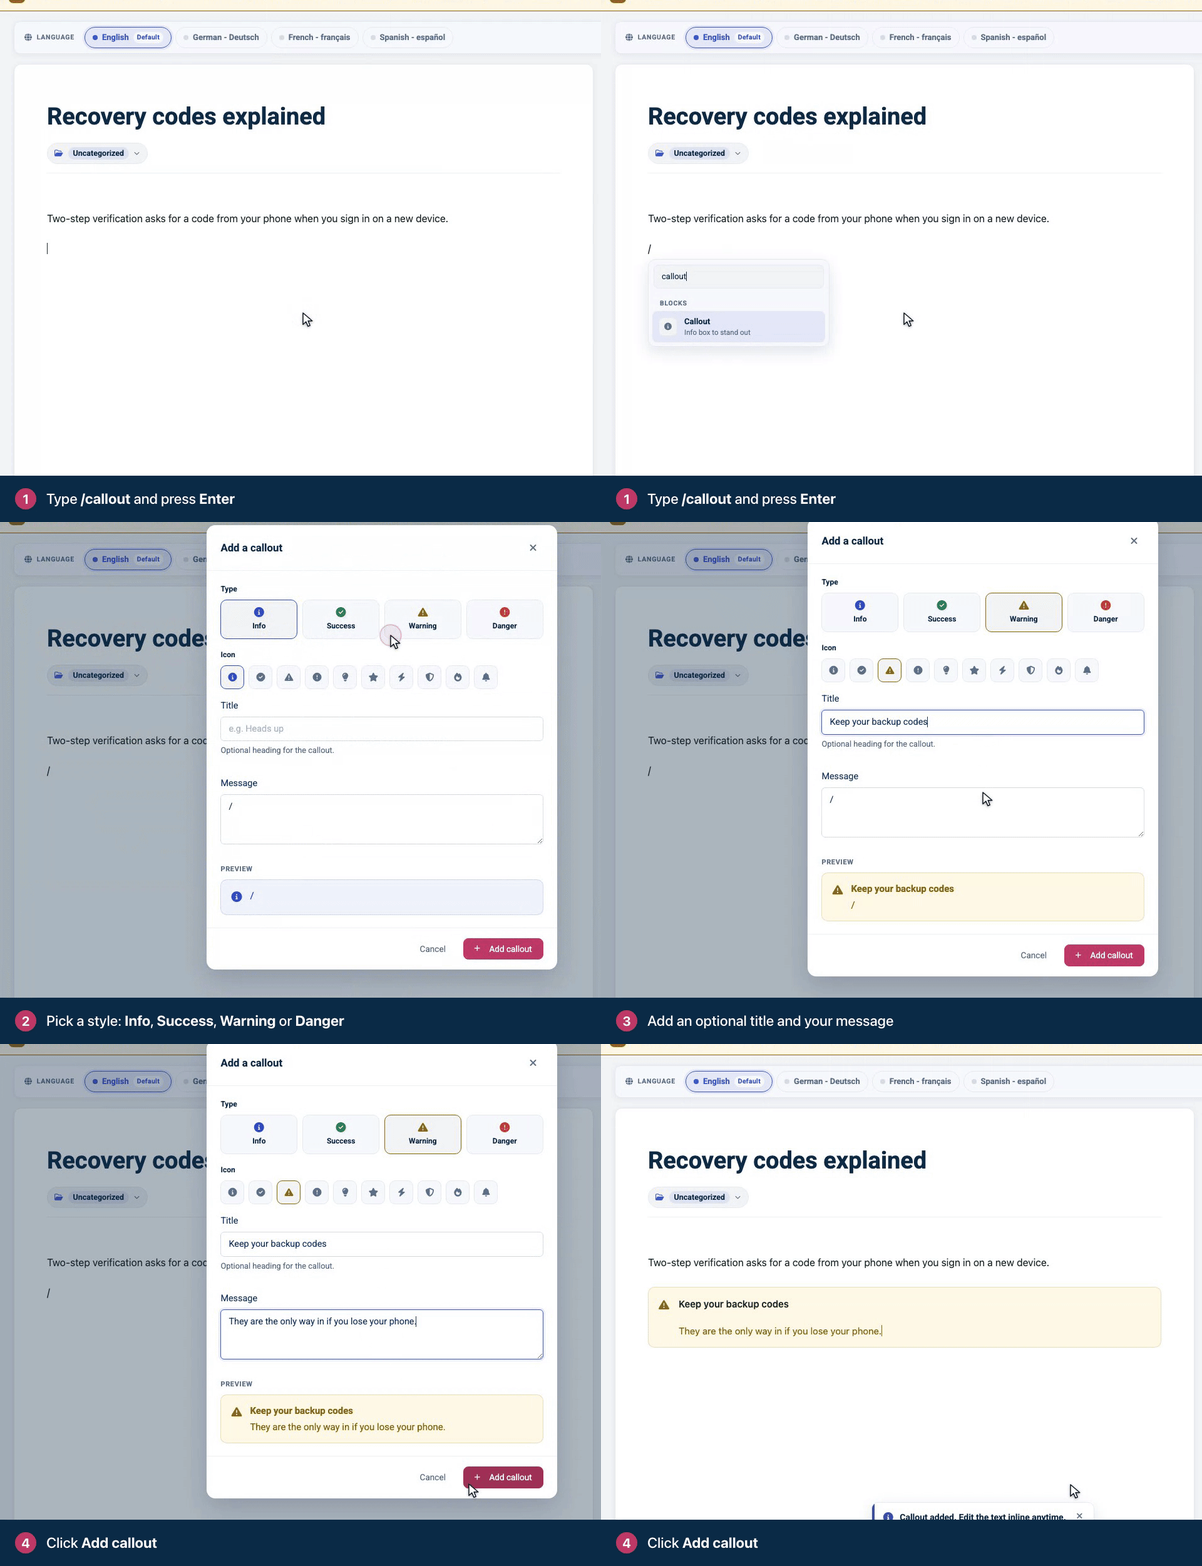
Pick a style, write the message, add the callout.
To turn a paragraph you've already written into a callout, click in it, click the **+** to the left of the line and pick **Callout**. Its text is already in the message box.
## The four styles
Here's how each style looks to your readers. The colors adapt to your theme, in light and dark mode.
**Info** adds helpful context, such as where a setting lives or what a term means.
**Success** confirms a good result or shares a tip that saves readers time.
**Warning** flags something that can trip readers up, such as a change that affects the whole team.
**Danger** warns about losing data, access or money. Say what would happen and how to avoid it.
## Edit or remove a callout
- **Change the text:** click in the callout and type.
- **Change the style, icon or title:** point at the callout, click **Edit**, make your changes and click **Save changes**.
- **Remove the box but keep the text:** click the **+** to the left of the callout and pick **Callout** again (it has a tick). The text stays as normal paragraphs.
## Use callouts well
- One or two per article is plenty. When everything stands out, nothing does.
- Keep each callout to one to three sentences.
- Place it right before the step it's about, not at the end of the article.
- Keep instructions in your numbered steps. A step hidden in a callout is easy to miss.
## Related articles
- [Add headings, lists and other blocks](https://self.helpcenter.io/content/add-blocks)
- [How to write help articles people actually read](https://self.helpcenter.io/content/how-to-write-help-articles)
---
Source: https://self.helpcenter.io/content/find-articles
# Find articles with search and filters
_Category: Organize and publish_
As your help center grows, the Articles page helps you find any article in seconds. Search by words, narrow the list by status, category or author, and save the views you use every day.
**Who can do this:** Owners, Admins, Editors and Translators · **Plans:** All plans
## Find an article
1. Click **Articles** in the left menu.
2. Type in the **Search titles and content…** box. The list updates as you type, and **Sort by** switches to **Best match**.
3. Click a status tab, such as **Published**, to narrow the list.
4. To keep this combination for later, click **Save view**.
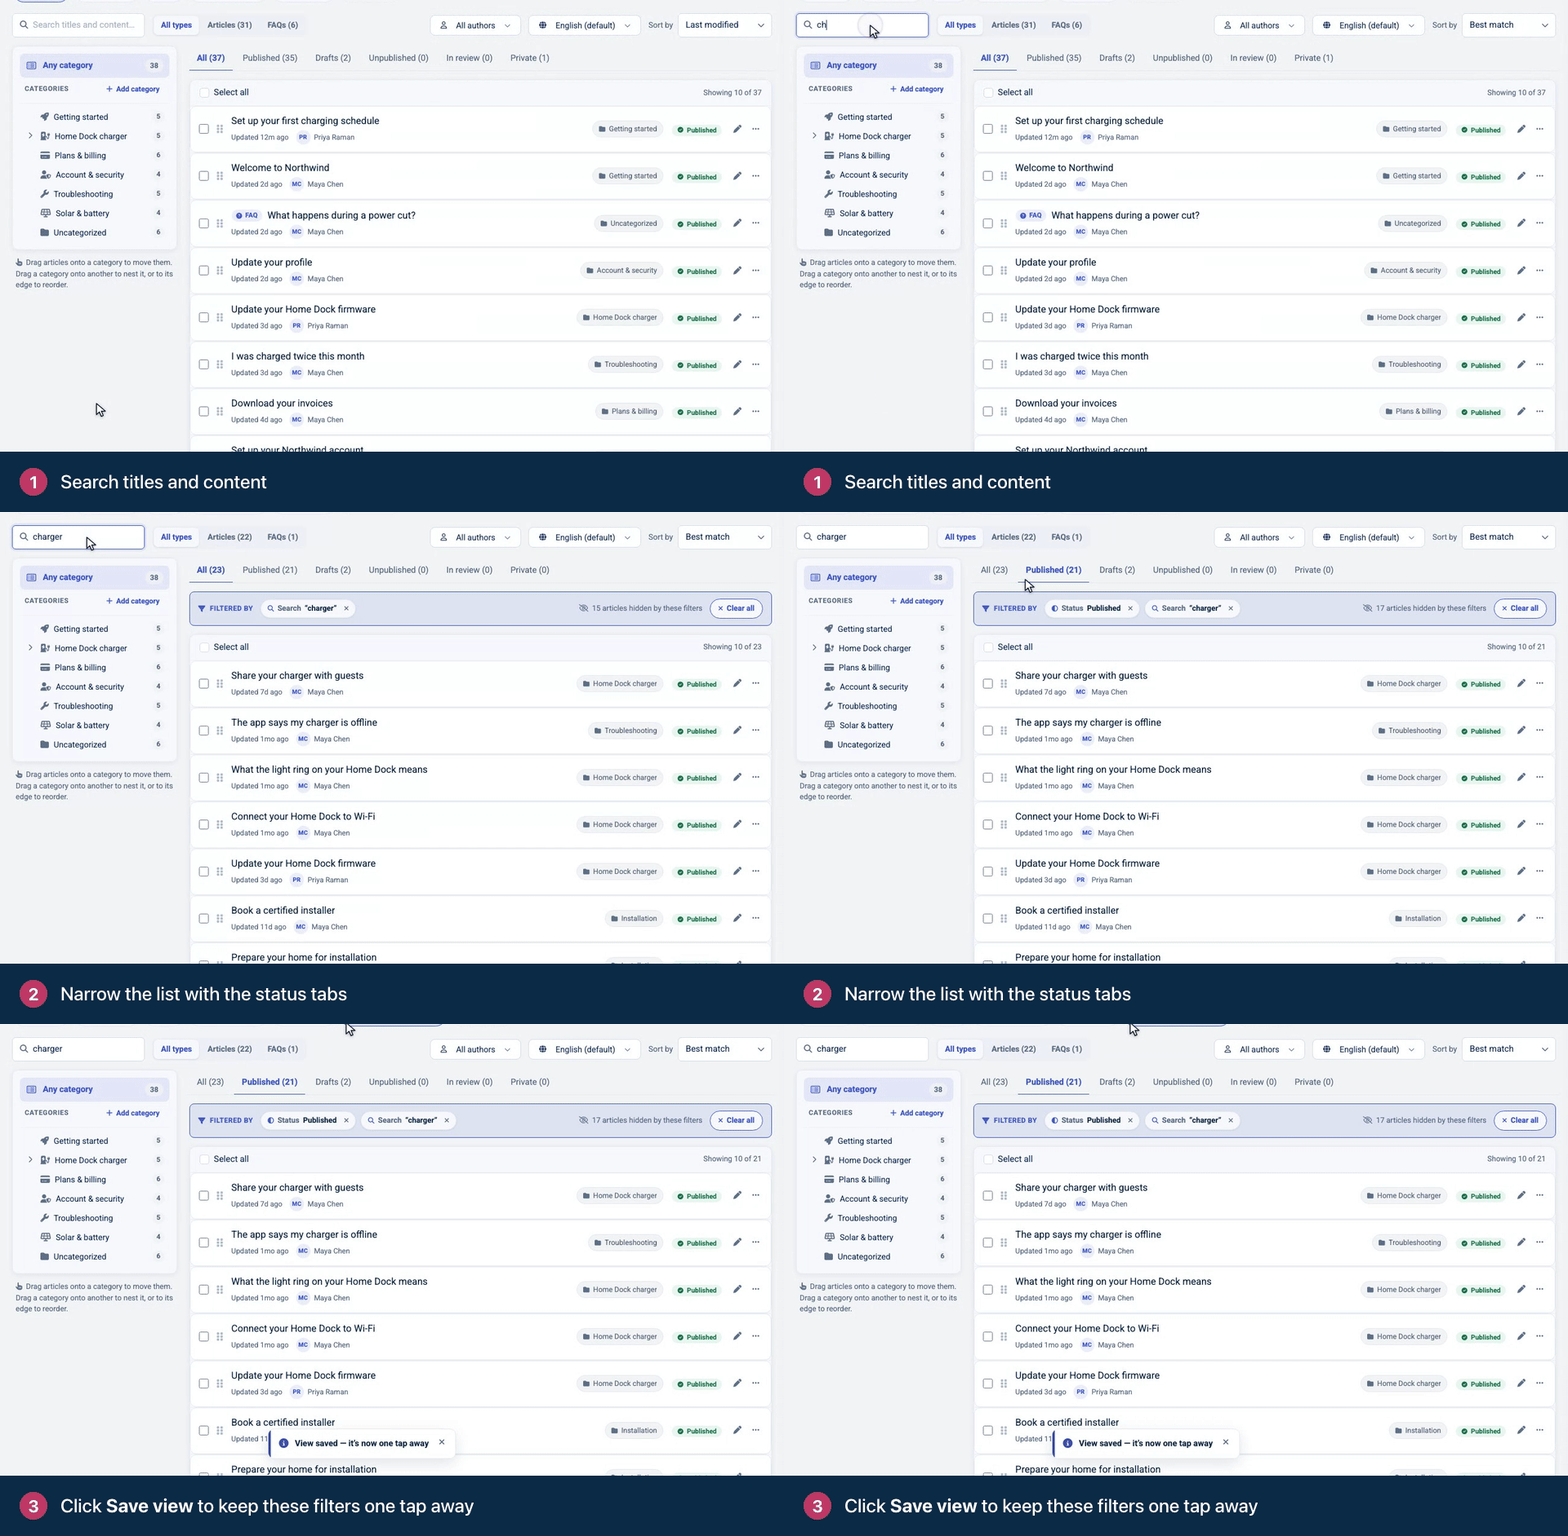
Saved views sit above the list, one click away.
Search also finds text in staged changes that aren't published yet, on help centers that use staged changes.
## Status tabs
| Tab | Shows |
| --- | --- |
| **All** | Every article. |
| **Published** | Articles that are live on your help center. |
| **Drafts** | Articles that have never been published. |
| **Unpublished** | Articles that were live and have been taken down. |
| **In review** | Articles flagged for review, or past their scheduled review date. |
| **Private** | Articles whose access is **Private** or **Anyone with the link**. |
Each tab shows how many articles it holds.
## Narrow the list
- **By category:** click a category in the **Categories** panel. **Any category** clears it.
- **By author:** open **All authors** and pick a teammate.
- **By type:** choose **Articles** or **FAQs**. This switch appears once your help center has FAQs.
- **By language:** on a help center with more than one language, pick a language from the language menu to work on its translations. Then show **Translated** or **Missing** articles, and look for rows marked **Not translated** or **Outdated**.
- **By staged changes:** on help centers that use staged changes, choose **Has staged changes** or **No staged changes**. You can also filter by change set.
Every filter you use shows as a chip next to **Filtered by**. Click the × on a chip to remove that filter, or **Clear all** to start over. When filters hide some articles, a note says how many.
## Sort the list
Use **Sort by** to order the list by **Last modified**, **Alphabetical**, **Most viewed** or **Most comments**. **Custom order** lets you drag articles into place inside a category. See [Change the order of articles and categories](https://self.helpcenter.io/content/reorder-articles-and-categories).
## Views
The views above the list give you common lists in one click: **All articles**, **Needs review**, **Drafts**, **Pending changes** (articles with staged changes) and **Most viewed**.
**Save view** saves your current search, tab, category, author and sort as a view of your own, named after what it filters. To remove a saved view, click the × next to its name.
Your saved views, and the filters you used last, are kept in this browser. Teammates don't see them, and they don't follow you to another computer.
## Long lists
More articles load as you scroll down. You can also click **Load more** at the bottom of the list.
## What next
- Click an article to see its details, or click its pencil icon to make a quick edit. See [See article details and make quick edits](https://self.helpcenter.io/content/article-details).
- Tick several articles to publish, move or delete them together. See [Change many articles at once](https://self.helpcenter.io/content/bulk-actions).
## Related articles
- [Change many articles at once](https://self.helpcenter.io/content/bulk-actions)
- [See article details and make quick edits](https://self.helpcenter.io/content/article-details)
- [Find your way around the dashboard](https://self.helpcenter.io/content/dashboard-tour)
---
Source: https://self.helpcenter.io/content/category-icons-and-images
# Add a category icon, image and description
_Category: Organize and publish_
A short description and an icon or image help readers see what's in a category before they click. You set both in the category's settings.
**Who can do this:** Owners, Admins and Editors · **Plans:** All plans
## Add a description and an icon
1. Click **Articles** in the left menu and select the category in the **Categories** panel.
2. Click **Edit category**. The **Category settings** panel opens.
3. Under **Description**, write a sentence about what the category covers. It's shown on the category card in your help center.
4. Under **Category image**, keep **Icon** selected. Search for an icon and click the one you want.
5. Click **Update category**.
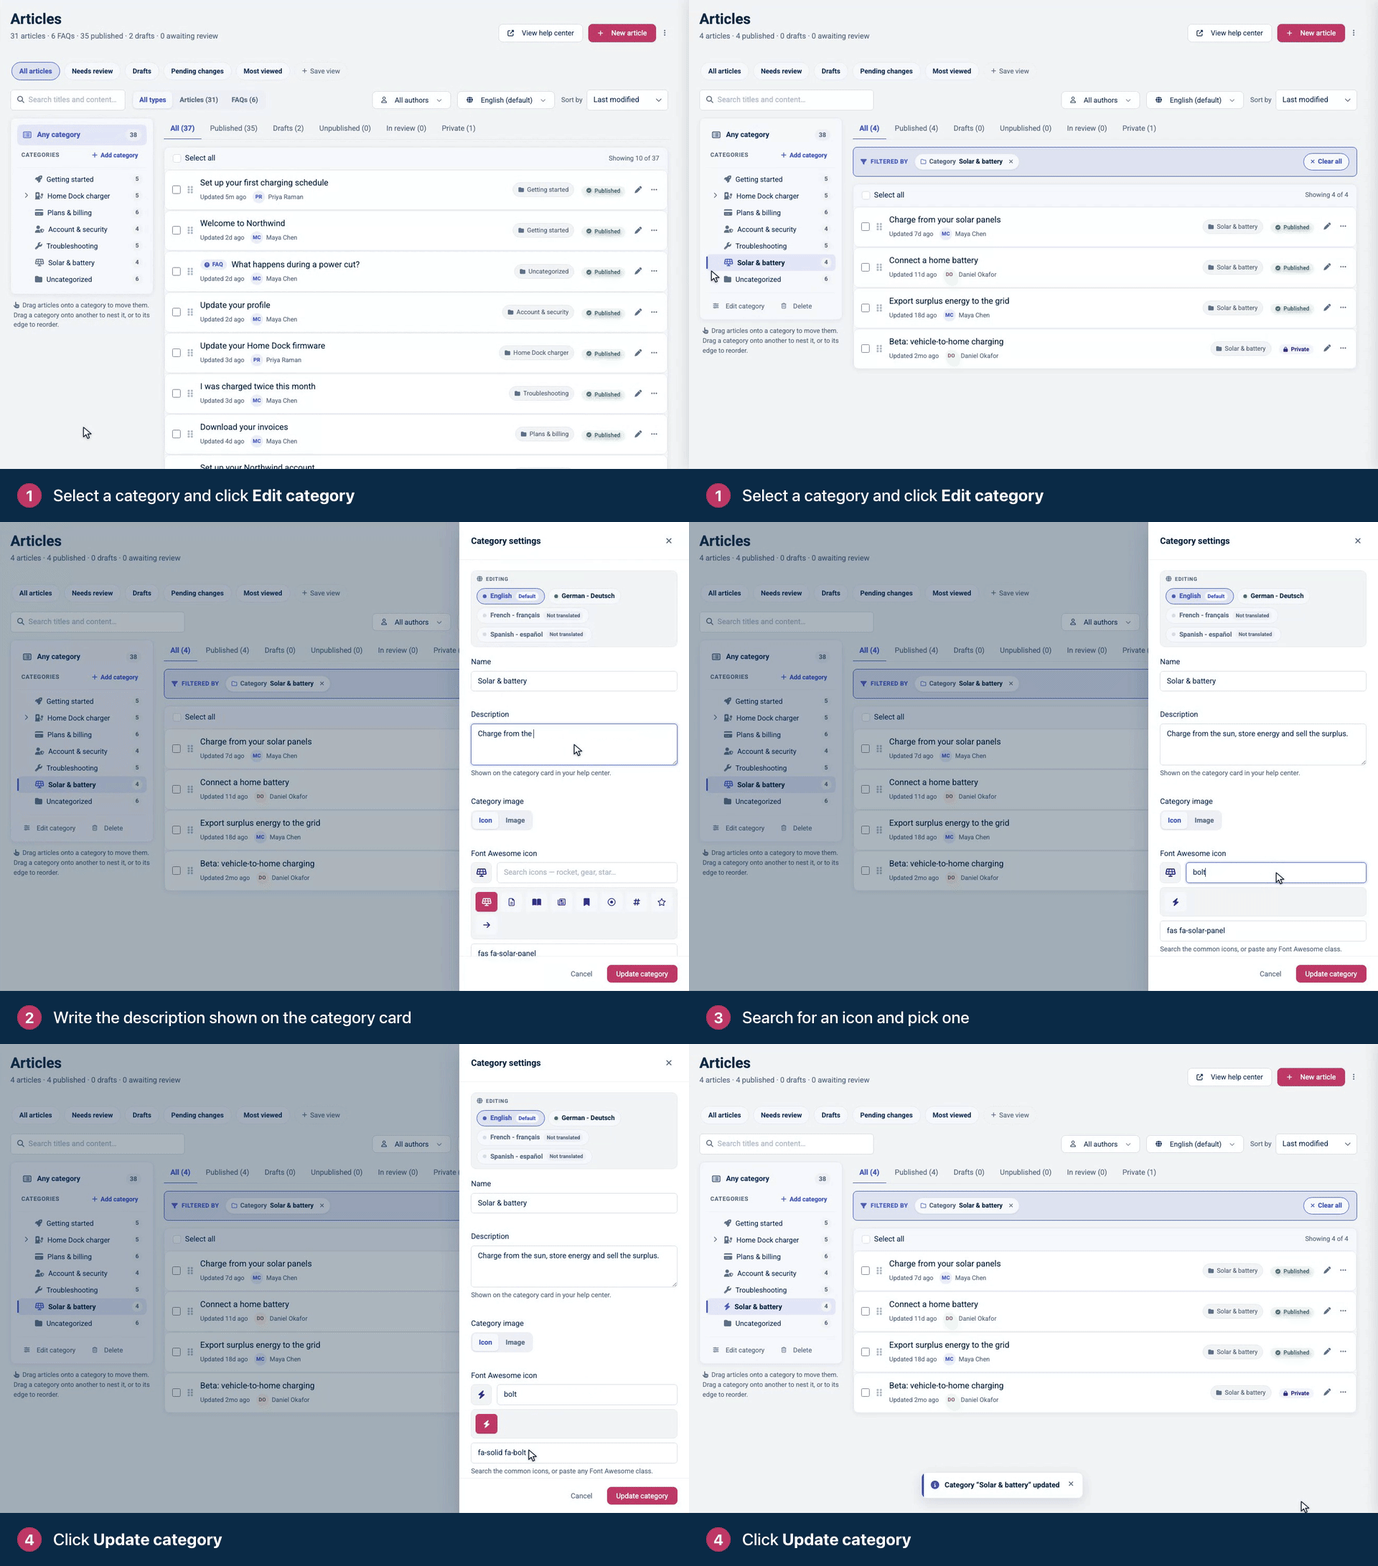
The description and icon appear on the category's card.
## Use an image instead
1. Under **Category image**, choose **Image**.
2. Click **Choose image** and pick a PNG or JPG file, at least 640×360 pixels.
3. Click **Update category**.
A category shows either an icon or an image, not both.
## Find the right icon
The picker opens with popular Font Awesome icons. Type a word such as "rocket" or "gear" to search the rest. If the icon you want isn't in the results, paste its Font Awesome class into the field below the icons, for example `fa-solid fa-map-signs`.
## Where they show
- **Category cards:** wherever your help center lists categories, such as the home page. Which details a card shows depends on the category list settings in the template editor. See [Customize category and article lists](https://self.helpcenter.io/content/category-and-article-lists).
- **The category page:** the icon or image can appear in front of the category's name. In the template editor, open **Pages**, choose the **Category** page and turn on **Category image**.
## Control how the category looks in search engines
Open **Search engine listing** at the bottom of the panel to set a **Meta title** and a **Meta description** for the category page. If you leave them empty, the category's name and description are used. A meta description of around 155 characters works best.
## Other languages
On a help center with more than one language, pick a language at the top of the panel to translate the name, description and search engine listing. The save button then saves that language. The icon or image, **Share with** and **Parent category** are shared by all languages.
## Troubleshooting
**"Category name cannot be empty."** Add a name in your default language, then save again.
**The image won't upload.** Use a PNG or JPG file. See [An image or file won't upload](https://self.helpcenter.io/content/upload-problems).
## Related articles
- [Create and organize categories](https://self.helpcenter.io/content/organize-categories)
- [Customize category and article lists](https://self.helpcenter.io/content/category-and-article-lists)
- [Make a category private](https://self.helpcenter.io/content/private-categories)
---
Source: https://self.helpcenter.io/content/attach-files
# Attach files
_Category: Write articles_
Attach a PDF, a spreadsheet or another file to an article so readers can download it right where they need it: a price list next to your pricing FAQ, or a template next to the steps that use it.
**Who can do this:** Owners, Admins and Editors · **Plans:** All plans
## Attach a file
1. On an empty line, type `/file` and pick **File attachment**. The **Attachments** window opens.
2. Click **Upload new** and choose a file. You can also drag the file onto the box that says **Drag files here or browse**.
3. When the upload finishes, click **Insert** next to the file. It's added to the article as a download link.
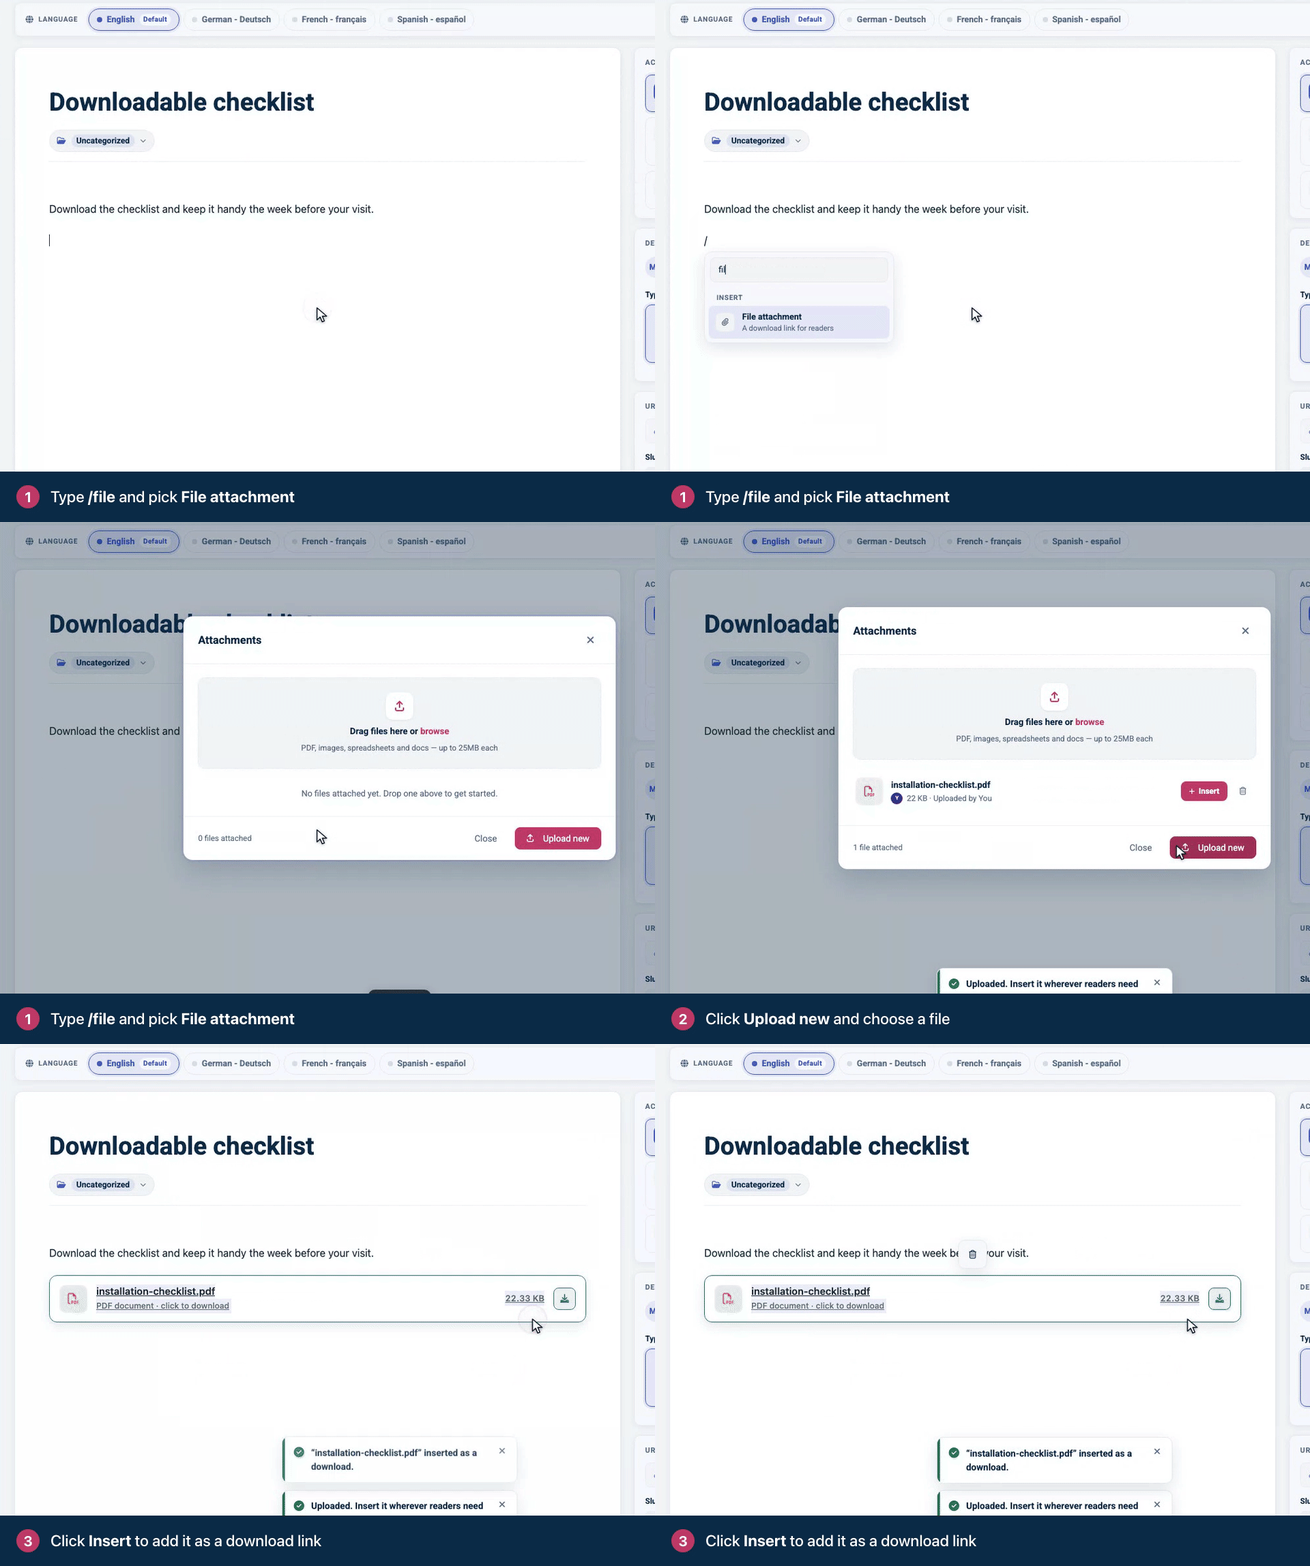
Upload once, then insert the file wherever readers need it.
You can also click **Add** on the **Attachments** card in the right-hand panel. The file goes where your cursor is in the article.
Readers see the file's name, type and size. One click downloads it. The **Attachments** card lists every file in the article; click one to jump to it.
## Reuse a file you already uploaded
The **Attachments** window lists every file uploaded to your help center, with its size and who uploaded it. Click **Insert** next to any of them to add it to the article you're writing. There's no need to upload the same file twice.
## What you can attach
Files up to 25 MB each, in these formats:
- **Documents:** PDF, Word, Excel, PowerPoint, OpenDocument, RTF, TXT and CSV
- **Archives:** ZIP, GZ, TAR, RAR and 7Z
- **Images:** JPEG, PNG, GIF, WebP, AVIF and HEIC
- **Audio:** MP3, WAV, OGG, AAC and M4A
- **Video:** MP4, MOV, WebM, AVI and OGV
Web pages, SVG files and scripts can't be attached.
Each file gets a long, random web address. Readers find it through your article, but anyone who has that address can download the file, even when the article is private. Keep confidential files out of attachments.
## Remove a file
- **From this article:** in the **Attachments** card in the right-hand panel, click the trash icon next to the file. The file stays in your library for other articles.
- **From your help center:** in the **Attachments** window, click the trash icon next to the file, then **Delete**. This deletes the file for good, and its download link stops working in every article that uses it.
## Troubleshooting
**"Files up to 25MB work here."** The file is too big. Compress it, or split it into smaller files.
**"Could not upload the file. Please try again."** Check that the file is in one of the formats above and under 25 MB, then try again. See [An image or file won't upload](https://self.helpcenter.io/content/upload-problems) for more fixes.
## Related articles
- [Add images to an article](https://self.helpcenter.io/content/add-images)
- [Get to know the article editor](https://self.helpcenter.io/content/article-editor)
---
Source: https://self.helpcenter.io/content/change-your-password
# Change or reset your password
_Category: Team and account_
Change your password any time from Account Settings. If you've forgotten it, reset it from the sign-in page instead.
**Who can do this:** Everyone, for their own account · **Plans:** All plans
## Change your password
1. At the bottom of the left menu, click your avatar, then **Account Settings**. You can also go to [helpcenter.io/app/account](https://helpcenter.io/app/account).
2. Under **Change Password**, enter your **Current Password**.
3. Enter a **New Password** of at least 6 characters, and type it again in **Confirm Password**.
4. Click **Change Password**. You see "Password successfully changed."
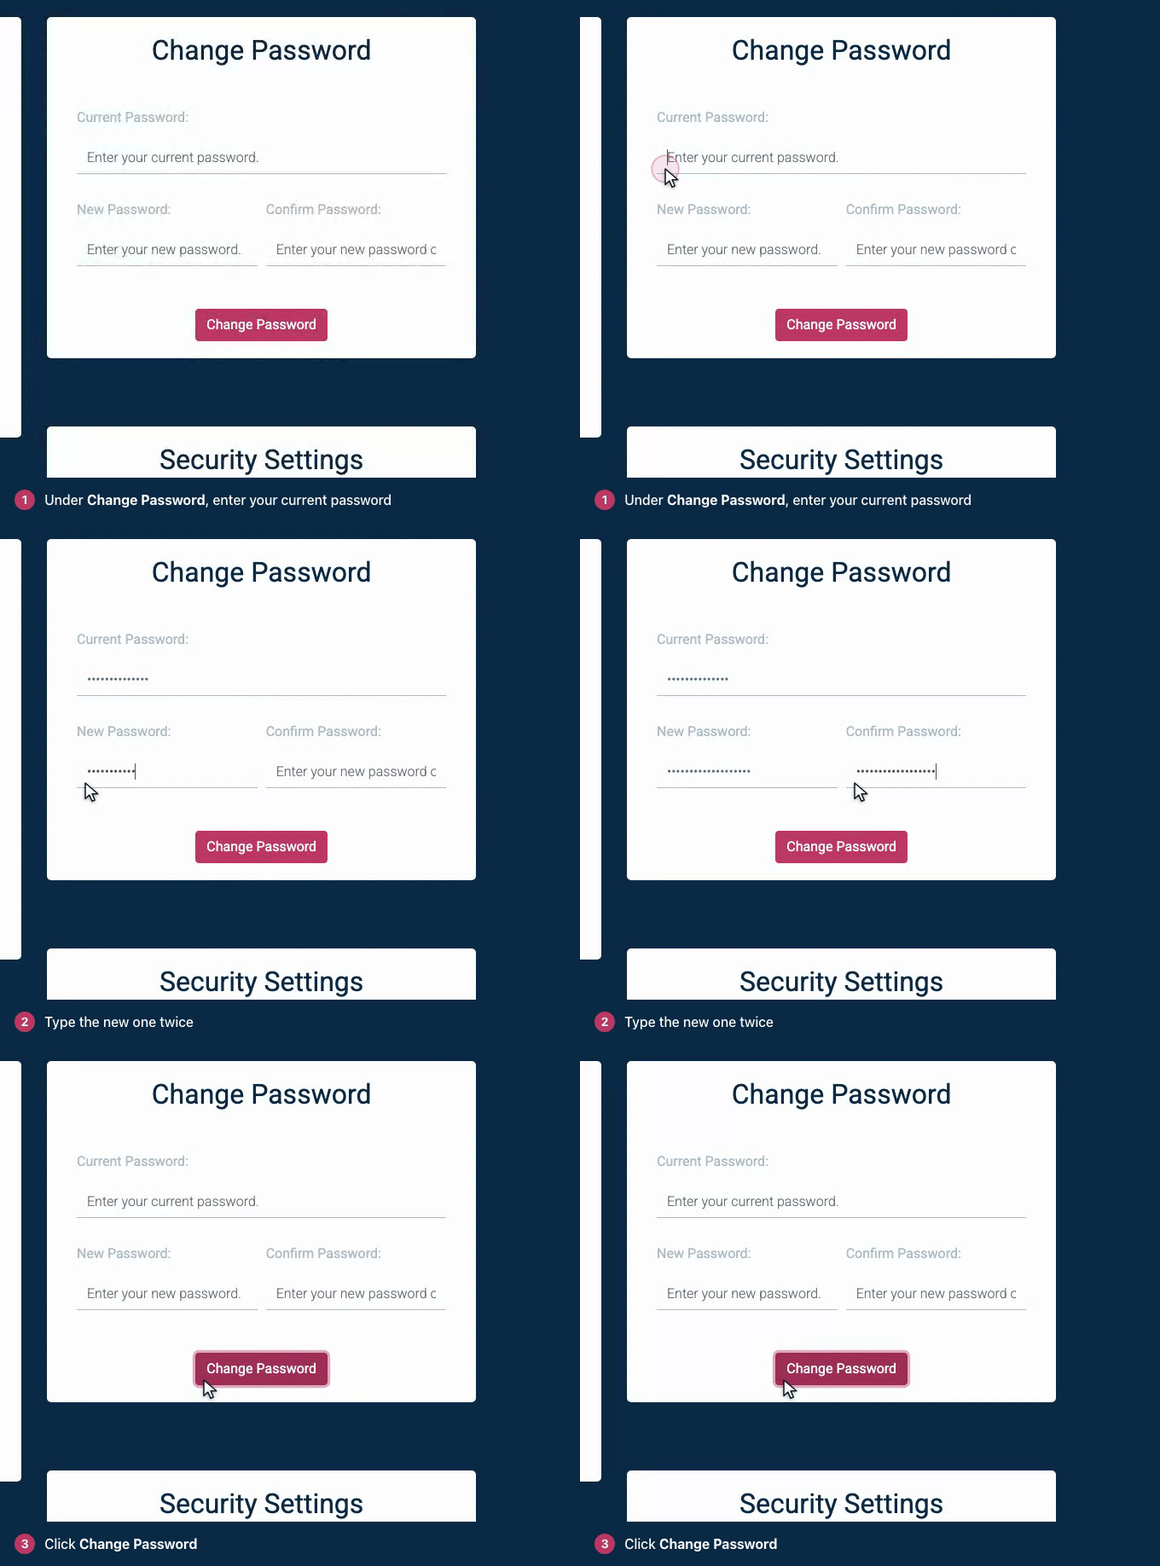
Use your new password the next time you sign in.
## If you signed up with Google
An account created with Google has no password yet. Account Settings shows **Set a Password** instead of Change Password, and doesn't ask for a current password: enter a **New Password**, confirm it and click **Set Password**. After that you can sign in with Google or with your email and password.
## Connect or disconnect Google
In **Account Settings**, **Sign-in Methods** lists Google.
- Click **Connect** and pick your Google account to sign in with **Continue with Google** from then on. The Google account's address doesn't have to match your HelpCenter.io email address. The card then reads **Connected as** followed by that address.
- Click **Disconnect** to go back to signing in with your email and password only.
Google can't be disconnected while it's your only way to sign in. Set a password first.
## Reset a forgotten password
1. Click **Forgot password?** on the [sign-in page](https://helpcenter.io/app/signin).
2. Enter your **Email address** and click **Send Password Reset Link**. You see "If an account exists for that address, we've emailed a password reset link."
3. Open the email and click the reset link. It works for 60 minutes.
4. On **Reset your password**, enter your email address, then your new password in **New password** and **Confirm new password**.
5. Click **Reset Password**.
A reset needs a password of at least 8 characters, while Account Settings accepts 6. Choose 8 or more and your password works in both places.
## Keep your account safe
- Use a password you don't use anywhere else. A password manager makes that painless.
- Add a second step to signing in with [two-factor authentication](https://self.helpcenter.io/content/two-factor-authentication).
## Troubleshooting
**"The current password you've entered seems to be incorrect."** Type your current password again. If you don't remember it, reset it instead.
**The reset email doesn't arrive.** Wait a few minutes and check your spam folder. The page shows the same confirmation for every address, so check that you entered the one on your account. If you asked for a link less than a minute ago, wait a minute before asking again.
**"Set a password before disconnecting Google, or you would have no way to sign in."** Set a password under **Set a Password**, then disconnect Google.
**"That Google account is already connected to a different HelpCenter.io account."** A Google account signs in to one HelpCenter.io account. Disconnect it from the other account first, or pick another Google account.
**"This password reset token is invalid."** The link has expired or was already used. Request a new one.
## Related articles
- [Sign in to HelpCenter.io](https://self.helpcenter.io/content/sign-in)
- [Turn on two-factor authentication](https://self.helpcenter.io/content/two-factor-authentication)
- [I can't sign in](https://self.helpcenter.io/content/cant-sign-in)
---
Source: https://self.helpcenter.io/content/add-links
# Link to another article or a website
_Category: Write articles_
Link words in an article to another article in your help center, or to any website. You can find and link your own articles without leaving the editor, and those links keep working when you rename an article.
**Who can do this:** Owners, Admins and Editors · **Plans:** All plans
## Link to another article
1. Select the words that should become the link.
2. Click **Link** in the toolbar that appears.
3. Click the magnifying glass (**Link to an article**).
4. Type part of the article's title, then click the article in the results.
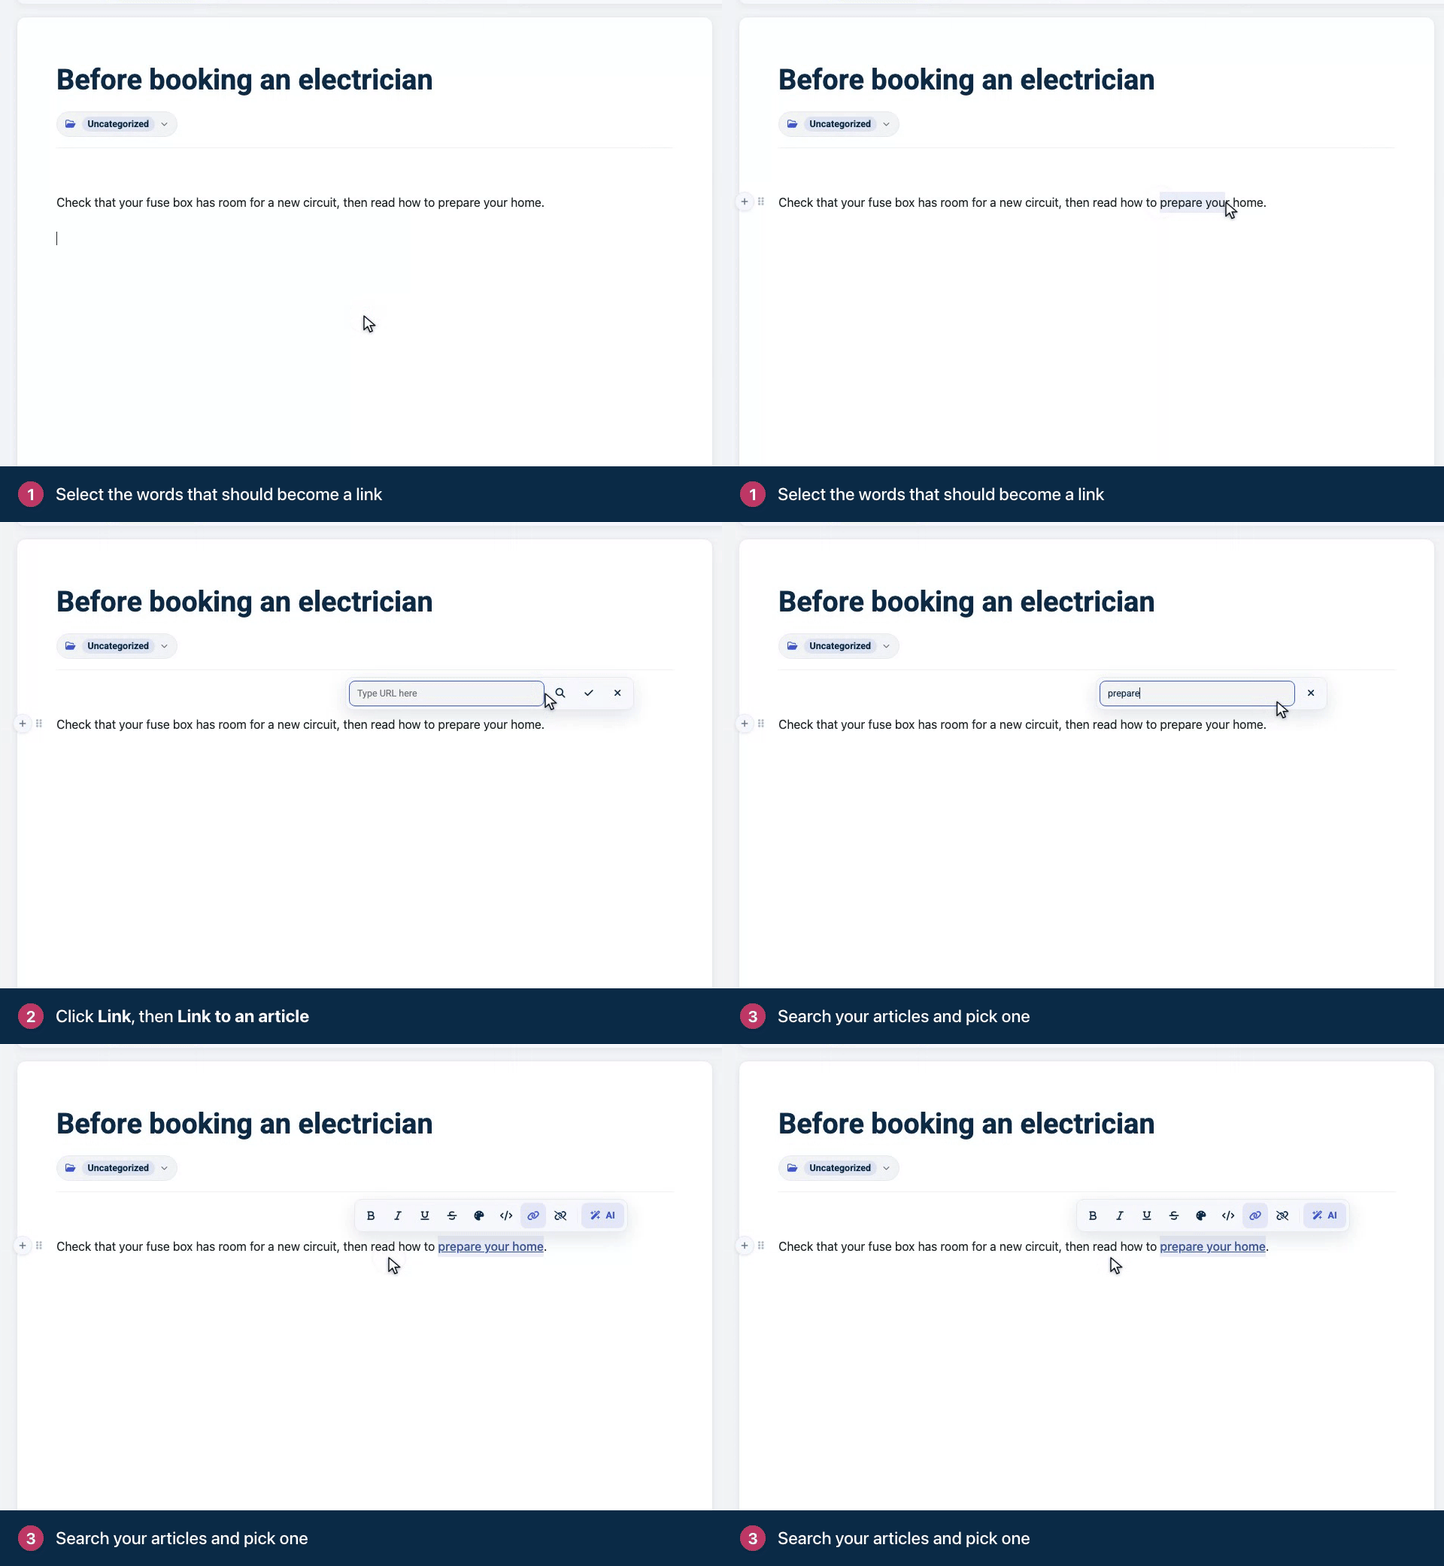
Search your articles right from the toolbar.
Drafts appear in the results with a **draft** label. You can link to a draft, but readers can't open it until you publish it.
## Link to a website
1. Select the words that should become the link.
2. Click **Link**.
3. Paste the full address, starting with `https://`, and press Enter.
Faster: with the words selected, paste a web address and they become a link straight away. To link an email address, type `mailto:` in front of it, for example `mailto:support@example.com`.
## Change or remove a link
- **Change it:** select the linked text and click **Link**. Edit the address and press Enter.
- **Remove it:** select the linked text and click **Remove link**. The words stay, without the link.
Links don't open when you click them in the editor. To test them, [preview the article](https://self.helpcenter.io/content/preview-an-article).
## Show a link as a card
To point readers to another article more visibly, add an **Article link** block: type `/article` on an empty line, press Enter, then search for the article and pick it. Readers see a card with the article's title, a short summary, its category and the reading time.
## How links behave for readers
- Links to other websites open in a new tab, and so do links you add with **Link to an article**.
- When an article's address changes, for example because you renamed it, the old address redirects to the new one. Links you added before the change keep working, and article cards always show the current title.
- Your help center adds `nofollow` to links to other websites, which tells search engines not to pass ranking credit to them. To change this, or to exempt your own sites, open the **Template editor** → **Brand** and use **Nofollow external links** and **Whitelisted domains**.
## Troubleshooting
**A link opens a "page not found" page on my help center.** The address probably doesn't start with `https://`, so it's treated as a page on your help center. Edit the link and add `https://` at the start.
**A link points to an article I deleted.** Readers get a "page not found" page. Restore the article from **Trash**, update the link, or send the old address somewhere useful with a redirect. See [Redirect old links to the right page](https://self.helpcenter.io/content/custom-redirects).
## Related articles
- [Format text](https://self.helpcenter.io/content/format-text)
- [Show an article in more than one category](https://self.helpcenter.io/content/multiple-categories)
- [Redirect old links to the right page](https://self.helpcenter.io/content/custom-redirects)
---
Source: https://self.helpcenter.io/content/install-the-widget
# Add the widget to your website
_Category: Widget and embeds_
Put your help center one click away on every page of your website or app. Visitors search your articles, read them and get answers without leaving the page they're on. You copy one snippet, paste it into your site and tell HelpCenter.io which website may show it.
**Who can do this:** Anyone on your team can copy the snippet, and Owners and Admins approve your website · **Plans:** All plans
## Copy the snippet
1. In the left menu, click the gear icon, then **Embeddables**. Your widget is ready the first time you open this page; there's nothing to activate.
2. On the **Widget** tab, find **Installation** and click **Copy**.
3. Paste the snippet into your website's HTML, right before the closing `` tag, on every page where the widget should appear.
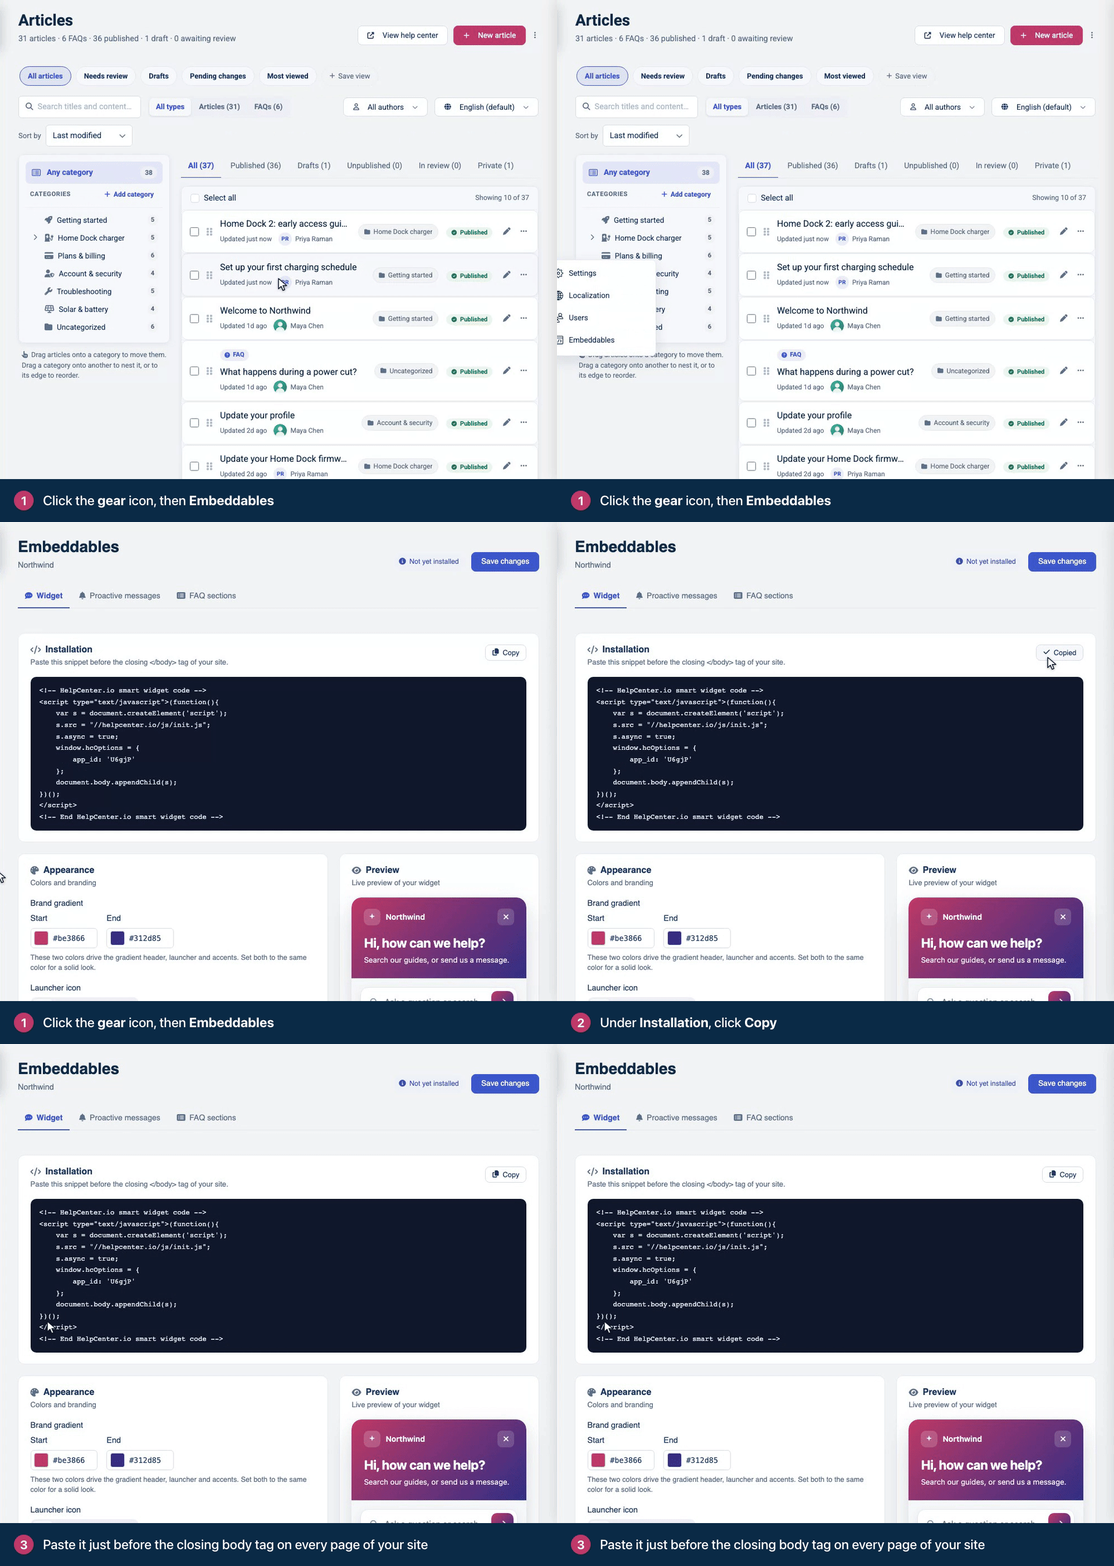
The snippet you copy already contains your widget's ID.
The snippet looks like this, with your own widget ID in place of `YOUR_WIDGET_ID`:
```
```
Put it before ``, not in the `