

Write articles
Use the article editor: text, images, videos, tables, callouts and more.
Frequently asked questions
-
When does an article show a table of contents?
When the article has headings and your theme's Article page includes the Table of contents component. Readers then see an On this page list beside the article and can jump to any section.
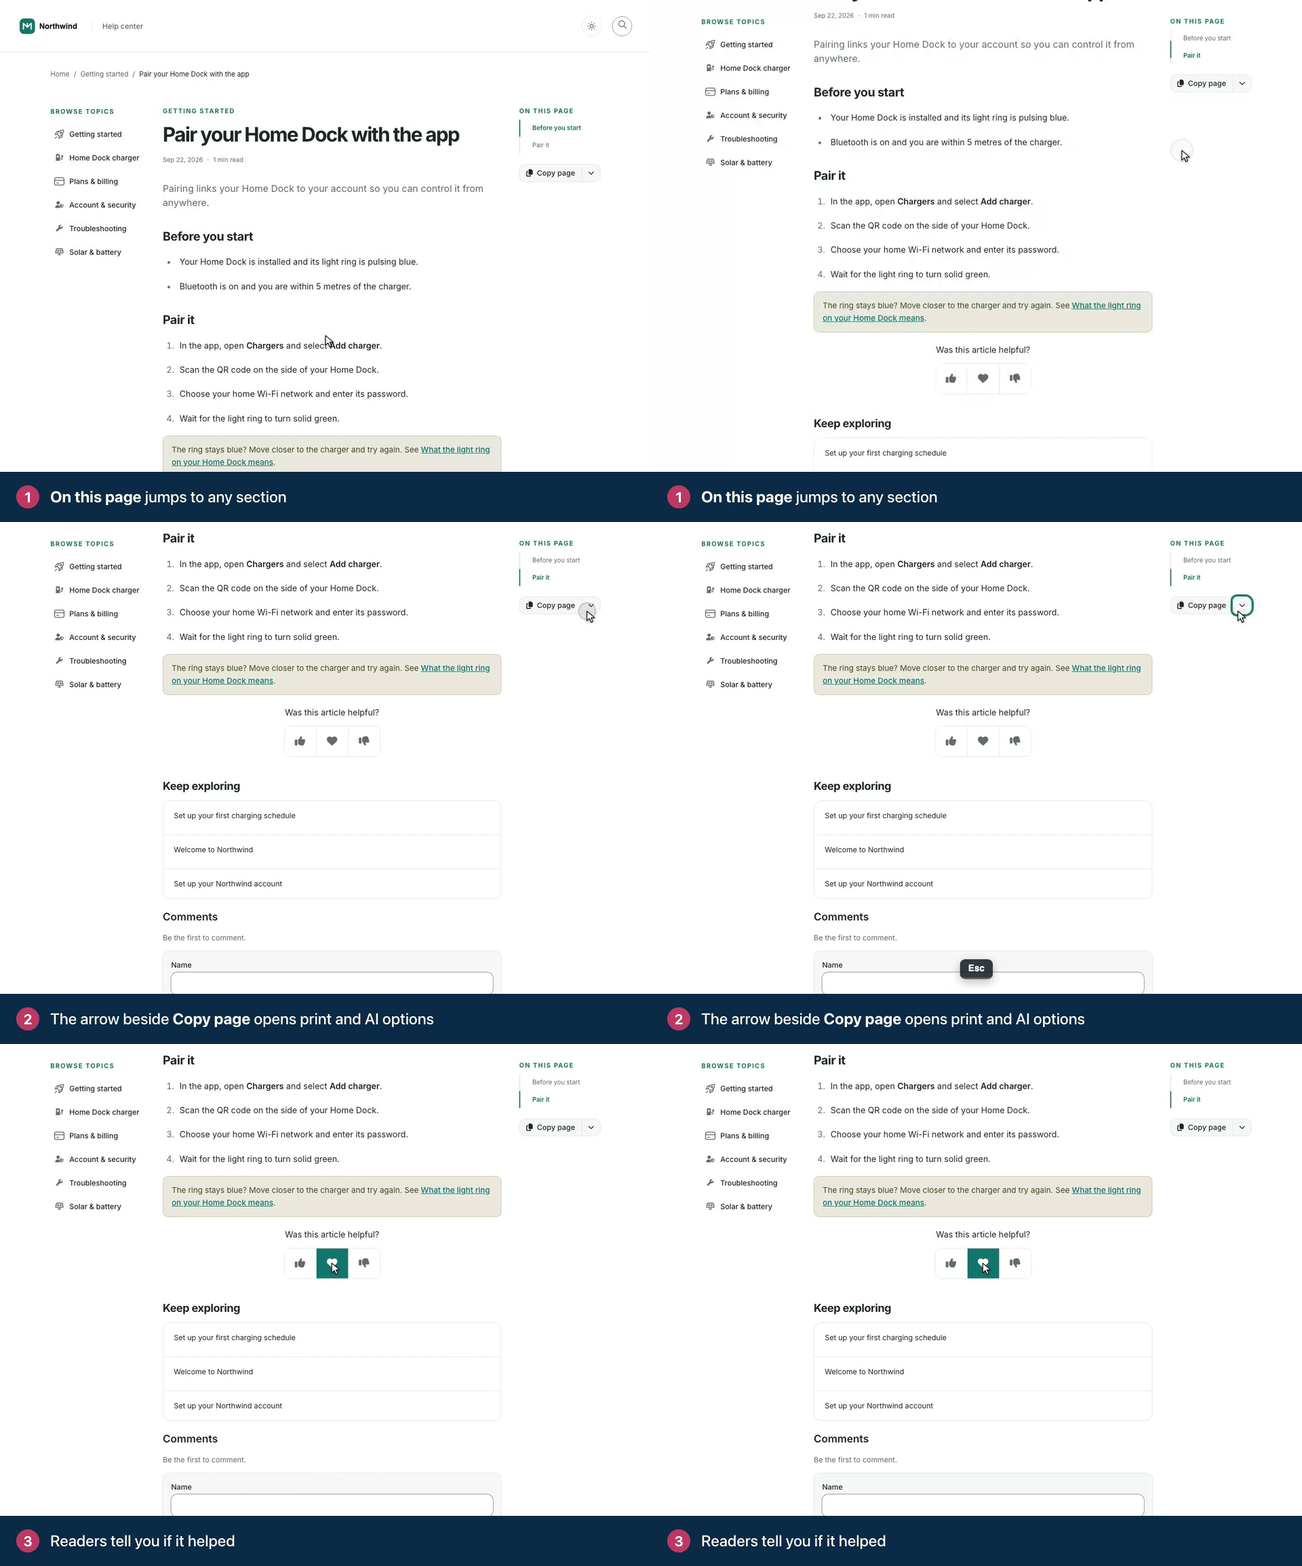
The On this page list follows the reader down the article. The list is built from the article's headings, starting at Heading 2. The article title isn't included, and an article without headings shows no list. Use Heading 2 for your main sections and Heading 3 for the parts inside them.
Compass, the default theme, includes the component. To add it, remove it or change it:
Open the Template editor, go to Pages and pick the Article page.
The component lives in the Sidebar or Utility region. Add it there with Add component, or click it to edit it.
In Heading levels, choose how deep the list goes, from Heading 2 only down to Heading 5. Sticky keeps it in view while readers scroll.
Click Publish.
Related articles
-
Preview an article before you publish
Save the article, then click the eye icon (Preview article) in the top bar. The preview opens in a new tab and shows the article on your help center, with your design, the way readers will see it.
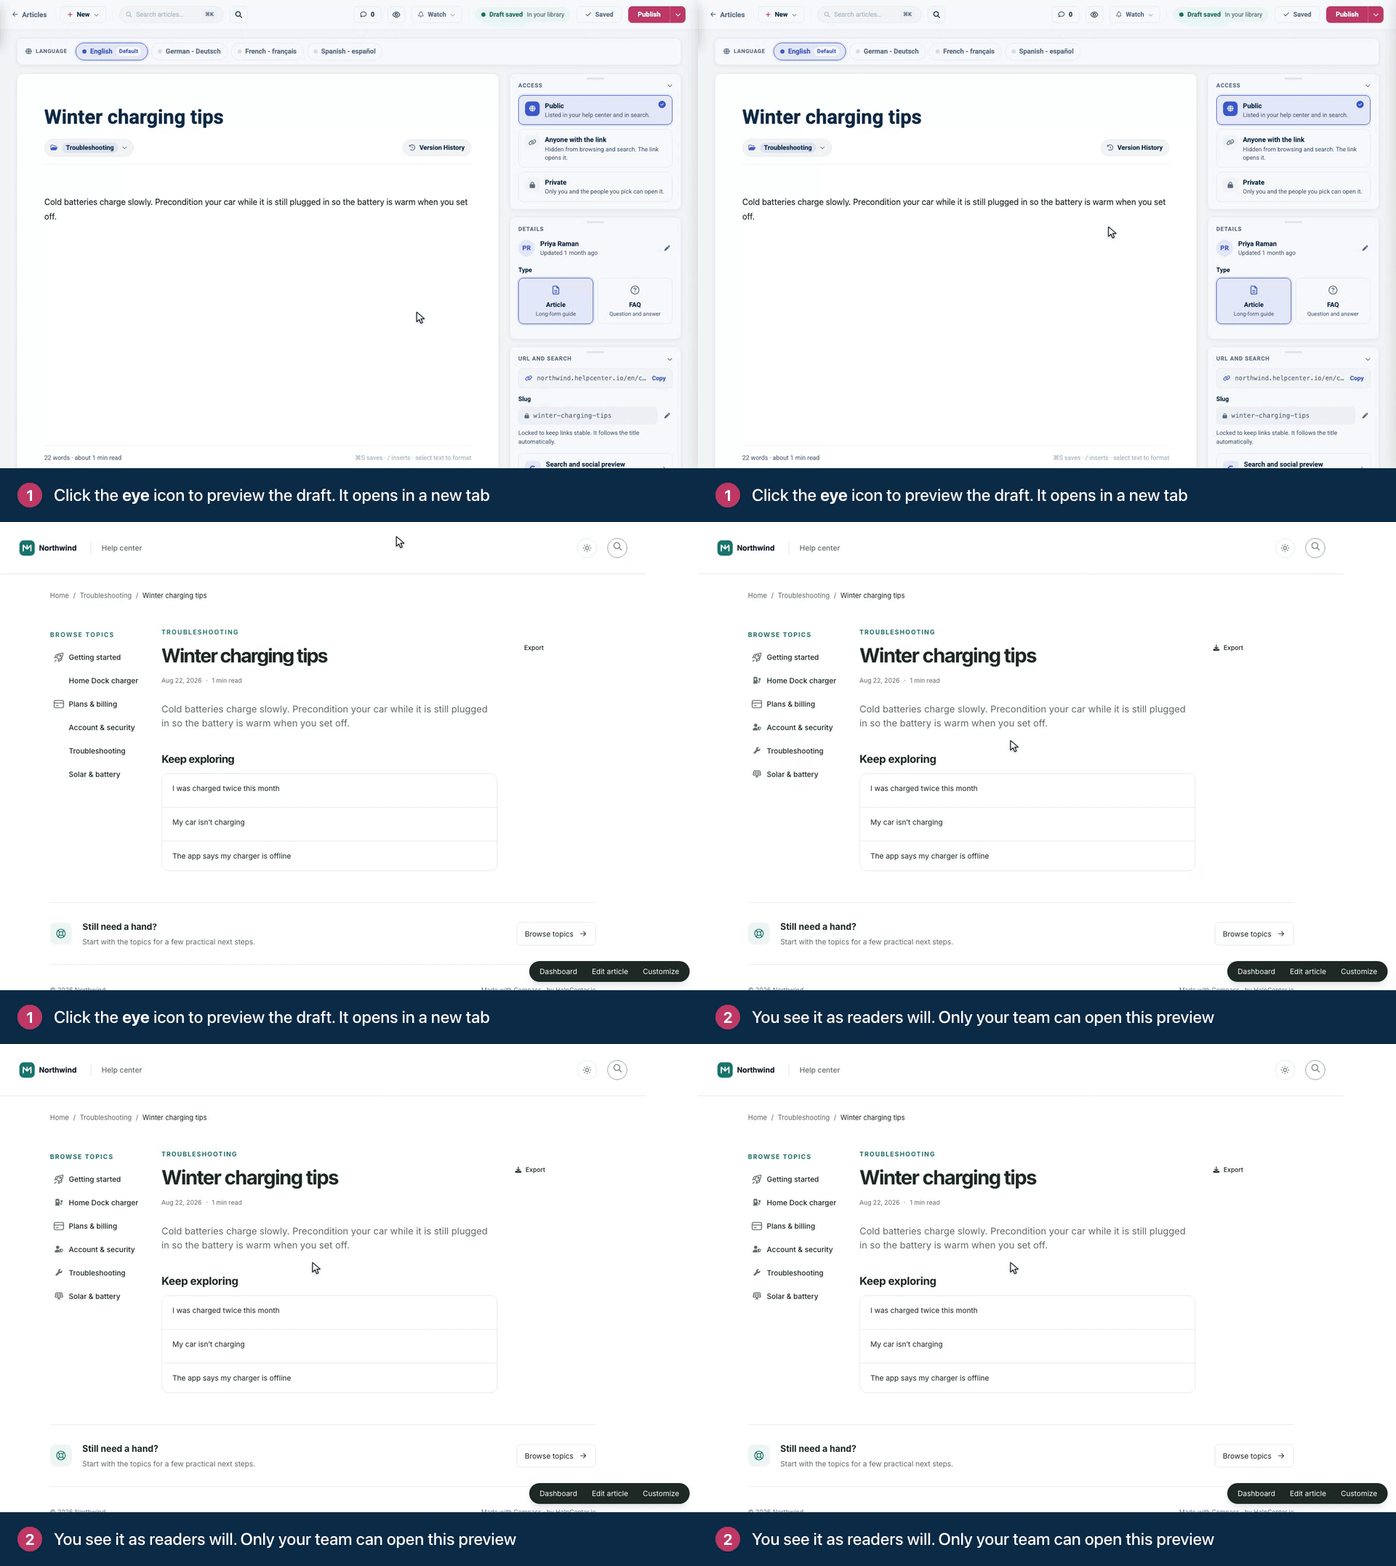
Preview a draft before anyone else can see it. Save first. The eye icon is grayed out until the article has been saved once. The preview shows the last saved version, so click Save draft before you preview your latest edits.
Published articles: your edits are saved when you click Update, which also publishes them. Until then, the preview shows the live version. On help centers with staged changes, click Preview in the staged changes banner to see your edits before they go live.
Who can open it: only teammates who can edit articles (Owners, Admins and Editors). Someone who isn't signed in is asked to sign in first, and anyone else gets a page-not-found page for an unpublished article.
You'll also find Preview article in the menu next to Publish.
Related articles
Articles
- Get to know the article editor Ivelina Pencheva
- Add headings, lists and other blocks Ivan Penchev
- Format text Ivan Penchev
- Link to another article or a website Ivan Penchev
- Add images to an article Ivelina Pencheva
- Resize images and add alt text Ivan Penchev
- Embed videos Ivan Penchev
- Attach files Ivelina Pencheva
- Highlight tips and warnings with callouts Ivelina Pencheva
- Add tables Ivan Penchev
- Add code blocks Ivan Penchev
- Leave notes for your team Ivan Penchev
- Start from an article template Ivan Penchev
- Write FAQs and add them to articles Ivan Penchev
- Avoid duplicate articles Ivan Penchev
- Set an article's search title, description and URL Ivan Penchev
- Paste content from Google Docs, Word and other apps Ivan Penchev
- Keyboard shortcuts in the article editor Ivan Penchev
Still stuck?
Our team answers in a few hours.