

To let readers leave comments on your articles, add the Comments component to the Article page in Template Editor v2, then publish your template.
This guide covers the new Template Editor. If you still use the classic editor, follow the legacy instructions.
1. Open the Article page
- Sign in to HelpCenter.io and select the help center you want to customize.
- Open Template Editor from the dashboard navigation.
- In the settings panel, select Pages.
- Choose Article from the page picker, then select the Main region.
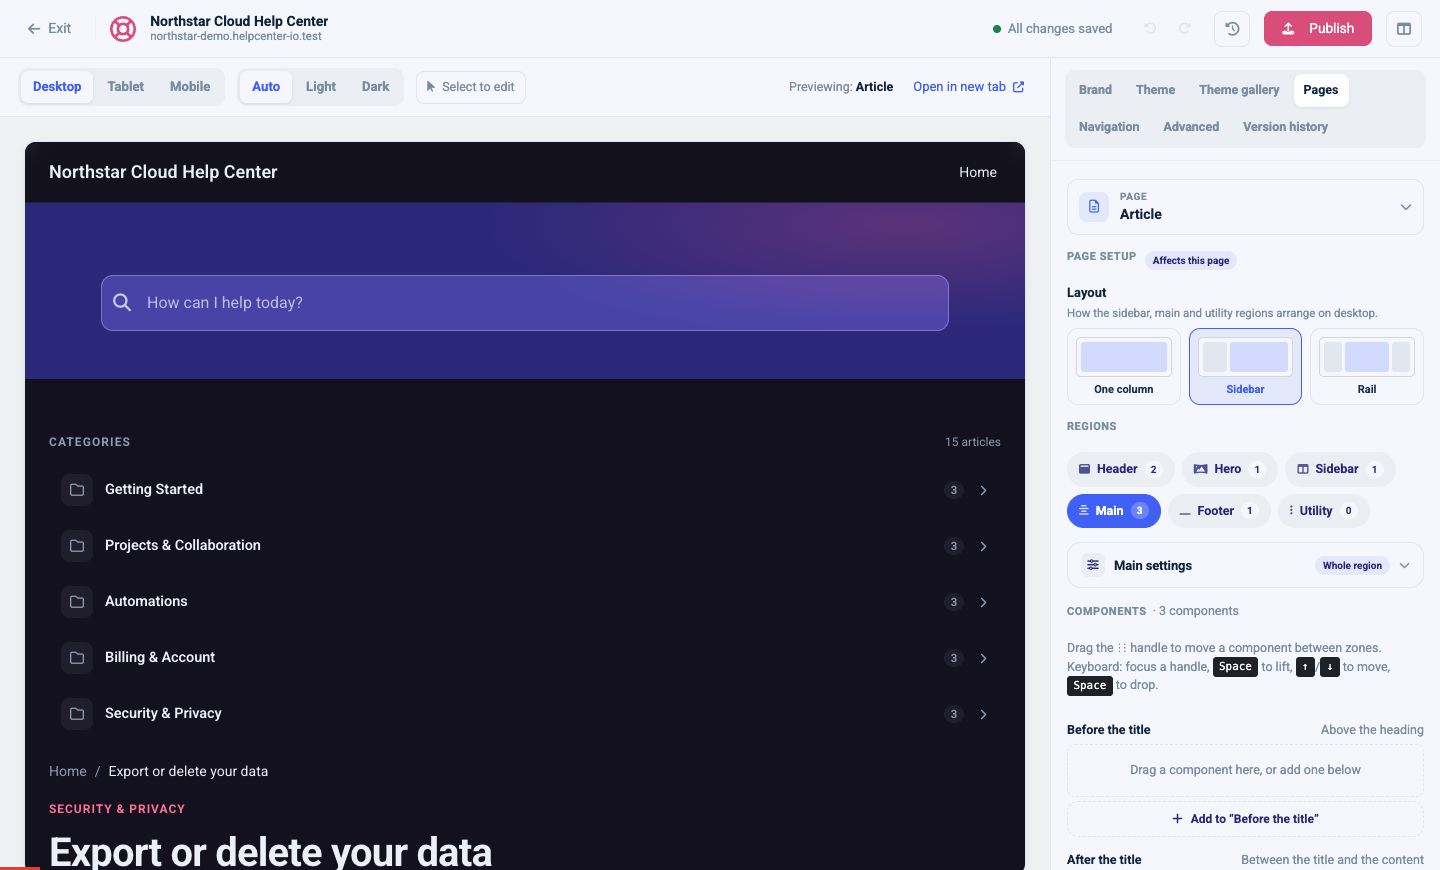
The Article page controls the shared layout used when visitors read your articles.
2. Add the Comments component
- Scroll down the Main region's component list to After the article.
- Select Add to “After the article”.
- In the component library, search for Comments, or find it under Article page.
- Select Comments to add it to the layout.
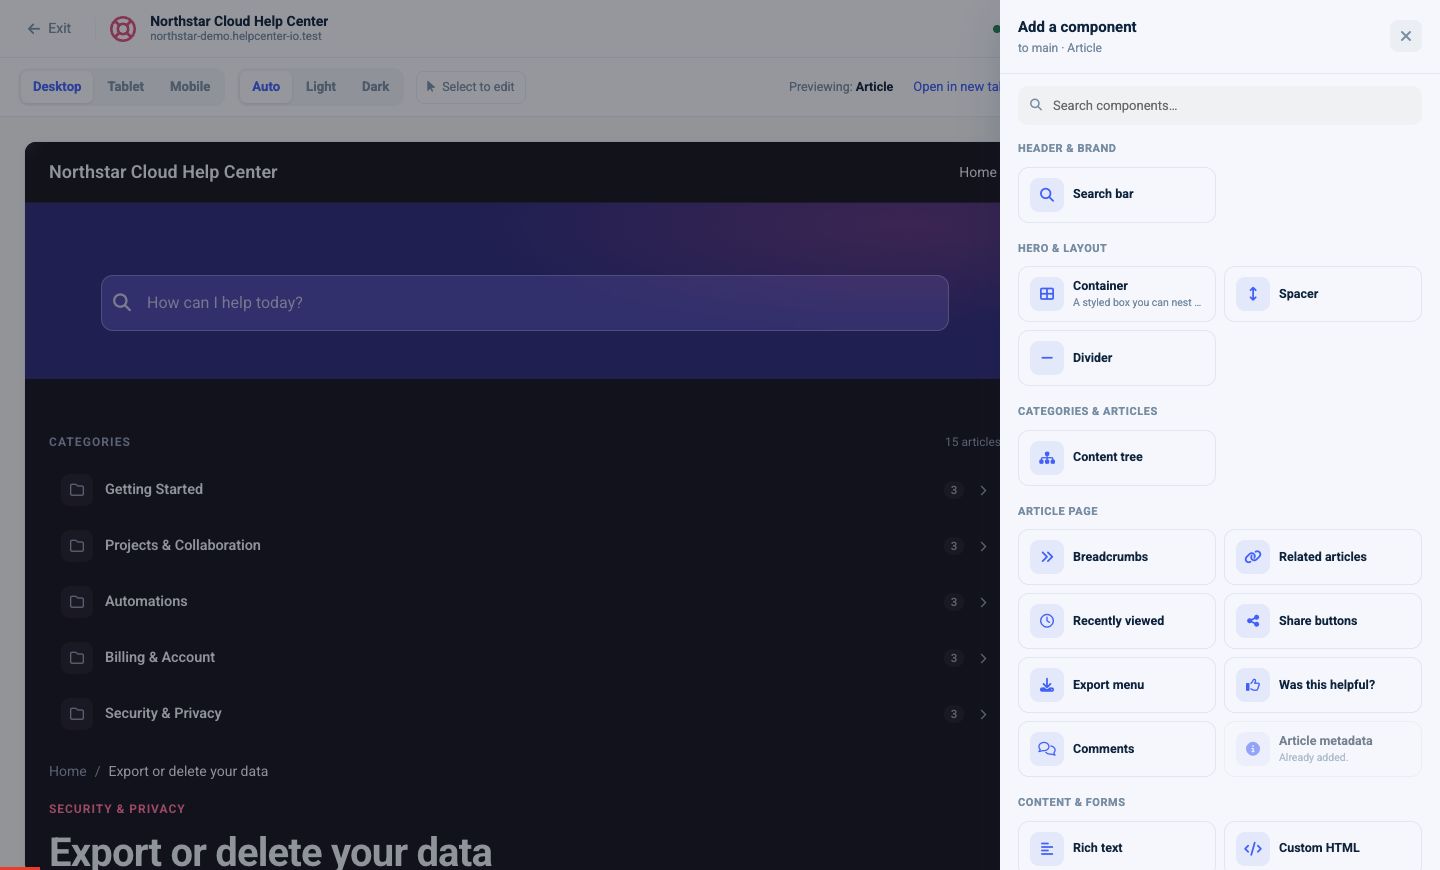
Choose Comments from the component library to add a comment section below the article.
If your layout already contains a Comments component, select that component to edit it instead of adding another one. You only need to add it to the shared Article page once, rather than to each article separately.
3. Choose how comments appear
Select the Comments component to open its settings.
- Heading: set the title displayed above the comments, such as “Comments” or “Questions and discussion”.
- Show comments below the article: turn this on to display the comment list. Turn it off if you want readers to submit comments for your team to read in the dashboard without showing the list publicly. The comment form remains available.
You can drag the component to change its position within After the article, for example before or after related articles.
4. Preview and publish
- Check an article in the preview and scroll below its content to find the comment form.
- Check the Desktop and Mobile previews so the form fits both screen sizes.
- Wait until the toolbar shows All changes saved.
- Select Publish and complete the publish dialog to make the template changes live.
- Open a published article in your live help center and confirm that the comment form appears below it.
Saving a draft does not update the live help center. Review the full preview before publishing, because publishing applies the current template draft, including any other pending design changes.
If comments do not appear
- No comment form: check that Comments is on Pages → Article → Main and that you published the template.
- The form appears, but the comment list does not: check Show comments below the article. Comments awaiting approval also need to be published before other readers can see them.
- You are looking at internal notes: internal article-editor comments are for your team. This guide enables comments from readers on the public-facing Article page.
For more layout options, see Customize the Article page.