

Every public help center is also an MCP server that your readers can add to Claude, ChatGPT, Cursor, VS Code and other AI assistants. Their assistant then searches and reads your published articles and answers with links to them, instead of guessing from what it learned elsewhere.
Who can do this: Owners and Admins · Plans: All plans
Find your server URL
The public MCP server is on by default. Here's where to find its address to share it.
In the left menu, click the gear icon, then Settings.
Find the Public MCP server card on the right. The Live badge means it is on.
Next to Server URL, click Copy. The address is your help center's address followed by
/mcp, and it uses your custom domain if you have one.To share step-by-step instructions instead, open Setup page for readers and send its link.
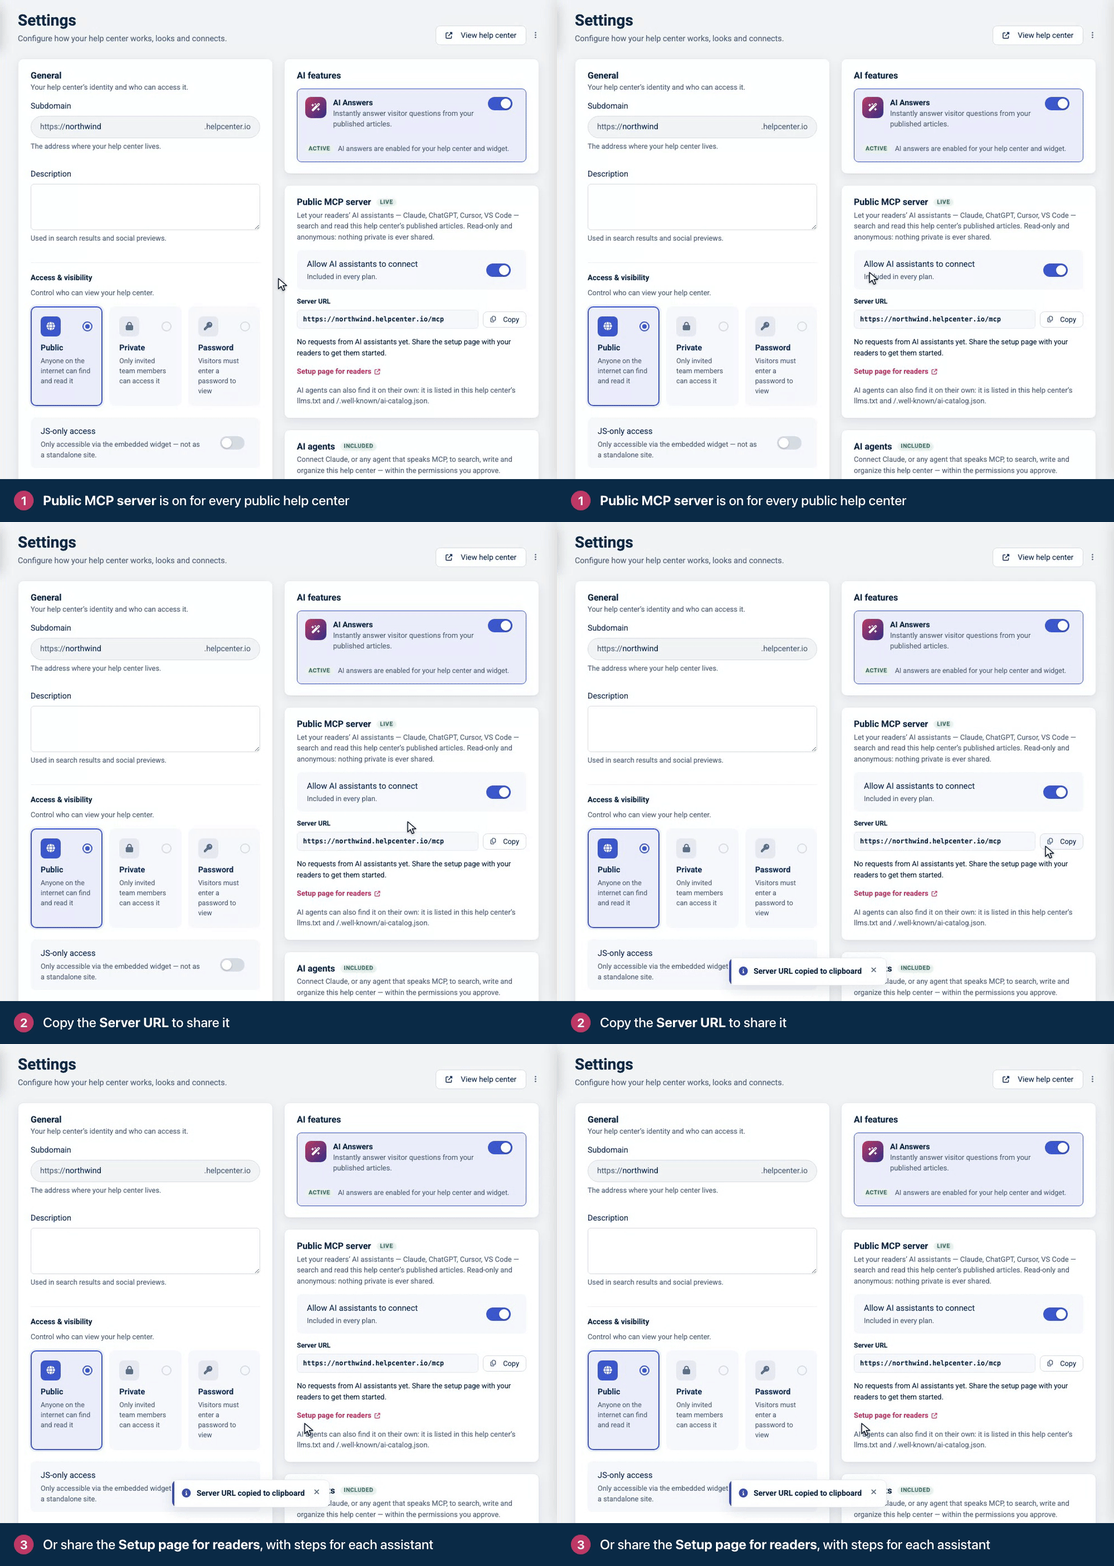
AI assistants can also find the server on their own: it is listed in your help center's llms.txt and /.well-known/ai-catalog.json. See How search engines and AI crawlers read your help center.
How readers connect
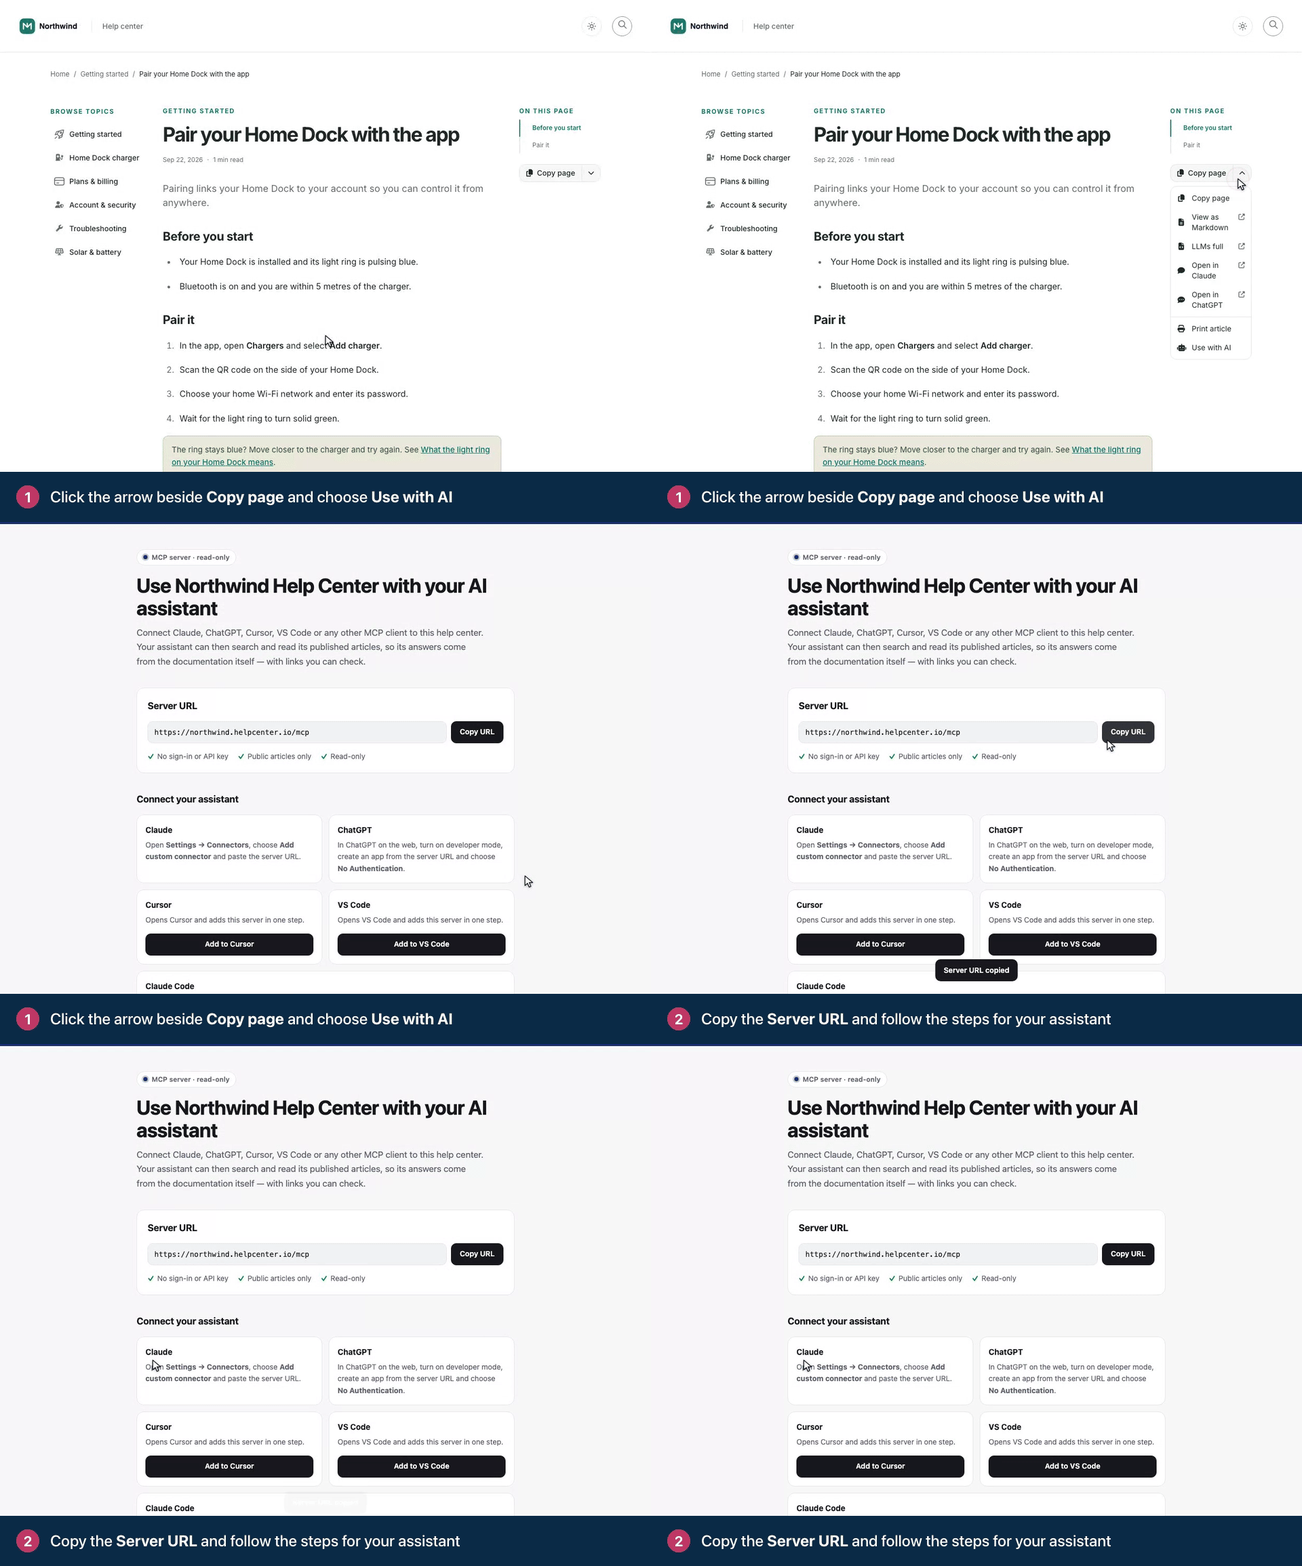
On an article, readers click the arrow beside Copy page and choose Use with AI. Compass, Docs Classic, GitHub Dense, Ledger and Stripe Clean put the Export menu on the article page. With any other theme, add the Export menu component to your article page first. See Customize the article page. The setup page shows the server URL with a Copy URL button and the steps for each assistant.
Assistant | How to connect |
|---|---|
Claude | Open Settings → Connectors, choose Add custom connector and paste the server URL. |
ChatGPT | In ChatGPT on the web, turn on developer mode, create an app from the server URL and choose No Authentication. |
Cursor | Click Add to Cursor on the setup page. |
VS Code | Click Add to VS Code on the setup page. |
Claude Code | Copy the command from the setup page and run it. |
Other assistants | Any client that supports remote MCP servers over Streamable HTTP works too, with no authentication. |
What assistants can do
The server is read-only and anonymous. It offers three tools:
searchfinds articles that answer a question.fetchreads an article, or a category's list of articles, in full.list_categoriesshows how your help center is organized.
Assistants see only what an anonymous visitor can read: published, public articles and released translations. Unlisted articles are left out too, even though anyone with their link can open them. Drafts, private content and team notes are never shared, and nobody signs in.
The tools' settings, the server's limits and how to call it from code are in The public MCP server of a help center on the developer portal.
When the server isn't available
A help center only has a public MCP server when anyone could read it anyway. The card shows Not available for this help center with the reason when your help center:
is private or password-protected,
is limited to specific IP addresses,
is only available inside the embedded widget (JS-only access),
asks search engines not to index it, or
isn't live at the moment.
For indexing, the message asks you to turn on "Allow search engines". The setting is called Search engine indexing, in the General card of Settings. See Control who can see your help center.
Turn it off or hide the link
Turn the server off: switch off Allow AI assistants to connect. You see Public MCP server turned off, and the badge changes to Off.
Keep the server but hide the link: in the Template editor, select the Export menu on your article page, untick Use with AI and publish your design.
Tip: The setup page is titled "Use your help center's name with your AI assistant", and assistants see the same name. It comes from the Default page title under Template editor → Brand → SEO. Set it to your product or company name. See SEO settings for your help center.
Comments
Be the first to comment.