

Create an API key to connect your help center to your own code, scripts and tools through the HelpCenter.io API. Sync articles with other systems, power your own search, automate content updates or pull your statistics into internal dashboards.
Who can do this: Owners and Admins · Plans: All plans
Create a key
In the left menu, click the gear icon, then Settings.
Under API keys, click New key.
In Name, say where the key will be used, for example "Docs sync script". A clear name tells you later which key to delete.
Pick a Scope: Read only or Read & write.
Leave Team notes off unless the integration needs your team's editorial notes, and Design off unless it changes how your help center looks.
Click Create key.
Click Copy next to the new key right away and store it somewhere safe, such as a password manager or your server's secret settings. The full key is shown only this once.
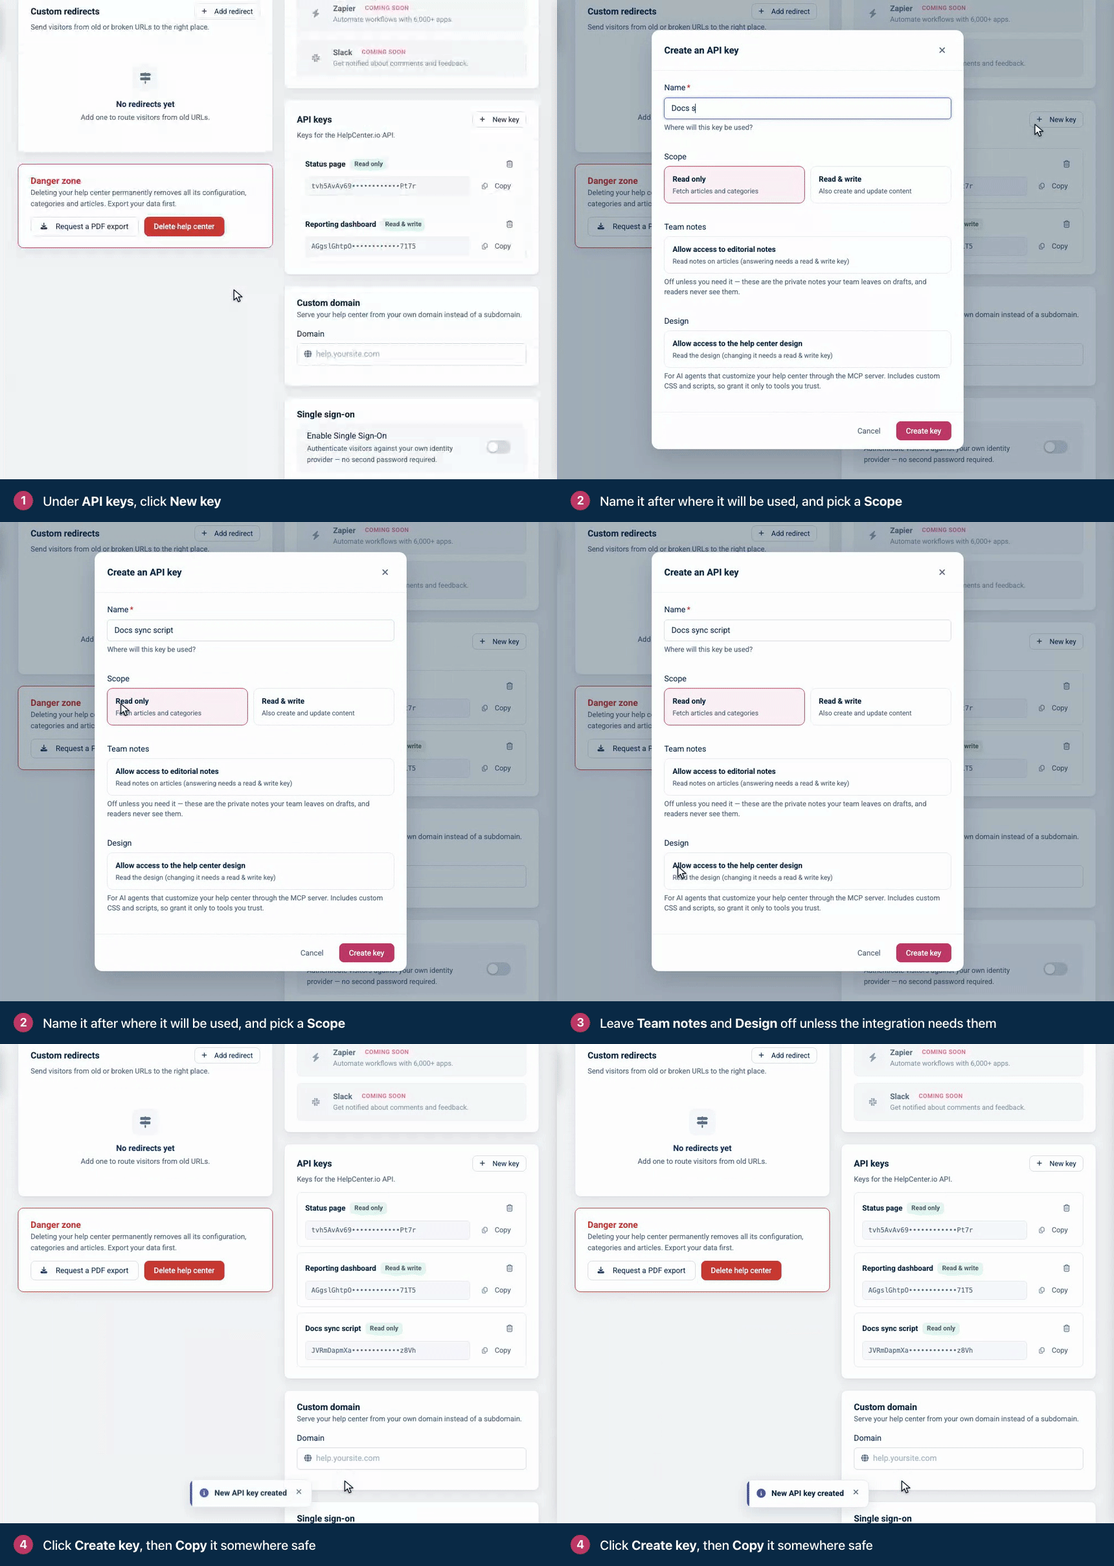
Once you leave the page, the list shows only the last four characters of each key, with its scope, a Team notes tag if it has notes access and a Design tag if it has design access. Under each key you see who created it, when, and when it was last used. Lost a key? Create a new one, switch your integration to it and delete the old one.
Choose a scope
Option | What the key can do |
|---|---|
Read only | Read your articles, categories, comments and statistics, without changing anything. |
Read & write | Everything a read-only key can do, plus create, update and delete articles and categories, upload images, moderate comments and manage webhooks. |
Team notes (optional) | Read the private notes your team leaves on articles. With Read & write, also answer and resolve them. Readers never see these notes. |
Design (optional) | Read your help center's design. With Read & write, also change and publish the theme, pages, components, custom CSS and scripts. |
You choose the scope, Team notes access and Design access when you create a key, and you can't change them later. To give an integration more access, create a new key, switch the integration to it and delete the old one.
Give a key access to your design
Tick Allow access to the help center design when an integration should work on your design: the theme, pages, components, navigation, custom CSS and scripts. Design access includes custom CSS and scripts, which run on every page of your help center, so give it only to tools you trust.
Under API keys, click New key and name the key.
Pick Read & write if the key should change and publish your design. A Read only key can read the design but not change it.
Under Design, tick Allow access to the help center design.
Click Create key. The key appears in the list with a Design tag.
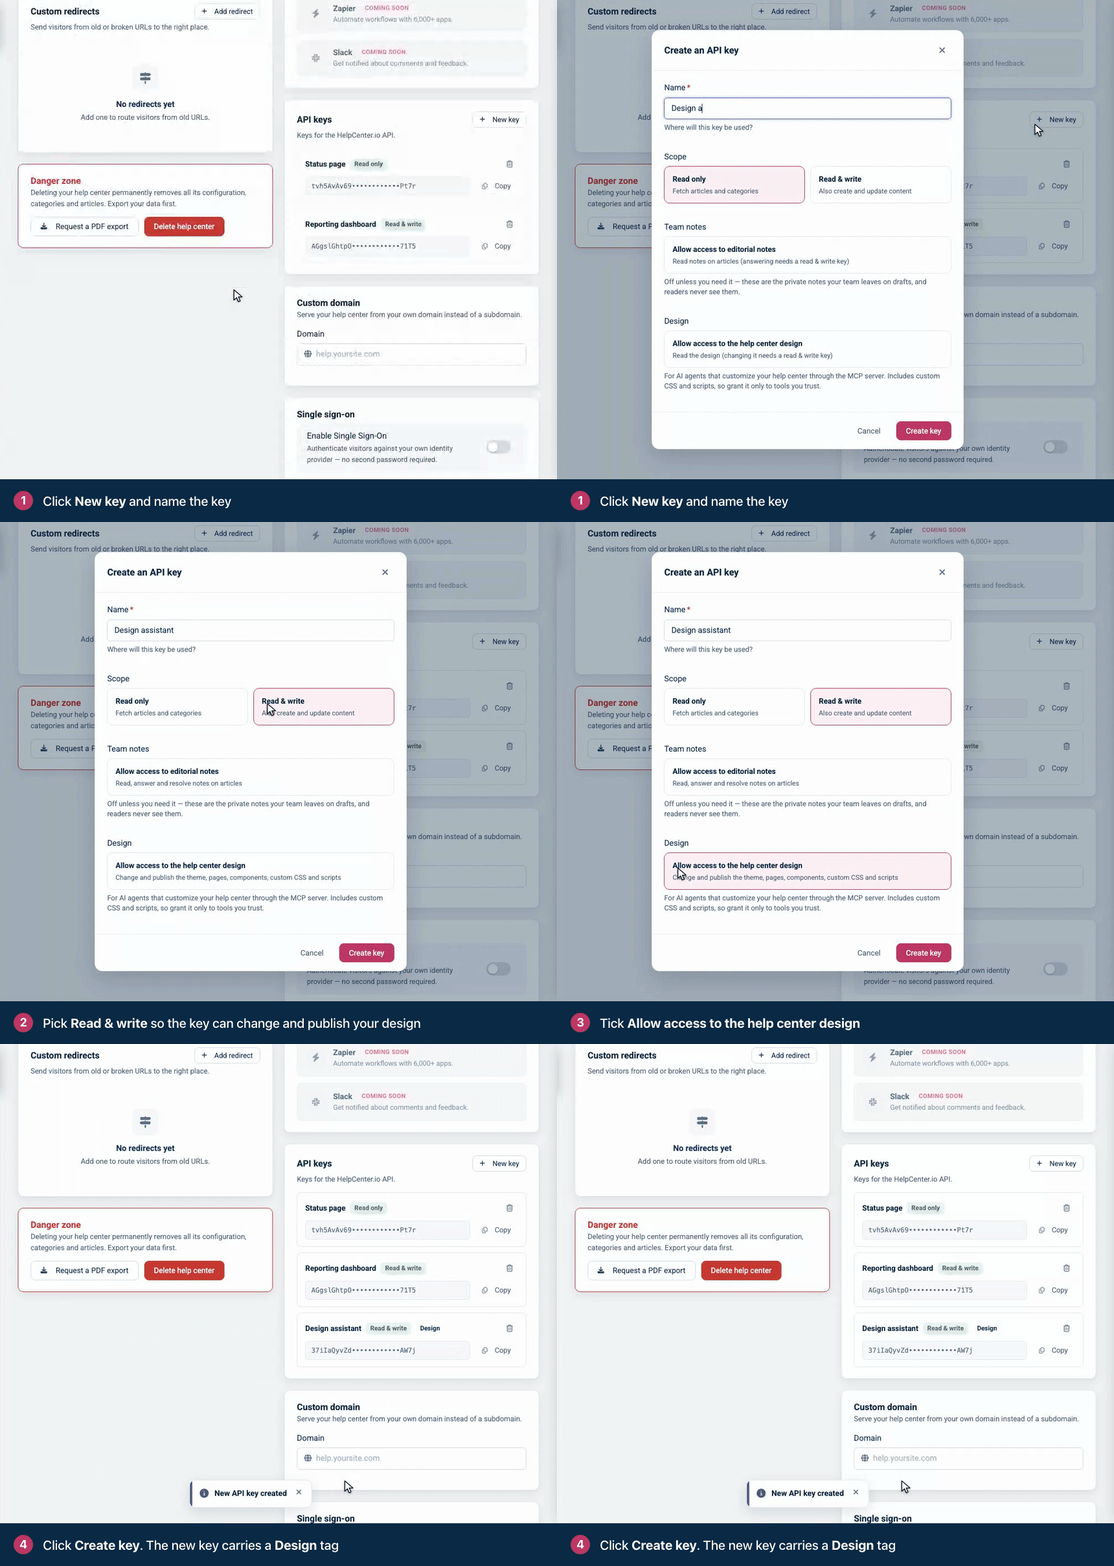
A key with design access edits the same draft you see in the template editor. You can review its changes there with the live preview, and visitors see nothing until the draft is published, either by you in the editor or by the integration with a Read & write key. The Design API article on the developer portal explains each request.
Use your key
Whoever builds the integration sends the key in the apikey header of each request to https://api.helpcenter.io/v1. A key works only with the help center it was created in. For a first request, follow Quickstart: your first API request on the developer portal. API keys there explains how keys work in detail.
A key can also connect an AI agent you build to your help center, on the Growth and Catalyst plans. See Connect Claude, ChatGPT and other AI agents.
Limits and errors
Each key can make up to 300 requests a minute, with lower limits for changes and for statistics. A key that goes over a limit gets 429 responses until it may try again. Rate limits on the developer portal has the numbers and how to handle them, and Errors explains every error response.
Keep your keys safe
Use Read only keys whenever you don't need to change content.
Leave Team notes and Design off for integrations that only work with articles.
Create a separate key for each integration, so you can delete one without breaking the others.
Never put a key in code that runs in the browser or in a public repository. The widget doesn't need an API key.
To replace a key, create a new one, switch your integration to it, then delete the old one.
Delete keys you no longer use.
Delete a key
Under Settings → API keys, click the trash icon next to the key.
Click Delete key to confirm.
Requests using that key stop working immediately.
Who can see a key
Every Owner and Admin of your help center sees all of its keys, whoever created them, and can delete any of them.
A key works only while the person who created it is an Owner or Admin of this help center. When you remove them from the team or give them another role, their keys stop working on the next request, with nothing for you to revoke. The list then marks those keys Not working and says why.
Removing an Admin or changing their role? First switch the integrations that use their keys to a key created by an Owner or Admin who stays.
Related articles
API keys on the developer portal
Quickstart: your first API request on the developer portal
Comments
Be the first to comment.