

Give your help center your logo, colors and fonts so customers know they're in the right place. You work on a draft, so readers see nothing until you publish.
Who can do this: Owners and Admins (Editors can open the template editor with Customize on your help center) · Plans: All plans
Pick a theme
Sign in to HelpCenter.io and click Template editor in the left menu. Your help center opens in a preview, with the settings beside it.
Click Theme gallery.
Click Compare & apply… on a theme you like.
Untick anything you want to keep as it is.
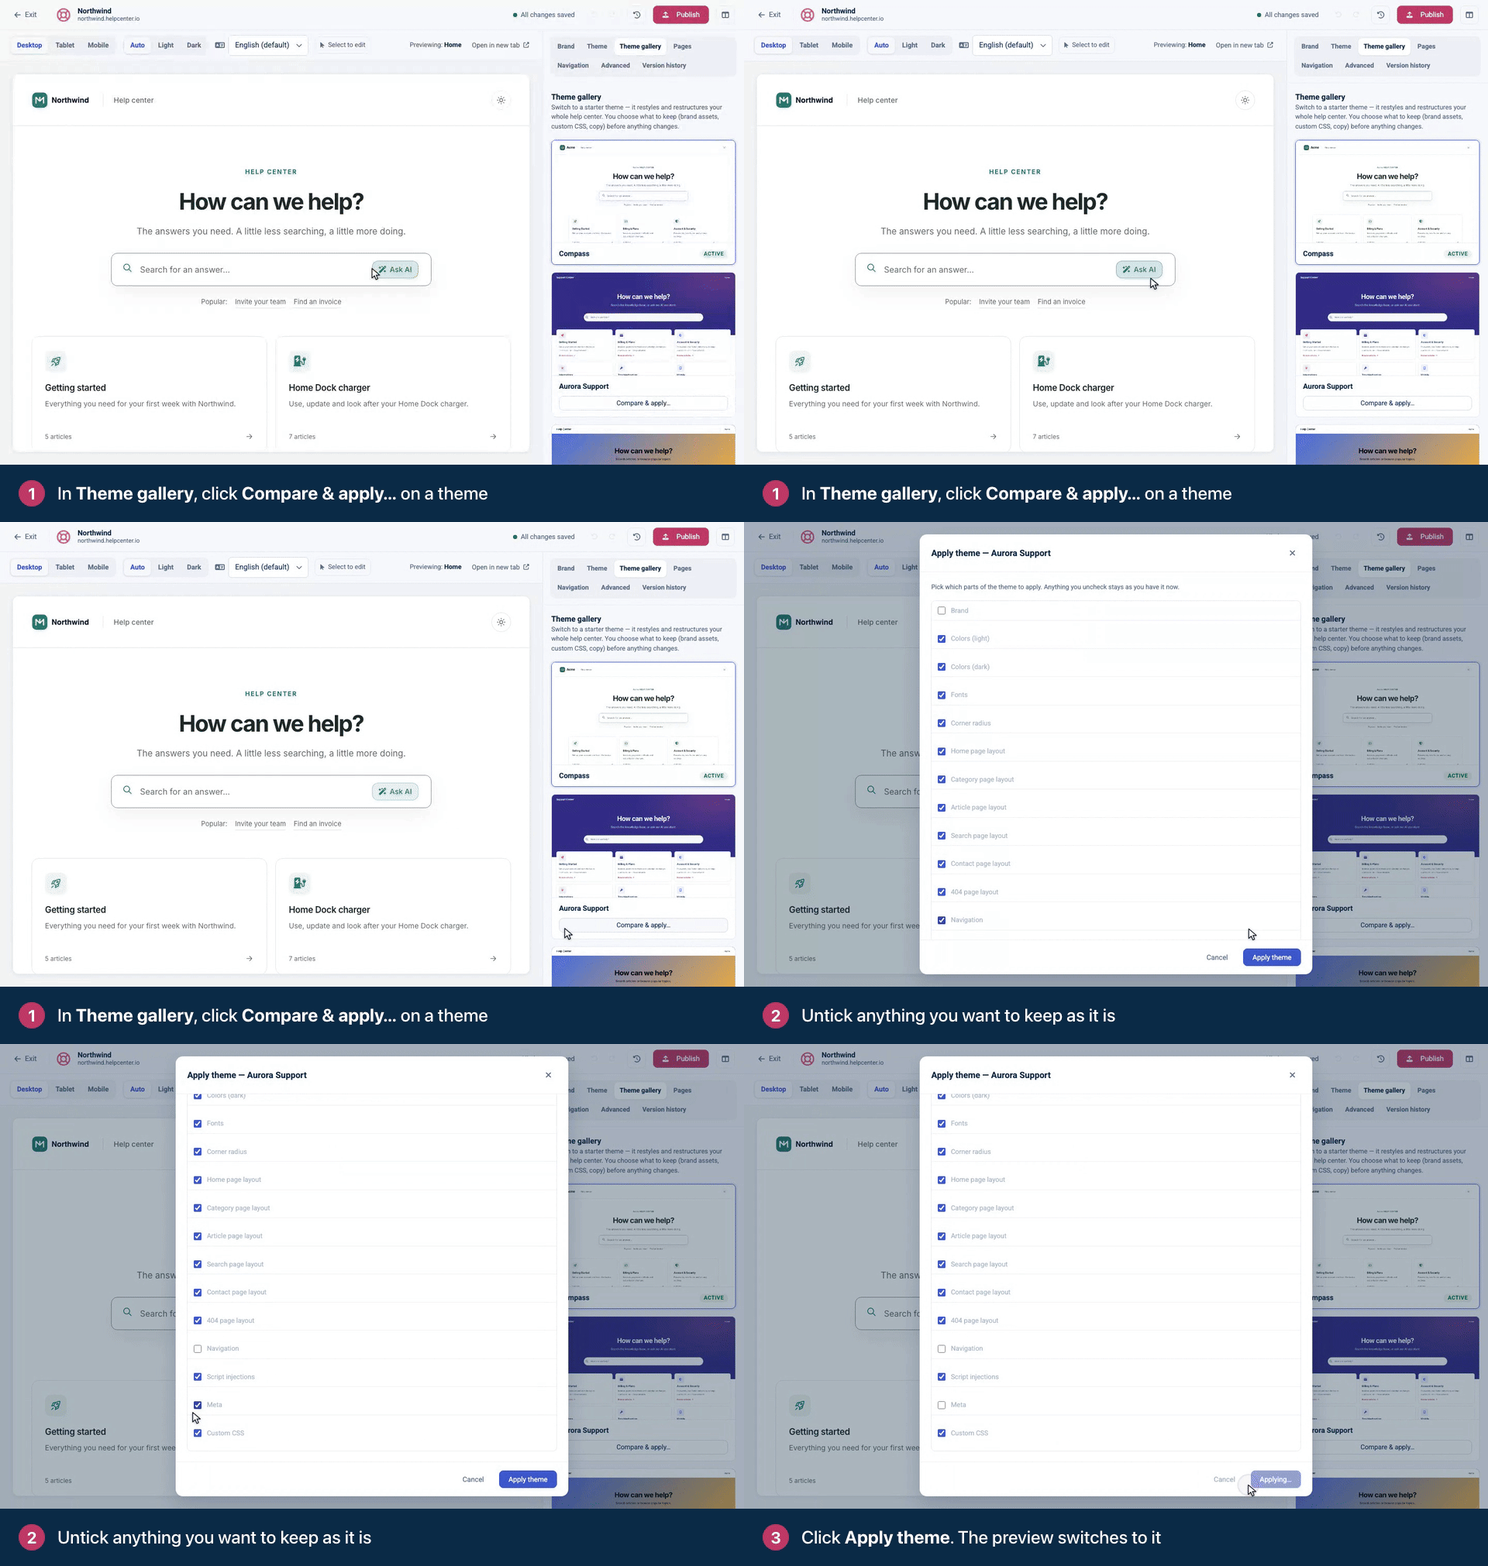
Click Apply theme. The preview switches to the new theme. It stays a draft until you publish.
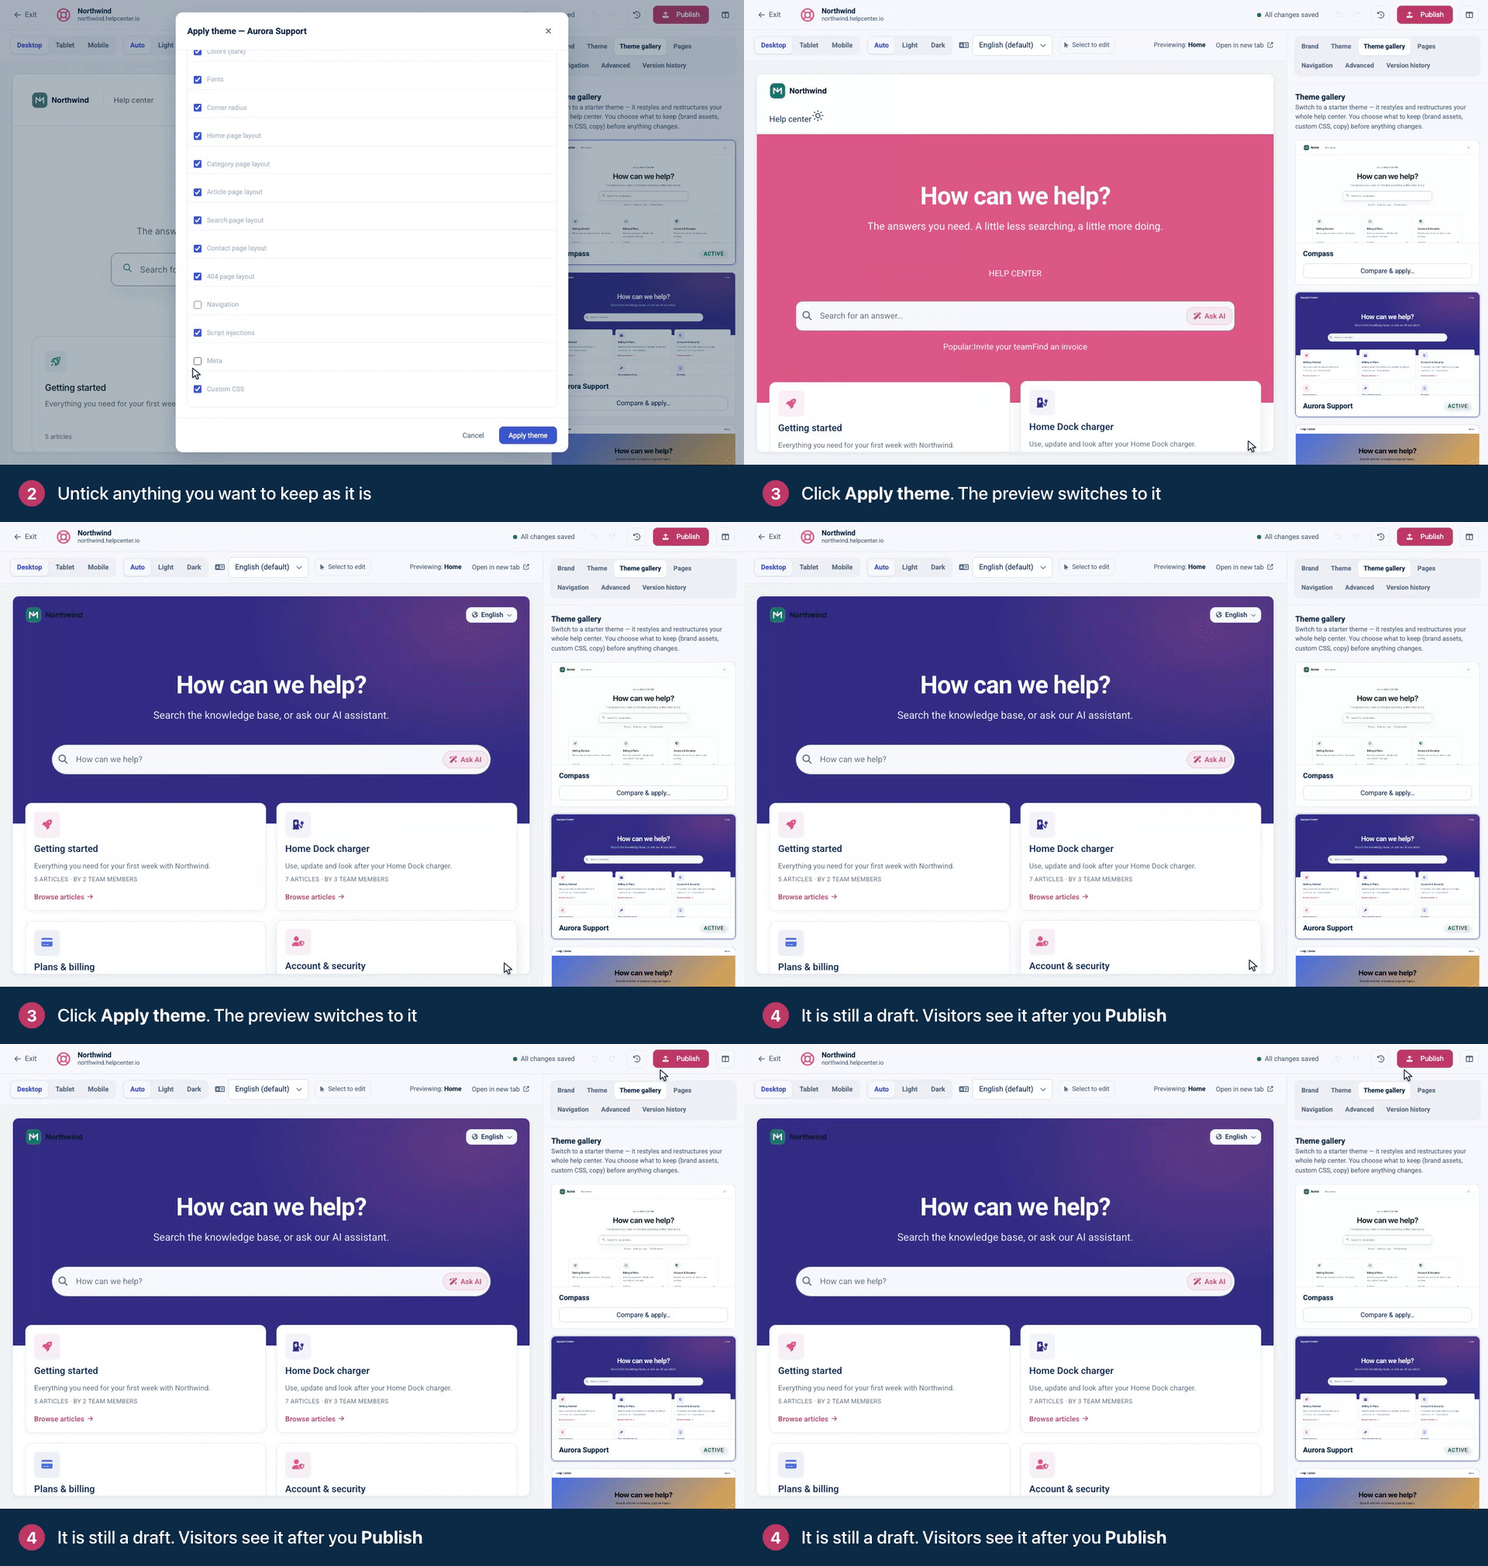
Brand starts unticked, so your logo and name stay as they are.
Add your logo and favicon
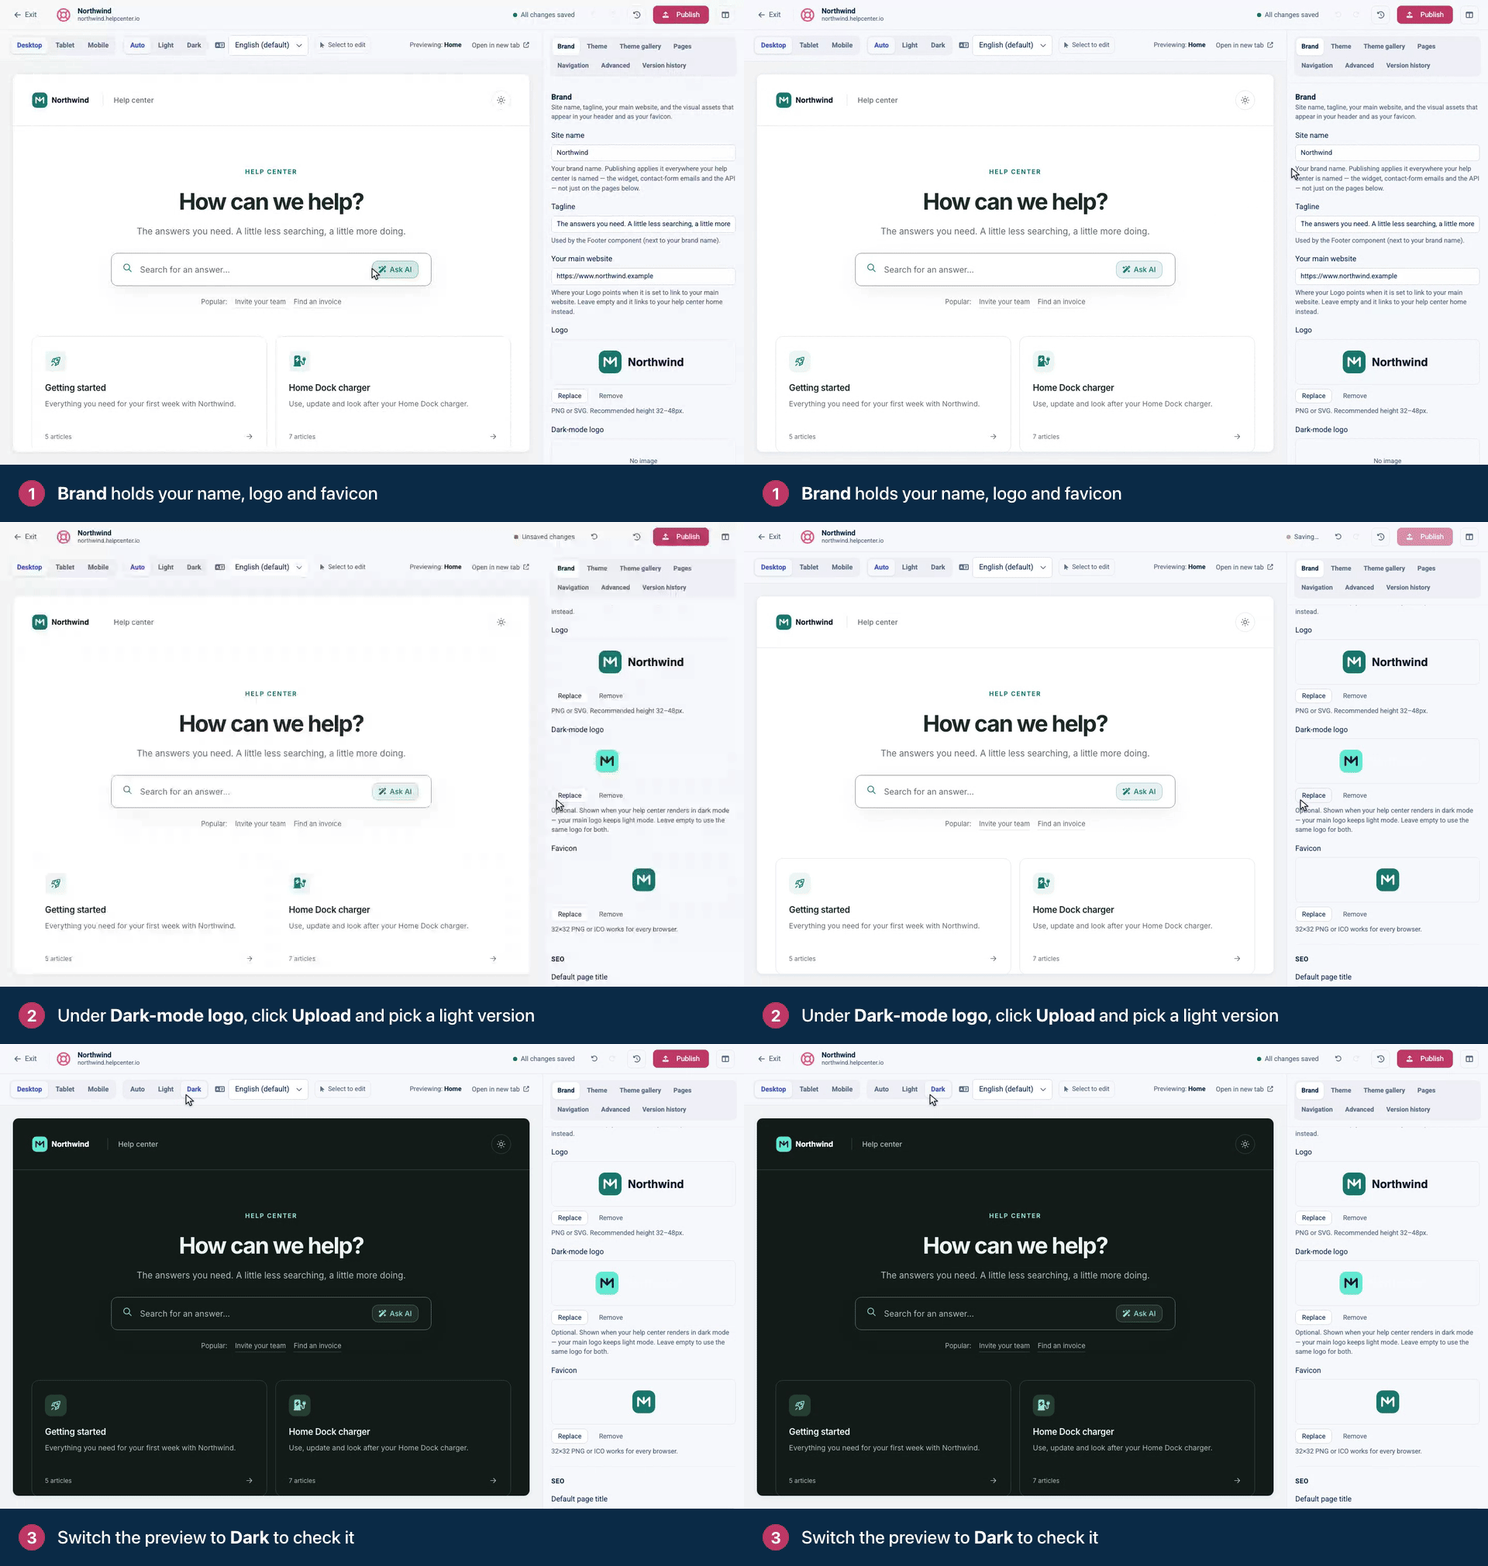
Click Brand.
Check the Site name. It's your brand name everywhere your help center is named, including the widget.
Under Logo, click Upload and choose your logo. PNG or SVG works best.
If your logo is dark, upload a light version under Dark-mode logo. Set the preview's appearance to Dark to check it.
Under Favicon, upload the small icon that browser tabs show. A 32×32 PNG or ICO file works in every browser.
Set your colors and fonts
Click Theme.
Under Light mode, set Primary to your main brand color. Change the other colors if you like, and the Dark mode colors too.
Under Typography, choose a Body font and a Heading font.
The preview updates as you go. Where a color would make text hard to read, HelpCenter.io adjusts it automatically.
Publish your design
Click Publish at the top of the template editor.
Check the list of changes, add a Version note if you like, then click Publish.
Your live help center switches to the new design. Every publish is kept in Version history, so you can go back to an earlier design.
Your changes save to a draft automatically, and the top bar shows All changes saved. Readers keep seeing your last published design until you click Publish.
Next steps
Rearrange what's on each page: Add, move and remove components.
Check your design on phones and in dark mode: Preview on phones, tablets and in dark mode.
Comments
Be the first to comment.