

Unpublish an article to take it off your help center without deleting it. It goes back to being a draft with everything intact, so you can fix it and publish it again later.
Who can do this: Owners, Admins and Editors · Plans: All plans
Unpublish from the editor
Open the article from Articles.
Click the arrow next to Update and choose Unpublish (back to draft).
Under Reason (optional), tell your team why, for example "Out of date since the new billing page". Then click Unpublish. If you'd rather not give a reason, click Skip: it unpublishes the article too.
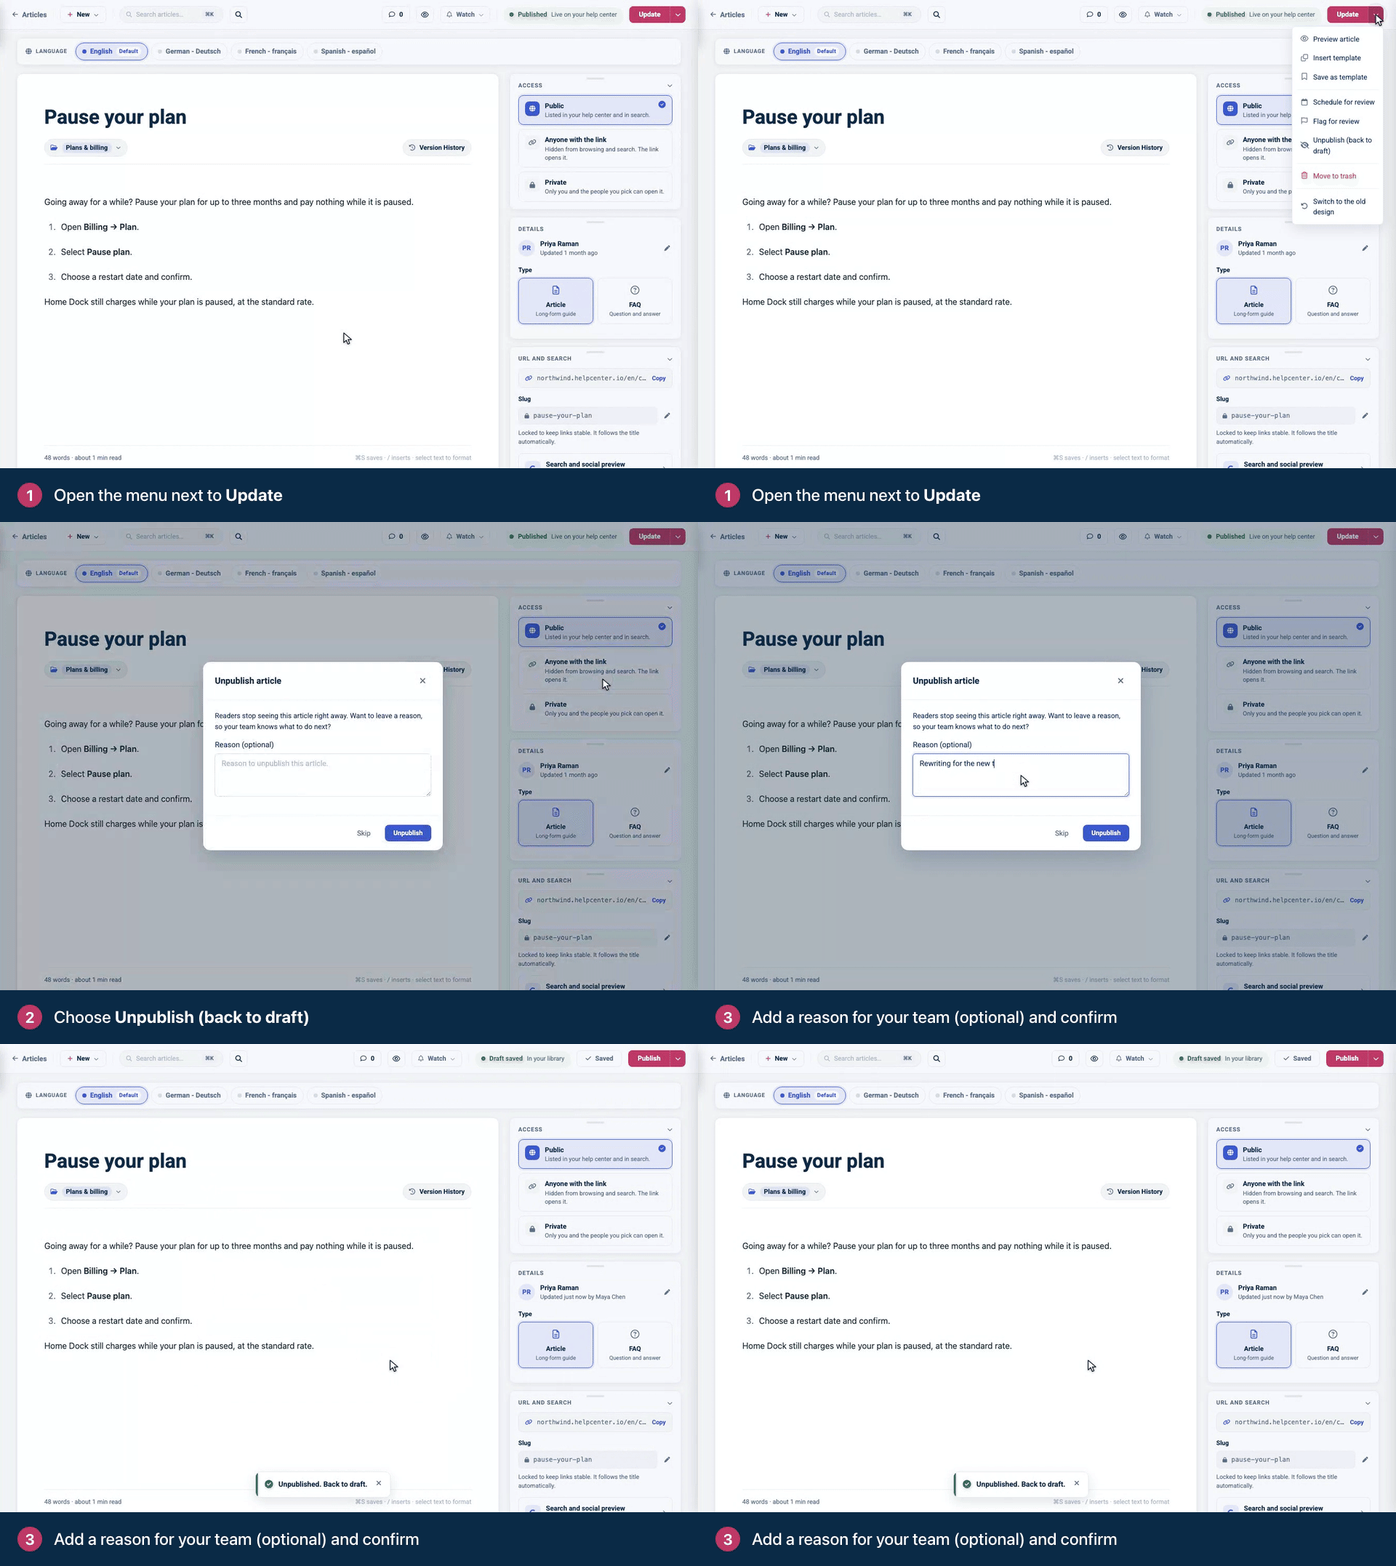
You'll see "Unpublished. Back to draft." Readers stop seeing the article right away.
Unpublish from the Articles page
One article: open the … menu on its row and choose Unpublish, or click the article and then Unpublish in Article details.
Several articles: tick them and click Unpublish in the bar at the bottom.
These ways don't ask for a reason.
What changes for readers
The article's address shows a not-found page.
It disappears from its category, from search, from the widget and from AI Answers.
It's removed from your help center's sitemap.
Your team still finds it on the Articles page under the Unpublished tab, marked Unpublished. Click that label to see who took it down, when, and the reason they gave.
Send readers somewhere else
Links to the article from other articles, emails or bookmarks now lead to a not-found page. To send visitors to a replacement page instead, add a redirect from the article's address. See Redirect old links to the right page.
Unpublish or delete?
Unpublish | Delete | |
|---|---|---|
What readers get | A not-found page | A not-found page |
Where the article goes | Stays on the Articles page as a draft | Moves to Trash |
How to bring it back | Click Publish | Restore it from Trash |
Best for | Articles you'll fix or reuse | Articles you no longer need |
See Delete and restore articles.
Publish it again
Open the article and click Publish. It goes live again at the same address.
Comments
Be the first to comment.