

Limit your help center to people on your office network or company VPN. Once you add allowed IP addresses, visitors from any other address can't open it, even if they have an account.
Who can do this: Owners and Admins
Add allowed IP addresses
In the left menu, click the gear icon, then Settings.
Under General, find IP whitelisting.
Type an IPv4 address, for example
203.0.113.24, and click Add (or press Enter). Repeat for each address you want to allow.Click Save changes.
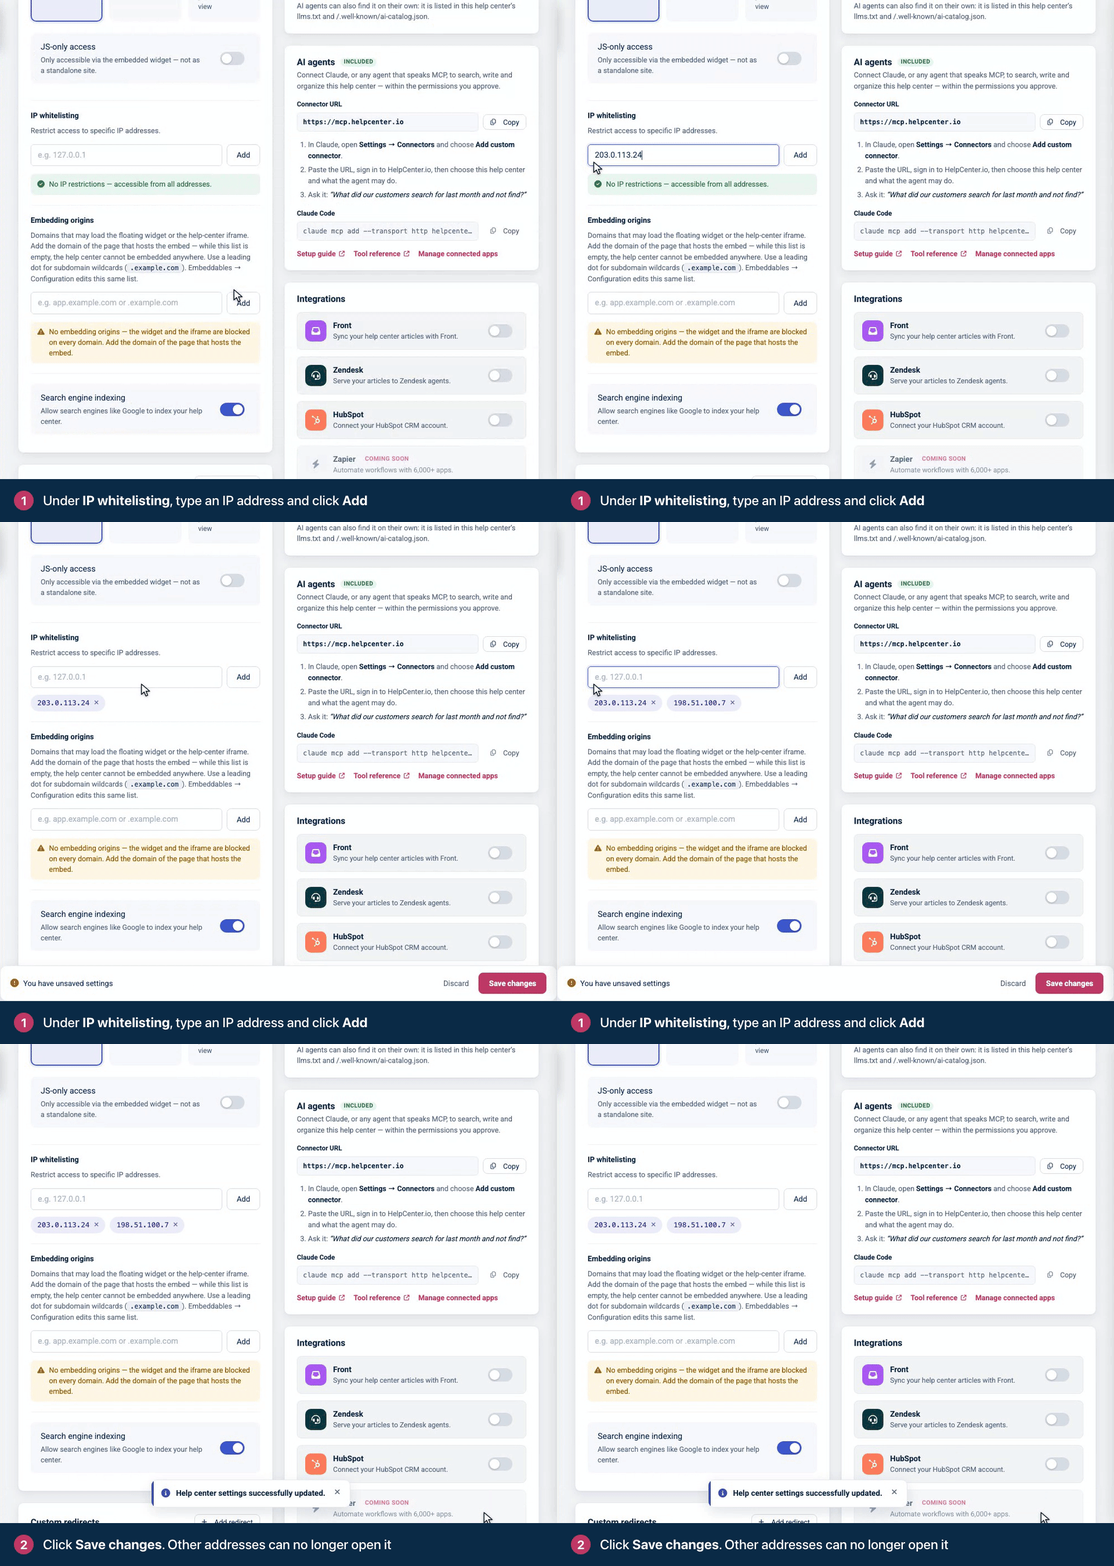
To remove an address, click the × on its chip, then Save changes. When the list is empty, the card confirms there are no IP restrictions, and anyone can open the help center again (within its visibility setting).
Add your own address. Once the list has any address in it, every address that isn't on it is refused, including yours. Your dashboard isn't restricted, so you can always come back and fix the list.
What the list applies to
Your help center's pages. Visitors from other addresses are sent to the HelpCenter.io sign-in page, and signing in doesn't let them through.
The widget and embeds. The widget shows "Not available on this network" and suggests connecting to your organization's network or VPN. FAQ sections and embedded help centers show a similar message.
Everyone, including your team. Signed-in team members and readers who use single sign-on are refused too when they're on an unlisted network.
Not your dashboard. You and your team can manage the help center from anywhere.
While the list has addresses, your help center's public MCP server is switched off, so readers can't connect it to an AI assistant.
Address rules
IPv4 only, like
198.51.100.7. IPv6 addresses can't be added.Exact addresses only. Ranges (like
203.0.113.0/24) and wildcards don't work, so add each address separately.Public addresses. Add the address your network shows to the internet, not an internal one like
192.168.1.10.
If your team works from home or travels, have them connect through a company VPN with a fixed address, and add that address.
Troubleshooting
"That doesn't look like an IPv4 address." Enter four numbers separated by dots, with no spaces, port number or range.
"Already added." That address is already on the list.
Someone on an allowed network is refused. Check the public address their connection uses right now. It may have changed, or their traffic may leave through a different network or VPN. A connection that reaches the help center over IPv6 can't match the list either, because the list only holds IPv4 addresses. Update the list and save.
Nobody can open the help center, including you. Your own address isn't on the list. Add it in Settings, or remove every address to lift the restriction.
Comments
Be the first to comment.